Roofing
Homeowners: Diagnose Skylight Leaks with a Low Pressure Hose Test
By Noah Spagnotti

Most skylight leaks are fixable once you know exactly where the water is getting in, whether that's failed flashing, a broken seal, or the glazing itself. Start by checking your attic and ceiling for stains, then run a controlled hose test to confirm the source. If you spot soft decking, spreading stains, or other structural warning signs, stop testing and call a licensed contractor.
TL;DR:
Most skylight leaks originate from failed flashing, broken seals, or glazing failures, and thorough inspection is necessary to pinpoint the cause.
A low-pressure hose test from the uphill roof area is key to avoiding false positives and confirming the actual leak source safely.
Temporary fixes include tarps or sealant to limit water damage, but they do not address the underlying problem, which may require resealing, reflashing, or replacing the unit.
Repair costs vary widely depending on the issue, with resealing being cheapest and full replacement being the most expensive, especially if there is hidden roof deck damage.
Regular maintenance, including seasonal inspections and timely professional assessment, can prevent leaks and ensure proper repair when needed.
How to confirm the leak source safely
Guessing at a skylight leak wastes money on the wrong fix. The skylight inspection steps from the Building Science Education Solution Center (U.S. DOE) start indoors, then move to the roof covering, the roof deck, the skylight unit, and finally a garden hose test.
Check the ceiling and drywall around the skylight for staining, bubbling paint, or soft spots, and trace any stain upward to its highest point rather than assuming it starts where you see it.
Go into the attic, if you have access, and look for damp rafters, dark streaks on the underlayment, or wet insulation near the skylight shaft.
Look at the glass itself for fogging or condensation between panes, which points to a seal failure inside the unit rather than a roof problem.
Once you have a suspected area, have a helper run a garden hose at low pressure over the uphill roof section first, then move down toward the skylight, holding each position for several minutes before moving on.
Water often travels along rafters or underlayment before it drips through the ceiling, so the wet spot indoors is rarely directly below the actual opening. High-pressure water can force its way through gaps that would never leak in real rain, so keep the flow gentle to avoid false positives.
Pro Tip: Test one section of roof at a time and wait for the leak to show up inside before soaking the next area. Rushing the hose test is the most common reason homeowners misdiagnose the source.
Skip the roof climb entirely if the pitch is steep, the shingles are wet, or you're not comfortable on a ladder. A related read on water leaking around windows covers the same travel-path problem for window leaks, and the logic applies here too.
Emergency and temporary fixes you can use right away
Once you know roughly where the water is coming from, the priority shifts to limiting damage while you plan a permanent repair. None of these steps fix the underlying failure, but they buy you time.
Set out a bucket or tarp to catch dripping water and protect flooring or furniture underneath.
Pull down any wet insulation you can reach safely, since damp material left in place invites mold growth, a health concern the CDC outlines in its mold guidance.
Open the ceiling area slightly if it's already damaged, to let it dry faster, and run a dehumidifier or fan nearby.
On the roof, a securely weighted tarp over the skylight or exterior-grade sealant on a small, specific edge gap can hold until a proper repair.
Photograph the stain, the attic condition, and any temporary patch you apply, along with the date and weather at the time.
Avoid the temptation to smear roof cement broadly around the skylight frame. It often seals the surface without addressing the actual gap, and it can trap moisture underneath while making the real problem harder for a contractor to find later. For a broader walkthrough of what to do the moment a leak starts, see our roof leak emergency guide.
Permanent solutions: reseal, reflash, or replace the unit
The right permanent fix depends entirely on what the diagnosis turned up.
Resealing works for small, isolated gaps in old caulk or sealant. It requires removing all of the old material, cleaning the surface, using backer rod for wider gaps, and tooling the new bead so it sheds water instead of holding it. Expect a well-done reseal to last several years, not indefinitely.
Reflashing is the fix for most leaks traced to the roof-skylight junction rather than the glass. BSESC's skylight flashing guidance describes installing flashing and underlayment from the bottom up so upper layers overlap lower ones: self-adhered membrane at the bottom of the curb first, then the sides, with the top membrane sealed to the deck and underlayment lapped over it. Done correctly, this is more durable than sealant-only patches and is the standard remedy professional roofers reach for.
Glazing or unit replacement is necessary when fog or moisture appears between the panes, since that indicates a failed seal inside the unit itself rather than anything fixable from outside. If the skylight is a VELUX model, warranty coverage may apply, though VELUX's own warranty guidance notes that coverage depends on the flashing kit being installed correctly and any reproofing following the proper re-wrap procedure.
Deck or broader roof work becomes necessary when the plywood underneath is soft or rotted, or when leaks show up in multiple spots around the skylight opening rather than one clear location.
On many skylights, the flashing is built into the unit itself, in an integrated or self-flashing design, rather than installed as separate pieces around it. When that built-in flashing fails, it often can't be repaired on its own, so the fix is usually replacing the whole skylight rather than resealing or reflashing it. Before paying for a reflash, ask whoever inspects it whether your skylight's flashing is a separate kit or part of the unit.
Pro Tip: If your skylight is a VELUX unit, check the installation paperwork before doing any repair yourself. VELUX has noted that repairs done without consulting the manufacturer or installer can affect warranty coverage.
For a wider look at when a patch is enough versus when the whole roof needs attention, see our comparison of roof repair versus replacement.
Realistic cost ranges and what changes the price
Skylight repair costs vary widely depending on what's actually wrong. A basic reseal is the cheapest fix, reflashing costs more because it involves removing shingles and rebuilding the water barrier, and full unit replacement costs the most since it includes both material and installation labor.
Skylight type matters: curb-mounted units generally cost more to reflash than deck-mounted units because of the added framing involved.
Roof pitch and access affect labor time, since steep or high roofs take longer to work safely.
The extent of hidden damage, such as rotted decking or saturated insulation, adds cost once a contractor opens up the area.
Local labor rates and material choices, including the flashing kit and underlayment used, shift the final number.
Misdiagnosis is common in this category. Many apparent skylight leaks trace back to flashing or roof-integration failures rather than the skylight unit itself, which means the wrong fix can leave you paying twice.
When comparing bids, ask each contractor to spell out the scope of work, the materials and brand of flashing kit, before-and-after photos, and the warranty terms in writing.
A short seasonal checklist to prevent skylight leaks
Most skylight failures build up slowly, which makes a regular check worth the ten minutes it takes.
Clear leaves and debris from the roof area just uphill of the skylight each fall, since buildup traps moisture against the flashing.
Inspect visible seals and flashing edges each spring for cracking, gaps, or lifted shingles nearby.
Check the attic for condensation or musty smells, which often points to poor ventilation rather than a roof leak, similar to the moisture pattern behind ice dams.
If you're having your roof replaced, confirm the skylight gets rewrapped and reflashed as part of the job rather than left as is.
Schedule a professional look if the skylight is older or has needed more than one minor repair in the past couple of years.
What a skylight assessment actually looks for
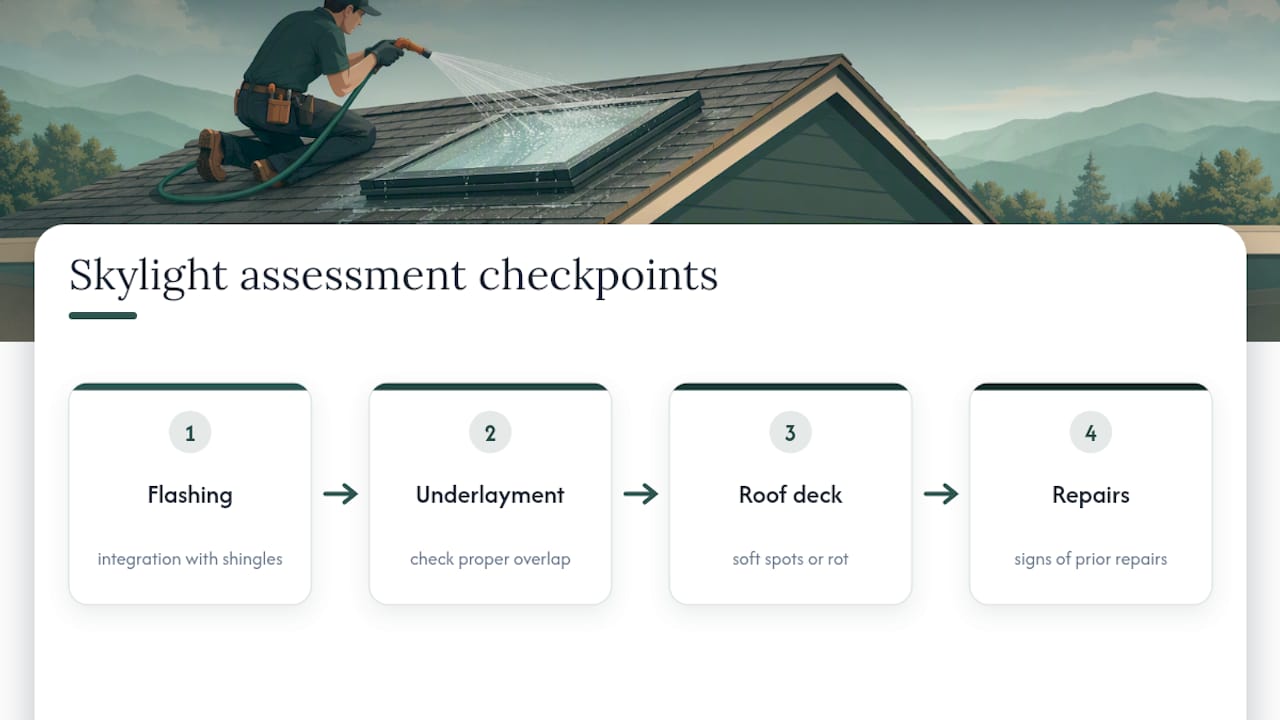
When Spagnotti Contracting evaluates a leaking skylight, the crew checks how the flashing integrates with the surrounding shingles and underlayment, examines the roof deck for soft spots or rot, and looks for signs of prior repairs that may have masked the real issue. Before that visit, homeowners help the process by photographing stains, noting when the leak appears relative to weather, and checking the attic for moisture.
What the diagnosis-first approach really means for homeowners
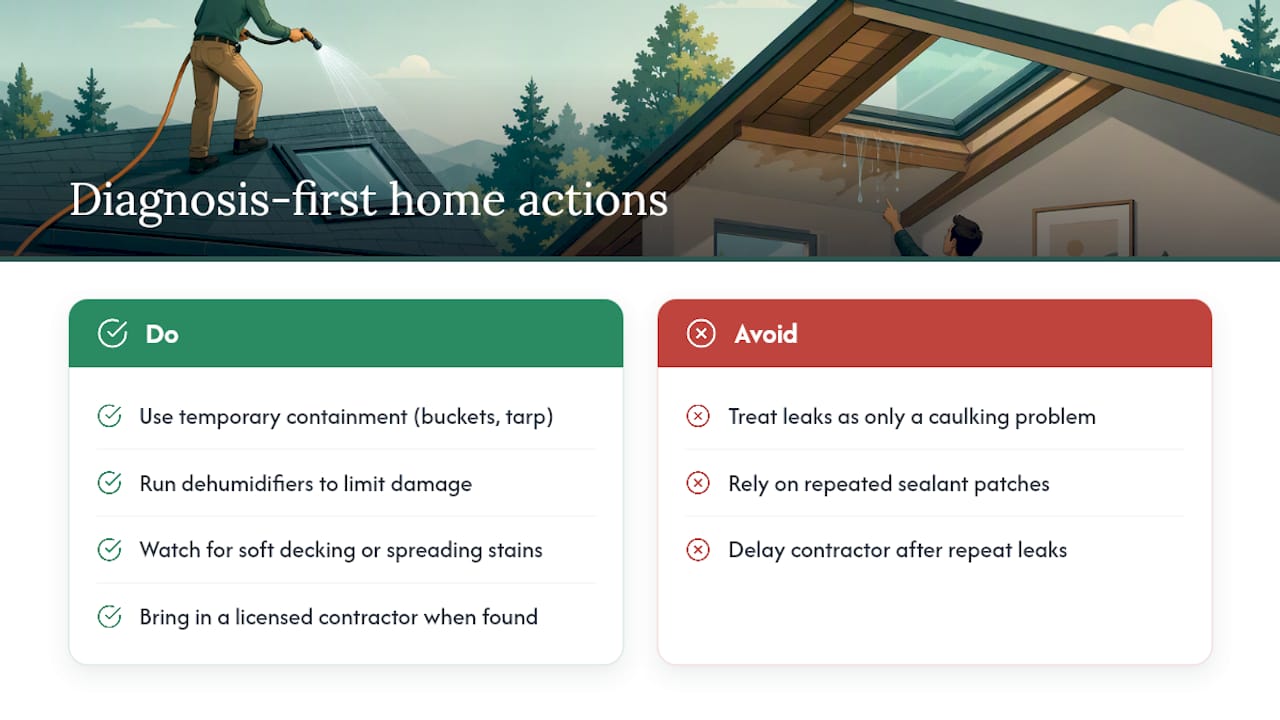
The biggest mistake in skylight repair is treating it as a caulking problem when it's usually a water-management problem. A bead of sealant can hide a flashing failure for a season, but the water finds another way in eventually, often causing more damage than if you'd fixed the actual gap the first time.
DIY containment, buckets, dehumidifiers, a tarp, is fine while you sort things out. The moment you see soft decking, spreading stains, or repeat leaks after a patch, that's the signal to bring in a licensed contractor rather than try again.
— Noah
Get a professional skylight and roof inspection
A misdiagnosed skylight leak costs more in the long run than getting it right the first time, and that's the gap a trusted contractor can help homeowners close. Crews check flashing integration, deck condition, and prior patch work as part of every roof visit, then walk you through exactly what's needed before any work starts.
Relevant services for a leaking skylight include:
Roof Leak Assessment, a focused visit to diagnose the source before recommending a fix.
Roof Repair, for flashing, reseal, or localized deck work once the leak is confirmed.
Roof Replacement, when the deck or broader roof system needs more than a patch.
Request a roofing estimate to get a clear scope and price before any work begins.
Sources
FAQ
Can leaking skylights be repaired?
Yes, most skylight leaks can be repaired once you identify whether the failure is in the flashing, the seal, or the glazing. Flashing and seal issues are usually fixable in place, while a failed glazing unit typically needs replacement.
How much does it cost to fix a leaky skylight?
Cost depends heavily on the cause: a simple reseal is the least expensive option, reflashing costs more due to the labor involved in removing and replacing shingles, and full unit replacement costs the most. Get written estimates that spell out scope, materials, and warranty terms so you can compare bids accurately.
My skylight is leaking. How can I fix it?
Start with an interior check for stains and attic moisture, then confirm the source with a garden hose test (BSESC's inspection guidance includes one), keeping the flow gentle and working from the uphill roof area toward the skylight. Once you know the source, reseal small gaps yourself or bring in a contractor for flashing work or unit replacement.
Does homeowners insurance cover skylight leaks?
Coverage varies by policy and by the cause of the leak, so check your own homeowners policy or ask your insurer.
Recommended
Dealing With Something Similar?
Every property is different, but if this sounds like what you’re seeing, we’re happy to take a look and help you figure out what’s actually going on.