General Contracting
Skip Stripping: Painting Over Stained Wood With a Pro’s Primer Plan
By Noah Spagnotti

Yes, you can almost always paint over stained wood without stripping it first. The surface prep that actually matters is removing grease, wax, and furniture polish, then deglossing or scuff-sanding so paint has something to grip, and finally choosing the right primer, a shellac-based one for tannin-heavy wood or a bonding primer for slick finishes, to stop peeling and stain bleed-through before it starts.
TL;DR:
If water beads, the finish is likely varnish or polyurethane; if denatured alcohol softens it, it is likely shellac.
Remove grease, wax, and polish, then scuff sand flat areas with 120 to 150 grit; reserve stripping for damaged or incompatible coatings.
Choose shellac primer for tannin prone pine, cedar, mahogany, or dark stains; use a bonding primer on slick surfaces with low tannin risk.
Apply thin topcoats with light 220 grit sanding between coats, and allow 7 to 14 days for full curing before heavy use.
If the wood predates 1978, test for lead before sanding; solvent based products also require ventilation and respiratory protection indoors.
Test the finish and plan your timeline before you touch a brush
Before buying a single can of primer, spend ten minutes figuring out what you're dealing with. Two quick tests tell you almost everything.
Water-drop test: place a few drops of water on the stained surface. If it beads up, you're looking at a film finish like varnish or polyurethane, which means you need to degloss or sand before anything will stick.
Denatured alcohol test: rub a cotton rag soaked in denatured alcohol on a hidden spot. If the finish softens or the rag picks up color, you're likely dealing with shellac, which changes how aggressively you need to prep.
Species matters too. Pine, oak, mahogany, and cedar are all prone to releasing tannins, natural compounds that can bleed through fresh paint as yellow or brown discoloration, especially under white or light colors. Darker stains over these woods raise the risk further, since more pigment and tannin are sitting in the wood fibers waiting for a reason to migrate. A proper prep sequence, degreasing, scuffing, and priming, is the step most likely to determine whether your paint job lasts, according to a guide on painting varnished trim, and skipping any one of those steps is a common cause of early peeling.
For a typical interior trim or door project, expect this rough sequence: clean and degrease (same day), scuff-sand or degloss (same day or next), prime (allow the recommended recoat window), then two topcoats with light sanding between them. Most homeowners can finish a room's worth of trim over a weekend, though full cure time extends well beyond that. Knowing this upfront helps you decide whether to tackle it yourself or bring in help, which we'll cover later.
Clean, degrease, and fill before any primer goes on
Paint failure on stained wood almost never starts with the paint. It starts with something left behind on the surface, grease near kitchen trim, hand oils on doorjambs, or old furniture polish on cabinetry. Primer cannot bond to a film of residue, no matter how good the product is.
Wash surfaces with a TSP substitute or a degreasing cleaner like Krud Kutter, working in small sections so the cleaner doesn't dry on the wood.
Rinse with clean water on a separate rag to lift dissolved grime rather than redistributing it.
Let the wood dry fully, generally a few hours in normal room conditions, before sanding or priming.
Pay extra attention to high-touch areas: door handles, lower cabinet doors, and stair rails tend to carry the most built-up oil.
Fill nail holes and dents with a quality wood filler, then sand flush once cured.
Vacuum dust with a HEPA attachment and finish with a tack cloth right before priming.
Pro Tip: Wipe a clean white rag over the surface after cleaning. If it comes away even slightly dirty, clean again before you sand or prime.
Scuff-sand, degloss, or strip: match the method to the finish
Once the surface is clean, you need to give the primer something to mechanically grab onto. Three methods work, but they're not interchangeable, and choosing the most invasive one when a lighter touch would do just adds labor.
Scuff-sand with 120 to 150 grit on flat trim, doors, and cabinet faces until the surface shows an even dull haze, not shiny in some spots and dull in others.
Use a liquid deglosser on carved moldings, spindles, or detailed profiles where sandpaper can't reach every groove; it chemically dulls the finish instead of abrading it.
Work with ventilation and a respirator when using solvent-based deglossers indoors, since fumes build up quickly in closed rooms.
Strip down to raw wood only when necessary, such as when the existing finish is severely alligatored, delaminating, or layered with incompatible coatings that won't take primer at all.
Combining methods often works best. Pros frequently hand-sand flat sections while using deglosser on carved details, which keeps labor reasonable while still giving the whole surface uniform tooth, a technique noted in the varnished trim prep guide.
Pick the right primer: shellac for tannins, bonding primer for slick surfaces
This is the step that separates a paint job that lasts from one that needs redoing in six months. Your water-drop and alcohol tests from earlier should point you toward one of two primer families.
Zinsser B-I-N, a shellac-based primer, is the standard choice for tannin-prone species and dark stains, since it creates a strong barrier against bleed-through, according to Rust-Oleum's technical data for the product.
INSL-X STIX or an equivalent waterborne bonding primer works well on deglossed, slick surfaces with low tannin risk, since it's formulated to stick to glossy paint, PVC, and other hard-to-bond substrates, according to Benjamin Moore's product page for INSL-X STIX.
Zinsser Bulls Eye 1-2-3 is a general-purpose option worth considering on mixed surfaces where tannin risk is low but you still want stain-blocking protection.
Behr's bonding primer line offers a similar waterborne option for homeowners who prefer to shop a single brand for primer and topcoat.
Shellac primers often allow recoating in well under an hour under ideal conditions (around 70 to 80°F and 50% humidity), though actual windows vary by product and should be confirmed on the label, per MyMove's guide to painting over wood stain.
Always check the technical data sheet for your specific product, since recoat windows and maximum humidity or temperature conditions vary and affect how soon you can move to topcoat.
Choose your topcoat and apply it in thin, even passes
With primer down, the topcoat decision is mostly about durability and finish feel. Waterborne alkyds and acrylic-urethane enamels have become the preferred choice for trim and doors because they level smoothly and dry into a hard, washable film comparable to traditional oil enamel, according to FineHomeKeeping's guide on painting over stained wood. Oil-based enamel is still worth choosing when you want maximum leveling and don't mind longer dry times and stronger odor.
Apply thin coats rather than one heavy one; thick paint sags and takes far longer to cure properly.
Use a quality synthetic brush for cut-in work and a foam or microfiber roller for flats, or spray for the smoothest possible finish on doors removed from their hinges.
Lightly sand with 220-grit sandpaper between coats to knock down any raised grain or brush marks, then wipe with a tack cloth.
Allow full cure time, often 7 to 14 days, before subjecting surfaces to heavy use, since "dry to the touch" and fully cured are different states, as the varnished trim guide notes.
For sheen choices on doors, our breakdown of paint finish types covers how to balance durability with how much a finish shows imperfections.
Fix peeling, bleed-through, and adhesion loss before they spread
Most problems trace back to a skipped prep step, and most have a targeted fix rather than requiring you to start over.
Paint peeling soon after application usually means leftover grease or an unaddressed glossy finish; re-clean, scuff-sand, and spot-prime with a bonding primer before repainting that area.
Tannin showing through as yellow or brown blotches calls for a shellac primer like Zinsser B-I-N over the affected spots, or the whole surface if bleed is widespread, followed by a fresh topcoat.
Localized adhesion loss, small areas where paint lifts, can be feather-sanded back to sound paint, spot-primed, and recoated.
Widespread failure across large areas often signals a deeper substrate problem and may require stripping back to bare wood.
Ongoing tannin bleed despite correct priming can mean moisture is still moving through the wood; check for leaks or humidity issues before repainting again.
What a contractor's workflow looks like on a real project
When we take on a painting project, we start with the same inspection steps outlined above: testing the finish, checking for tannin risk, and scoping how many coats the job needs before quoting a timeline.
Clear furniture and breakables from the work area and remove hardware from doors and cabinets before we arrive.
Complex trim profiles, exterior exposures facing weather, or tight timelines are good reasons to bring in a pro rather than DIY.
Our guide to interior trim styles breaks down which profiles are simple enough to tackle yourself.
Our breakdown of paint finish types covers cure times and sheen in more depth.
Sealing heavily stained wood when bleed-through is a serious risk
Some pieces, heavily stained antique furniture, old cedar trim, or wood with years of accumulated dark stain, need more than a single coat of primer to fully lock in tannins and dye. In these cases, a dedicated sealing step before your regular primer and topcoat routine prevents repeat bleed-through.
Start by applying a shellac-based sealer, such as Zinsser B-I-N, as a standalone coat over the entire stained area rather than just a primer pass. Because shellac dries fast and forms a hard, impermeable film, it's effective at trapping both color and tannins beneath it. For particularly dark or old stains, a second shellac coat after the first has dried adds an extra margin of protection, since one thin coat can occasionally let faint discoloration through on very porous wood.
Once the sealing coat has cured, treat the surface as you would any primed piece: scuff lightly if the shellac dried with texture, then move on to your regular primer if you're using a different product for the base coat, or straight to topcoat if the shellac itself serves as both sealer and primer. Skipping this dedicated sealing step on heavily stained pieces is one of the more common reasons homeowners see stains reappear weeks after painting, since a single thin primer coat sometimes isn't enough mass to fully block years of absorbed color and tannin.
Prepping pine, cedar, and other tricky species
Wood species changes how you should approach prep, since density, grain pattern, and tannin content all vary.
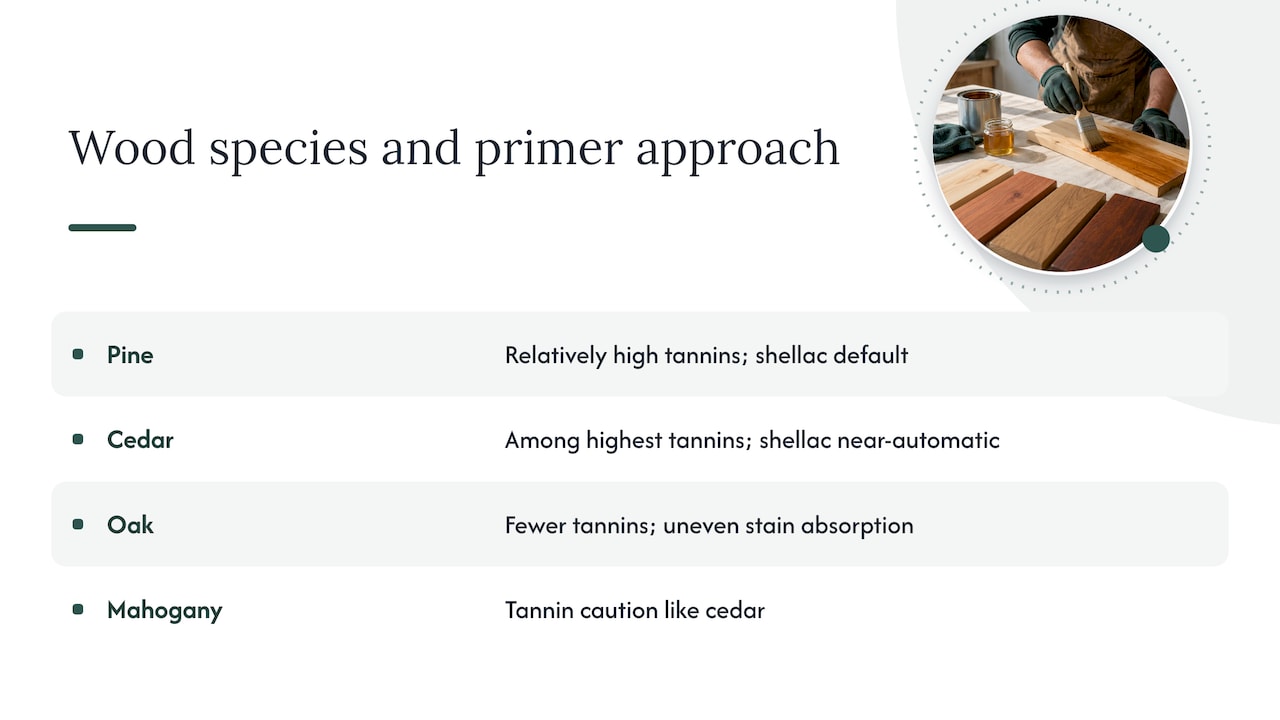
Pine is soft, inexpensive, and common in trim and furniture, but it's also prone to uneven stain absorption and relatively high tannin content. When painting over stained pine, expect some risk of bleed-through under light colors and plan on a shellac primer as a default rather than an afterthought. Pine also dents and scuffs easily during sanding, so use a light touch with 120 to 150 grit rather than aggressive stock removal.
Cedar carries some of the highest tannin content of common building woods, which is part of why it's prized for its natural rot resistance outdoors. That same chemistry makes cedar a near-automatic candidate for shellac primer whenever you're painting over a stained cedar surface, indoors or out. Cedar's soft, often uneven grain also benefits from careful cleaning, since dust and pollen can settle into the texture and interfere with primer adhesion.
Oak and other closed-grain hardwoods behave differently: they take stain unevenly due to grain structure but tend to release fewer tannins than pine or cedar. Mahogany, by contrast, is another species worth treating with the same tannin caution as cedar. Across all species, the water-drop and alcohol tests described earlier remain the fastest way to confirm what you're dealing with before committing to a prep plan.
Ventilation and conditions that affect how paint cures
Temperature, humidity, and airflow all affect how primer and paint behave, and getting these wrong can undo otherwise careful prep work.
Most primers and topcoats perform best in the 65 to 85°F range with moderate humidity. Painting in a cold or very humid room slows drying and can cause problems like poor leveling or extended tack time, while painting in a hot, dry room can cause paint to skin over too fast for proper leveling, especially with fast-drying shellac products.
Ventilation matters for both safety and finish quality. Solvent-based primers and deglossers release fumes that require open windows, fans, or a respirator in enclosed spaces, and shellac primers in particular have a strong odor that lingers until fully cured. Even waterborne products benefit from airflow, since it speeds up the evaporation that allows each coat to dry and cure on schedule. If you're working in a room without good cross-ventilation, a box fan pointed out an open window helps clear fumes without disturbing wet paint. Plan painting days around weather when possible, since humidity swings from an open window on a rainy day can slow curing far more than most people expect.
Why prep and primer matter more than the paint you choose
After going through every prep step, test, and primer option above, the real takeaway is this: the paint brand matters far less than people assume. Most callbacks and redo jobs trace back to a skipped cleaning step or the wrong primer choice, not an inferior topcoat. Homeowners often want to skip straight to color selection, but that's the smallest decision in the whole process.
One safety note worth repeating: if your stained wood predates 1978, have it tested for lead before sanding or deglossing, since disturbing old finishes can release lead dust. Wear a respirator and work in ventilated spaces when using solvent-based primers or deglossers, regardless of the wood's age.
— Noah
Get a painted finish that holds up: request an estimate from us
If the prep steps above feel like more time than you have, or your project involves detailed trim, cabinetry touch-ups, or full-room repaints, you can hire a professional painting service to handle all of it. Professional painting services typically include testing, cleaning, and primer selection processes to ensure a finish built to last rather than one that needs attention again soon.
To get a quote, send us a few photos of the surfaces involved along with your rough scope and timeline, and we'll walk you through what the project will involve and what to expect at each stage. Visit our painting services page to request an estimate and see the full range of interior and exterior work we take on.
FAQ
Do you need to stain wood before painting?
No, staining wood before painting isn't necessary. Paint and primer are designed to work directly over properly prepped bare wood, so staining first adds a step that provides no adhesion benefit.
Can you stain already stained wood without sanding?
Applying a new stain over existing stain without sanding is generally not recommended, since stain needs some texture to absorb into, unlike paint, which can use a bonding primer instead. If your goal is a different color, painting over the stain with the right primer is usually the more reliable route.
Can you paint over gel stains?
Yes, gel stains can be painted over once the surface is clean and properly deglossed or scuffed. Because gel stain often sits as a film on top of the wood rather than soaking in, treat it similarly to a glossy finish and use a bonding primer like INSL-X STIX for adhesion.
What is the best way to paint over dark stained wood?
The most reliable approach is cleaning the surface, scuff-sanding or deglossing it, then applying a shellac-based primer such as Zinsser B-I-N, which is specifically suited to blocking bleed-through from dark stains and tannins. Follow with a waterborne alkyd or acrylic-urethane enamel topcoat in thin, even coats for a durable finish.
How long does painting over stained wood take?
A typical trim or door project runs from a single weekend for cleaning, prep, and priming, to a full week once two topcoats and dry time between coats are factored in. Full cure, when the finish reaches its maximum hardness, often takes 7 to 14 days beyond that, according to the varnished trim prep guide.
Sources
How to paint over varnished wood trim — CompositePaint guide
How To Paint Over Stained Wood? Step-by-Step Guide for Lasting Results - FineHomeKeeping
Recommended
Dealing With Something Similar?
Every property is different, but if this sounds like what you’re seeing, we’re happy to take a look and help you figure out what’s actually going on.