General Contracting
Interior Trim: 4 Styles, Exact Sizing Rules, and When to Hire a Pro
By Noah Spagnotti

Most homes fit into one of four trim families: Modern, Traditional/Colonial, Craftsman, or Transitional/Farmhouse. The right pick isn’t about personal taste alone. It comes down to matching the profile and scale of your trim to your home’s architecture, then running that same family through every room. Once you settle on a style, the real decisions (which materials, what sizes, how it gets installed) follow from that choice.
TL;DR:
Different trim styles suit specific architectural eras and room functions, making matching the style to your home’s bones crucial for a cohesive look.
Modern trim favors flat profiles with tall baseboards suitable for minimalist, contemporary interiors, while traditional styles feature layered profiles with decorative crown mouldings.
Material options vary based on paint or stain preference, with MDF being best for painted finishes and hardwoods or PVC suited for stained or moisture-prone areas.
Maintaining consistent trim family throughout the house enhances design harmony, especially before drywall installation, to avoid costly retrofits.
DIY installation requires specific tools and techniques, but hiring a contractor can save time and ensure a clean, professional finish for complex or flush system trims.
Table of Contents
Interior Trim Styles at a Glance: Modern, Traditional, Craftsman, and Farmhouse
What Are the Main Trim Components in a Full Package?
Choosing Materials: MDF, Poplar, Hardwood, and PVC
Getting the Scale Right: Baseboard Height, Casing Width, and Ceiling Proportion
DIY Installation: Tools, Technique, and When to Call It
Where Did These Trim Styles Come From?
Matching Trim to Your Home’s Architecture and Room Function
A Contractor’s View on Locking In Trim Decisions Early
How Spagnotti Contracting Handles Trim Selection and Installation
Sources
Interior Trim Styles at a Glance: Modern, Traditional, Craftsman, and Farmhouse
Walk into ten different homes and you’ll likely spot one of three dominant approaches: Modern’s clean lines, Traditional’s ornate curves, or Craftsman’s squared-off bulk, according to a beginner’s guide to trim and moulding. Transitional or farmhouse trim splits the difference, borrowing pieces from both camps. Here’s how to spot each one and where it belongs.
Modern trim strips away ornament in favor of flat, square-edge profiles. Baseboards tend to run tall, often 5 to 7 inches in contemporary builds, and high-end projects sometimes skip visible baseboards altogether in favor of reveal or shadow-gap systems, according to D and G Flooring’s breakdown of modern baseboard profiles. This style leans hard on paint, not stain, since the whole point is a smooth, uninterrupted line.
Best for: mid-century homes, new construction, minimalist interiors
Styling tip: pair tall flat baseboards with matching flat window casings so nothing competes for attention
Traditional/Colonial trim is the opposite instinct: layered, stepped profiles with ogee curves and decorative reveals. Crown moulding tends to be substantial, baseboards run tall and contoured, and the whole package reads formal.
Best for: colonial-era homes, formal dining rooms, historic renovations
Styling tip: keep crown proportional to baseboard height so the room doesn’t feel top-heavy
Craftsman trim skips the fancy millwork entirely. It’s typically built from simple square-edged boards, often 1x4 stock, stacked to create a substantial look without any carving, according to Family Handyman’s guide to Craftsman trim installation. The visual weight comes from width and layering, not detail.
Best for: bungalows, arts-and-crafts homes, anyone who wants a hardware-store-friendly DIY project
Styling tip: widen the casing rather than adding a second decorative band. Wide and simple beats narrow and busy in this style.
Transitional/Farmhouse trim borrows the simplicity of Craftsman boards but sometimes adds a modest cap or bead for a touch of formality. You’ll see it painted white as often as stained, depending on whether the room leans rustic or refined.
Best for: modern farmhouses, split-level remodels, homes blending old bones with a fresh layout
Styling tip: pick one detail (a small cap moulding, a chamfered edge) and repeat it everywhere instead of mixing several
What Are the Main Trim Components in a Full Package?
A complete trim package is really five separate pieces working together, and each one solves a different problem.
Baseboards run along the floor and come in flat, stepped, or sculpted profiles. Flat stock suits Modern and Craftsman rooms; stepped or sculpted profiles suit Traditional spaces where the baseboard needs to visually match an ornate crown.
Crown moulding finishes the wall-to-ceiling transition. Traditional rooms almost always include it; Modern rooms often skip it entirely or replace it with a shadow-gap reveal, since crown adds visual weight that fights the minimalist look.
Door and window casings frame openings and include side casings, a head casing across the top, and, for windows, a stool (the interior sill) below. Casing widths typically run 2.5 to 3.5 inches for standard homes and wider for Craftsman looks.
Chair rail sits roughly a third of the way up the wall, historically to protect plaster from chair backs, now mostly decorative in dining rooms and hallways.
Panel moulding creates decorative rectangles on walls below chair rail height, common in formal Traditional rooms. Transitions between components use base shoe or quarter-round to hide gaps where baseboard meets flooring, especially over hardwood or tile.
Skipping any one piece isn’t wrong. Plenty of Modern homes run baseboard and casing with zero crown or chair rail, and that’s a legitimate style choice, not a shortcut.
Choosing Materials: MDF, Poplar, Hardwood, and PVC
Material choice usually comes down to one question: are you painting or staining? MDF is the standard for painted flat profiles. It’s affordable, doesn’t warp, and takes paint smoothly, but it swells if it gets wet, so it’s a poor fit for bathrooms or basements prone to moisture, based on Home Depot’s guide to baseboard types. Poplar and other hardwoods cost more but take stain evenly, which matters if you want a natural wood look rather than a painted one.
MDF: cheapest option, paint-friendly, avoid in wet rooms
Poplar/hardwood: pricier, stain-friendly, holds up better to dents and moisture
PVC/engineered trim: best for bathrooms, mudrooms, and basements where humidity is a real concern
Jointed pine: a middle-ground option, often pre-primed, decent for paint but not ideal for stain since the joints can show
For finish sheen, matte or satin paint tends to hide small imperfections better than gloss, which is part of why it’s the go-to for Modern baseboards where every flaw shows under a flat profile. Stain needs a bit more upkeep: expect to reapply a protective coat every few years in high-traffic hallways, while painted MDF mostly just needs an occasional wipe-down and touch-up.
Getting the Scale Right: Baseboard Height, Casing Width, and Ceiling Proportion
Trim that’s undersized for a room looks like an afterthought. Trim that’s oversized looks like it’s trying too hard. A few working ratios keep things proportional without guesswork.
8-foot ceilings: baseboards around 3 to 4 inches tall keep proportions balanced without overwhelming the wall.
9-foot ceilings: bump up to 4.5 to 5.5 inches; this is where a lot of Modern homes land, since taller baseboards in the 5 to 7 inch range read as intentional rather than oversized once ceiling height supports it.
10-foot-plus ceilings: 6 to 7 inches or more, often paired with substantial crown to keep the room from feeling stretched.
Casing width: generally 2.5 to 3.5 inches, roughly matching or slightly exceeding baseboard thickness so the two don’t visually clash at inside corners.
Flooring thickness: thicker engineered or solid hardwood flooring may require a slightly deeper baseboard reveal or a taller base shoe to hide expansion gaps.
Before ordering anything, measure every wall length, note door and window opening widths, check ceiling height in each room (older homes are rarely a clean 8 feet), and confirm whether your flooring installer needs to go in before or after trim.
Pro Tip: Order 10% more linear footage than your measurements say you need. Miter cuts waste material fast, and running short mid-install means a second trip to the lumber yard with mismatched batch dye lots.
DIY Installation: Tools, Technique, and When to Call It
A basic trim job needs a miter saw, a coping saw for inside corners on stepped profiles, a finish nailer, wood filler, caulk, and sandpaper. Craftsman trim is more forgiving here: inside corners on simple square stock often just butt together instead of requiring a coped joint, which is part of why it’s a common first DIY trim project, per Family Handyman’s installation notes. Traditional stepped profiles usually demand actual coping to get a tight inside-corner fit.
Measure stud and wall-line locations before cutting baseboard, and install window stools before side casings so the casing sits correctly against them
Use pilot holes on delicate fillet pieces to keep them from splitting when nailed
Caulk every seam between trim and wall, fill nail holes, sand lightly, then prime and paint in that order, not out of sequence
Watch for the three mistakes that give away amateur work: trim that’s undersized for the ceiling height, mixed profiles from different product lines, and sloppy caulk lines where trim meets an uneven wall
Flush or reveal-style Modern systems are a different animal. They need to be planned during framing and drywall, not retrofitted afterward, and flush baseboard systems generally call for a smoother drywall finish level and precise blocking that most DIYers aren’t set up to pull off. That’s a strong signal to call a contractor rather than push through it yourself. Inconsistent, wavy walls and complex multi-piece crown builds are the other two situations where a pro usually saves you more in redone work than they cost upfront.
Where Did These Trim Styles Come From?
Traditional trim traces back to European classical architecture, where stepped and ogee profiles borrowed directly from stone cornice work in Greek and Roman buildings. American colonial builders adapted those same shapes in wood because carving stone wasn’t practical for houses, and the formal, layered look stuck around through the Georgian and Federal periods.
Craftsman trim is a reaction against that ornamentation. It grew out of the American Arts and Crafts movement in the early 1900s, which pushed back against Victorian excess and machine-made decoration in favor of honest materials and visible craftsmanship. Stacking plain boards into substantial-looking casings fit that philosophy: no carving, no applied decoration, just proportion and mass doing the work.
Modern trim’s minimalism has roots in the Bauhaus and mid-century modern movements of the mid-20th century, where “form follows function” pushed architects to strip trim down to its structural purpose or eliminate it visually with flush and reveal details. The current push toward shadow-gap systems is really a continuation of that decades-old idea, just with better manufacturing tolerances to pull it off.
Farmhouse and transitional trim doesn’t have a single origin story. It’s a modern retail-era blend, popularized largely through home renovation media, that borrows Craftsman’s simplicity and applies it to rural and vintage-inspired homes without the strict Arts and Crafts rulebook behind it.
Matching Trim to Your Home’s Architecture and Room Function
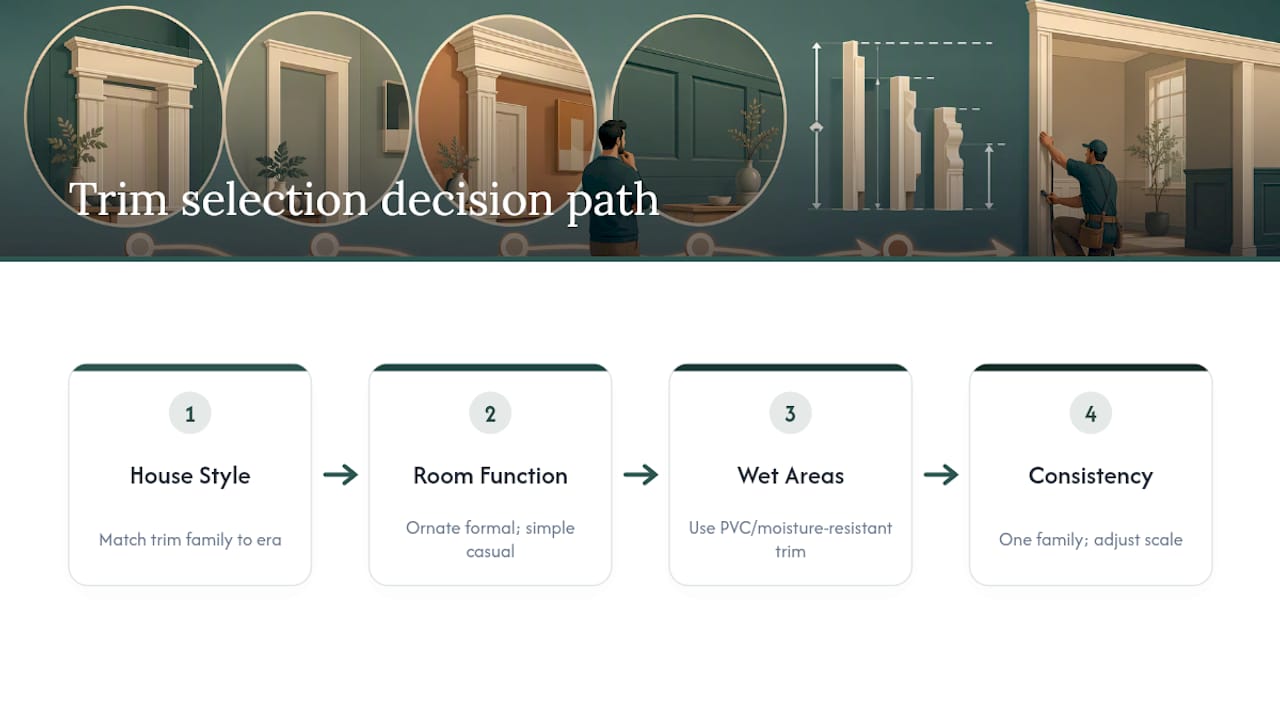
Style choice starts with what your house already is, not what’s trending. A colonial-era home with 8-foot ceilings and traditional window proportions will look off with flat Modern baseboards; a mid-century ranch with an open floor plan will look busy with heavy stepped Traditional crown. Match the trim family to the era and bones of the house first.
Room function matters almost as much as architecture. Formal spaces like dining rooms and entryways can carry more ornate trim, chair rail, or panel moulding without feeling fussy, because those rooms are meant to feel a little special. Bedrooms, hallways, and casual living spaces generally read better with simpler baseboard and casing, since heavy ornamentation in high-traffic zones just becomes something to bump into and repaint.
Wet areas deserve a separate rule entirely. Bathrooms, mudrooms, and basements do best with PVC or moisture-resistant engineered trim regardless of the style family you’re chasing, since MDF and most softwoods will swell and delaminate with repeated moisture exposure. If you love a Traditional profile but need it in a bathroom, look for the same profile shape milled in PVC rather than switching styles altogether.
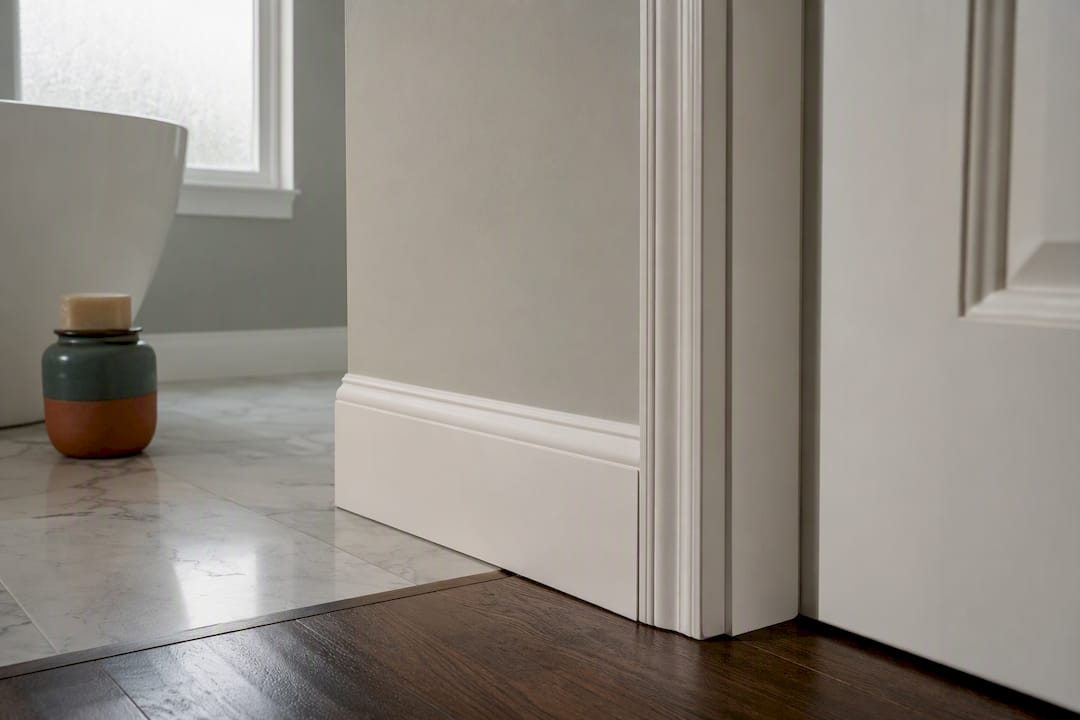
The safest rule for whole-house consistency: pick one trim family and carry it through every room, adjusting scale slightly for room size but never swapping profile shapes mid-house. Mixing unrelated trim styles from room to room is one of the more common design mistakes homeowners make, according to Houzz’s guide to unifying a home’s design, and it’s one of the easiest to avoid if you decide early.
A Contractor’s View on Locking In Trim Decisions Early
The biggest mistake I see isn’t a bad style choice. It’s an undecided one. Homeowners pick trim room by room as they go, and by the third room they’re stuck matching a profile they didn’t love in the first place. Lock the trim family before drywall goes up, especially for flush or reveal systems, since retrofitting those later means tearing into finished walls. Coordinate with your flooring and door installers early too. Baseboard reveal and casing width both depend on decisions those trades make.
— Noah
How Spagnotti Contracting Handles Trim Selection and Installation
If the miter saw and coping joints above sound like more weekend than you want to commit, that’s exactly the gap a contractor fills. Spagnotti Contracting works through carpentry and framing for built-up profiles, interior remodeling for full-room trim packages, and painting for the sheen and prep work that makes flat modern baseboards look clean instead of patchy.

A project estimate walks through your home’s architecture, room function, and existing profiles before recommending a trim family, so you’re not guessing between Modern and Craftsman on your own. From there, project management stays consistent from framing through final paint, with one point of contact instead of juggling separate trades. If you’re planning a remodel in the Omaha metro area and want trim handled start to finish, request a quote from Spagnotti Contracting to get a plan built around your home specifically.
Sources
For hands-on installation steps, Family Handyman’s Craftsman trim guide is a solid walkthrough. For style selection, see Woodgrain’s trim and moulding guide and D and G Flooring’s modern baseboard breakdown. For material shopping, check Home Depot’s baseboard types page.
A Beginner’s Guide to Choosing the Perfect Trim and Moulding
How to install Craftsman window trim and Craftsman door casing (Family Handyman)
Modern baseboard profiles: clean lines for a contemporary home - D and G Flooring
Recommended
Dealing With Something Similar?
Every property is different, but if this sounds like what you’re seeing, we’re happy to take a look and help you figure out what’s actually going on.