General Contracting
Cedar Fence Lifespan: Keep the Posts Dry and the Fence Lasts Longer
By Noah Spagnotti
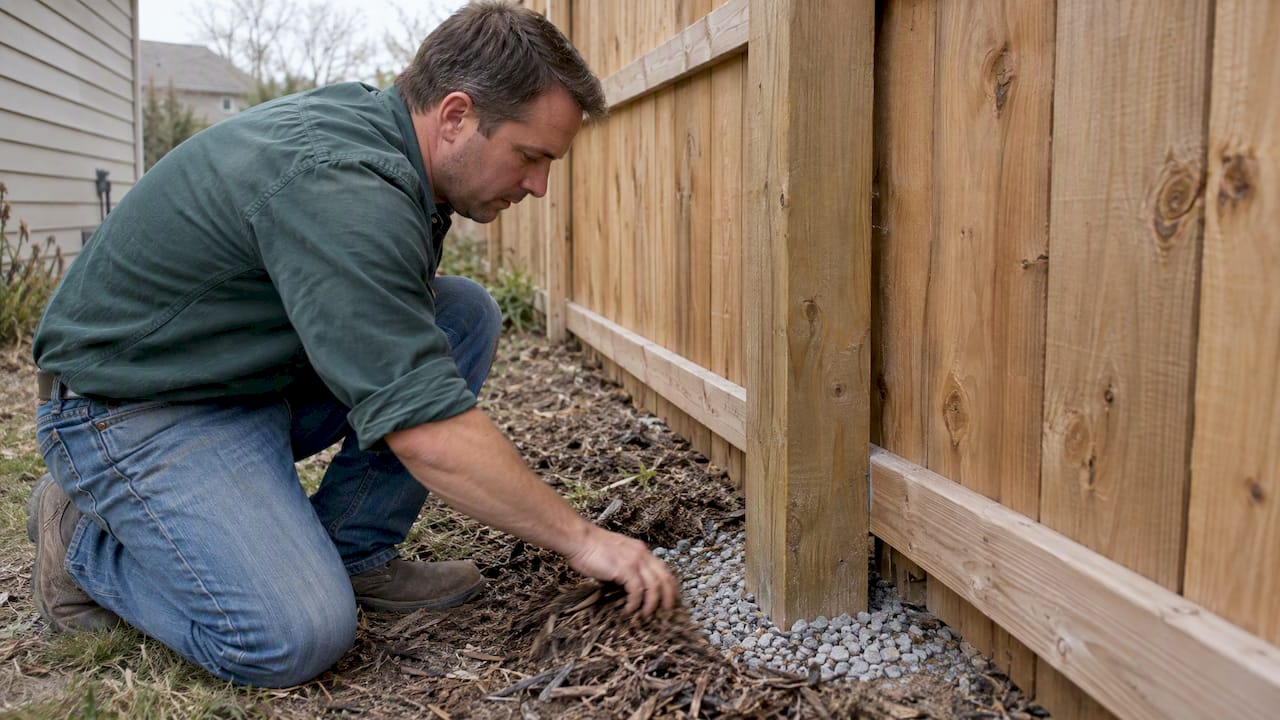
A well-built cedar fence can give you many years of service, and the biggest swing factor is how the posts are installed and kept dry. Panels and pickets tend to outlast the wood in the ground, so the first thing to do is inspect your posts, then set a yearly maintenance routine you will actually follow.
TL;DR:
Buried posts usually fail first because soil holds moisture; use compacted gravel for line posts and sloped concrete footings for gates and corners.
Check posts for wobble or softness, keep boards clear of soil, tighten gate hardware, and renew the finish when water stops beading.
If you pressure wash, use low pressure, hold the nozzle well back, and follow the grain; excess force roughens cedar and admits moisture.
A troubled fence may need only a few replacement posts and boards; an inspection can distinguish localized damage from a full replacement.
How long does a cedar fence really last?
The lifespan of a cedar fence varies with its conditions and care, and no estimate is a promise. A fence on well-drained ground, with posts that stay dry and a finish that gets refreshed, lands near the top. A fence with posts sitting in damp soil and no upkeep lands near the bottom.
Here is what the range means in practice:
Pickets and panels often outlast the posts, since they stay above ground and dry out after rain.
Posts are the usual reason a fence gets replaced, because the part buried in soil sees constant moisture.
Hardware such as nails, screws and hinges can fail or stain long before the wood does.
Gates carry extra stress from swinging weight, so they wear out earlier than fixed sections.
Cedar earns its reputation because its heartwood is naturally resistant to decay, which gives it an edge over less durable softwoods. Oregon State University Extension notes that this resistance is real but not immunity, and that naturally durable woods perform best when they are not in contact with soil. It buys you time, and what you do with that time decides how long the fence lasts. When someone quotes you a single number, ask what they assumed about installation and care. Sources disagree mostly because they assume different conditions.
How installation and site design affect durability
Most of a cedar fence's lifespan is decided on day one, before a single board is stained. The ground is hard on wood, so the choices below matter more than almost anything you do later.
Post depth and footing. Posts need to go deep enough to stay stable through freeze and thaw cycles and wind. A shallow post leans early, and a leaning post stresses every board attached to it.
Concrete or gravel. Concrete holds a post firmly, but if the collar is flat on top, water can pool around the wood and speed rot. Gravel backfill drains better and lets moisture escape, though it holds less rigidly. Gate posts and corners usually benefit from concrete. Line posts can do well with compacted gravel.
Drainage at the base. Slope the top of any concrete away from the post so water sheds instead of sitting. Keep soil and mulch from piling against the bottom boards.
Fasteners. Stainless steel resists corrosion and avoids the dark streaks that cheaper fasteners can leave on cedar. Hot-dip galvanized is a solid budget choice. Plain or electroplated fasteners rust and stain, then lose their grip.
Site conditions. Poorly draining soil, low spots that collect standing water, salty air, heavy snow loads and strong wind exposure all shorten life. A fence line that stays wet needs more protection and more frequent checks.
Pro Tip: Before you buy anything, walk the fence line after a hard rain. Wherever water lingers, plan extra gravel, a taller post base or a slight reroute.
Oregon State University Extension's wood preservation manual makes the same point: decay fungi need moisture, and good building design keeps water out and avoids direct soil contact.
The maintenance routine that extends a cedar fence's life
Cedar forgives neglect better than many woods, but it rewards attention. A simple yearly rhythm protects your investment without turning into a chore. The USDA Forest Products Laboratory's chapter on finishing wood notes that for wood used outdoors, a finish's most important job is protection from water, sunlight and weathering.
Your yearly inspection checklist:
Push on each post and look for wobble or soft spots at ground level.
Check that bottom boards are not touching soil or buried in mulch.
Test gate hinges, latches and sag, and tighten loose hardware.
Look for popped nails, split boards and dark streaks near fasteners.
Note any green or black growth on shaded sections.
Cleaning. A soft brush, mild soap and water handle most mildew and grime. If you use a pressure washer, keep the pressure low, hold the tip well back and work with the grain. Too much force roughens the surface and opens it to more moisture.
Staining and sealing. Refresh the finish periodically. Water that soaks in instead of beading up is a clear sign it is time. Sunny, exposed sections usually need it sooner than shaded ones.
Repairs. Replace a cracked board or loose rail as soon as you see it. One failing piece puts extra load on its neighbors, and small problems cascade quickly. If a post has started to rot, our guide to fixing rotted fence posts covers practical repairs.
The payoff of consistent care is hard to overstate. Treat the yearly check and periodic refinishing as the baseline, and you give cedar's natural resistance the best chance to carry the fence toward the long end of its range.
Installation best practices: posts, species and a quick checklist
Should cedar posts be set in concrete? Our answer is: it depends on the post. Concrete is a good call for gate posts, corners and ends, where the fence needs maximum rigidity. For line posts, many installers prefer compacted gravel because it drains and lets the wood breathe. Whichever you choose, shape the top of the footing so water runs away from the post.
Western Red Cedar is the common choice because of its natural decay resistance and its stable, easy-to-work wood. Its limit is that resistance fades when wood stays constantly wet, which is why posts underground remain the weak link. Many builders pair cedar pickets with posts that offer extra protection at ground contact.
A quick pre-install checklist:
Confirm the grade and mark low spots where water collects.
Plan drainage so water leaves the fence line instead of pooling.
Set post depth for your frost line and soil type.
Add post caps so rain does not soak the end grain.
Choose stainless or hot-dip galvanized fasteners.
Leave a gap between the bottom board and the soil.
After installation, walk the fence periodically. Look for settling posts, boards that have shifted as the wood dried and any fastener that has loosened. Early adjustments are cheap, and they keep small movements from becoming structural problems. If you are still choosing a style, our privacy fence ideas show how design affects wind and moisture exposure.
What cedar fence longevity costs, and what maintenance saves
Cedar usually costs more up front than basic pine, and that premium is what you are paying for: slower decay and a longer service window. The sensible way to compare is cost per year of service. A longer-lasting fence at a higher price can cost less annually than a cheaper fence that needs replacing more often.
Maintenance has its own budget, and it is modest next to replacement. Cleaning supplies, stain and a weekend of your time recur every few years. Skipping them feels like savings, but moisture damage compounds, and a fence that could have lasted longer may need a major rebuild sooner.
Where money does the most good:
Better post preparation and drainage at installation. This is the single investment that protects against the most common failure.
Quality fasteners. The price difference is small across a whole fence, and the payoff is fewer stains and fewer loose boards.
Timely repairs. Swapping one board or resetting one post costs far less than letting a section collapse and take its neighbors with it.
Your own project will price differently based on length, height, style, terrain and gates, so treat any general figure with caution. A written estimate that spells out post depth, footing method and fastener type tells you more about long-term value than the bottom-line number alone. We are happy to walk through those details with you at the site.
Common causes of cedar fence failure and how to prevent them
Fences rarely fail for mysterious reasons. The same handful of causes show up again and again, and nearly all of them trace back to moisture and movement.
Post rot at ground level. This is the leading cause. Soil holds water against the wood, and decay starts where the post meets the ground. Prevent it with good drainage, sloped footings and posts set to the right depth.
Standing water and poor drainage. A fence line in a low spot stays wet. Regrading, adding gravel or adjusting the layout keeps the wood from sitting in moisture.
Soil contact with boards. Mulch, leaves and raised garden beds against bottom boards trap moisture. Keep a clear gap and clear debris each season.
Cheap or mismatched fasteners. Corroded nails and screws lose their hold and stain the wood. Stainless or hot-dip galvanized fasteners avoid both problems.
Movement and loose hardware. Wind, freeze and thaw, and swinging gates loosen connections over time. Tighten and replace hardware during your yearly check.
Neglected finish. Without periodic refinishing, sun and rain break down the surface, which lets moisture in. Renewing the finish on schedule keeps the wood protected.
Ignored small damage. A split board or a leaning post rarely stays small. Fixing it early stops the load from shifting onto healthy sections.
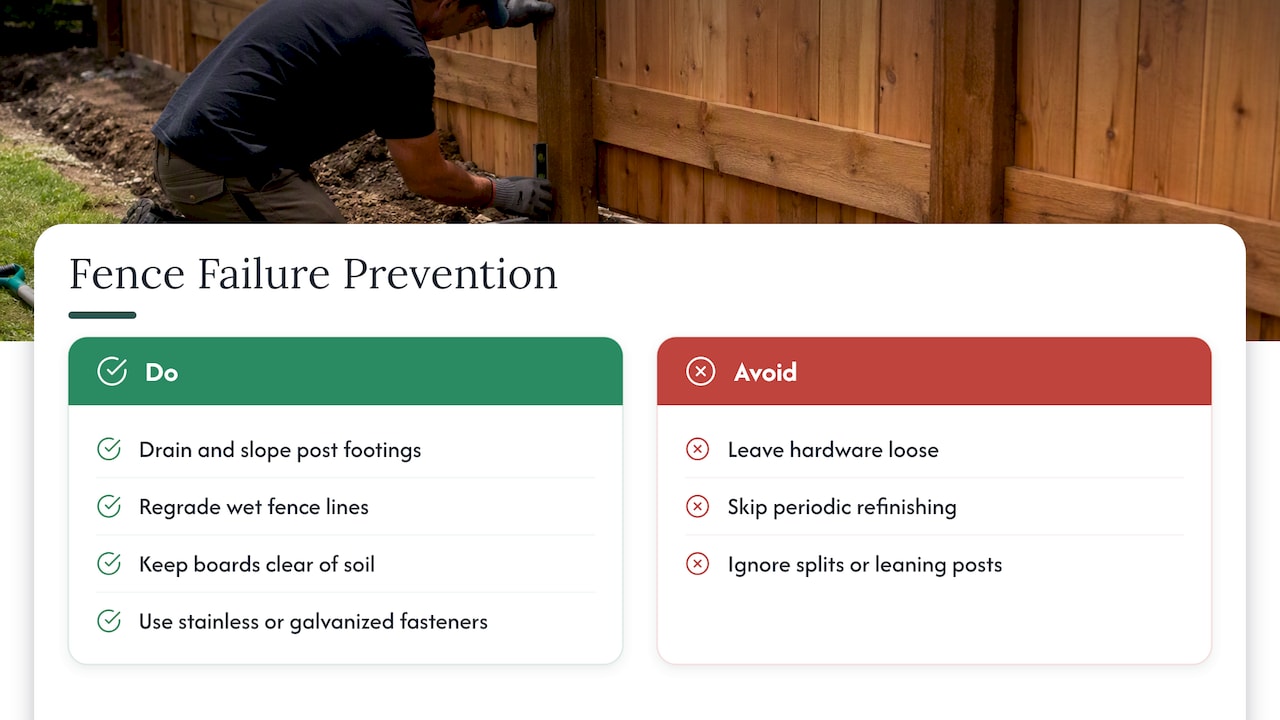
If your fence is already showing trouble, you do not necessarily need a full replacement. Often a few posts and a handful of boards bring a section back to solid condition, and an honest inspection will tell you which situation you are in.
How cedar compares with other fencing materials
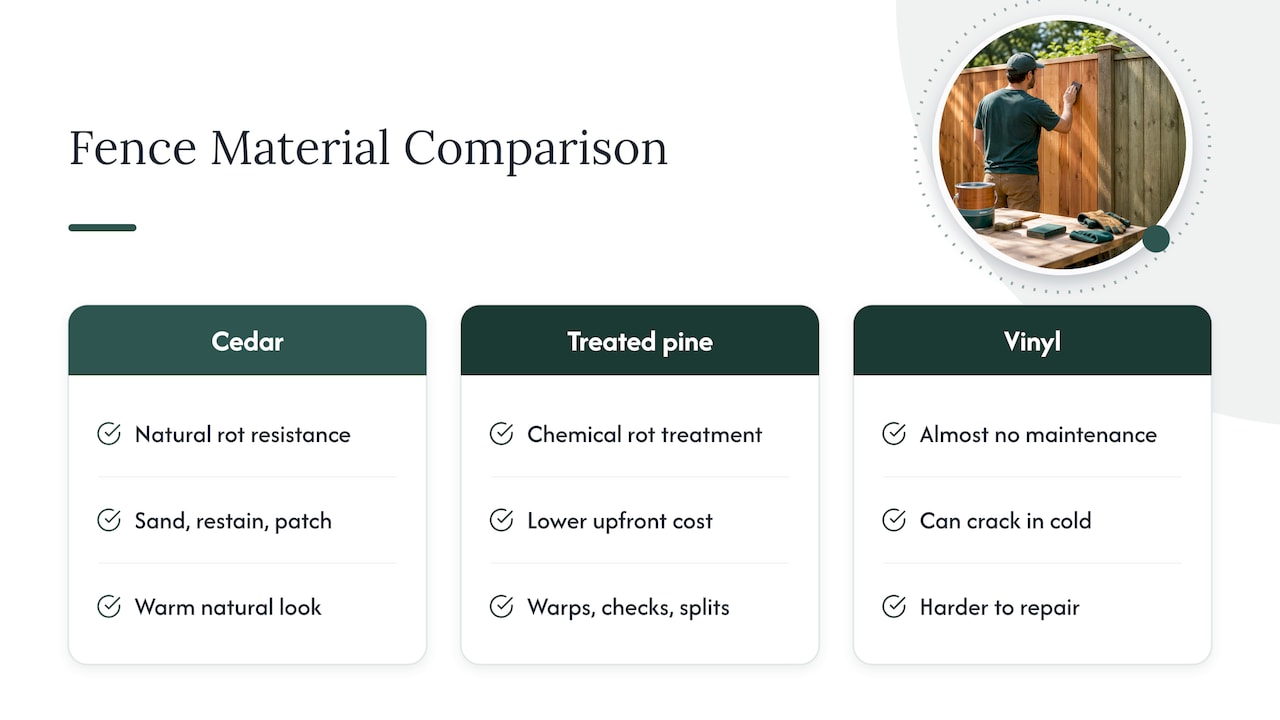
Cedar sits in a strong middle-to-upper position among wood options, and it behaves very differently from non-wood choices. The comparison below is about how each material ages, since exact lifespans swing with climate and care.
Pressure-treated pine resists rot through chemical treatment and costs less up front. It tends to warp, check and split more as it dries, and it often looks rougher over time. Cedar's natural resistance and stability give it a cleaner long-term appearance, though treated posts can pair well with cedar pickets.
Untreated softwoods such as basic spruce or fir have little decay resistance. OSU Extension notes that the heartwood of Douglas-fir, western hemlock and most other species is nondurable, which is why cedar holds up better without treatment.
Vinyl needs almost no maintenance and does not rot, but it can crack in cold, become brittle with age and cannot be refinished or repaired as easily as wood. Cedar can be sanded, restained and patched.
Metal fencing, such as aluminum or steel, resists decay entirely but offers less privacy and a very different look. Steel can rust if the coating is damaged.
Composite resists rot and insects, but it costs more and handles heat differently than wood.
The real tradeoff is upkeep versus warmth and repairability. Cedar asks for a little care in exchange for natural beauty and the ability to fix it piece by piece. If you want a fence that ages gracefully and can be renewed instead of replaced, cedar makes a strong case.
How cedar looks after a few years
Fresh cedar arrives in warm reds, tans and honey tones, and many homeowners love that color enough to want to keep it. How long it stays depends entirely on whether you finish it.
At first. Unfinished cedar begins to lighten as sun hits it. You may notice small color differences between boards as they dry and settle.
As it weathers. Without a finish, the surface fades toward gray, especially on sun-exposed sides. Light surface checking can appear as the wood moves with humidity. This is cosmetic, and the fence is still sound.
Over time. Unfinished cedar usually weathers to a silvery gray. Shaded or damp areas may show mildew, which looks green or black until cleaned. A sealed or stained fence keeps its color much longer and sheds water better.
Graying is not the same as failing. A gray fence with solid posts and tight boards is healthy. What deserves attention is soft wood, deep cracks, loose hardware and leaning posts.
You have a real choice here. Let it silver naturally and accept the look, or refinish periodically to hold the warm tone. Either path works, but the finished route also adds a layer of moisture protection, which supports longevity. If you plan to restain, clean first and let the wood dry fully so the finish bonds well.
A contractor's view: common mistakes and quick wins
I have watched fences that looked identical on install day end up lasting very different lengths of time, and the gap almost always came from what happened below the surface. The three mistakes I see most: ignoring drainage, buying cheap fasteners to save a few dollars, and skipping the yearly inspection. Taking time to prep the post bases and slope the footings pays off for years. Schedule that inspection, and call a professional when something looks off.
Our fence installation and repair services
We offer fence installation and repair, and we can evaluate your posts, drainage and hardware before anything goes in the ground. Hiring a contractor puts the biggest lifespan drivers in experienced hands.
Proper post depth and footing work, with drainage planned in.
The right fasteners and post protection for your site.
Honest repair-or-replace advice for an aging fence.
Ready to protect your fence? Request an inspection or estimate through our fence installation and repair page and we will take it from there.
FAQ
Should cedar fence posts be set in concrete?
Often yes for gate posts and corners, where rigidity matters most. Line posts can do well in compacted gravel because it drains better. Whichever you choose, slope the footing so water runs away from the wood.
Can you leave cedar wood untreated?
Yes, cedar has natural resistance to decay and insects, so many homeowners leave it unfinished. It will weather to a silvery gray and may need cleaning for mildew. A stain or sealer adds moisture protection and holds the original color longer.
How do you keep a wooden fence from rotting?
Keep the wood dry and off the soil. Improve drainage at the base, leave a gap under bottom boards, and refinish the surface regularly. A yearly inspection and prompt repairs catch small problems before they spread.
What does a cedar fence look like after two years?
An unfinished cedar fence typically fades from warm reds and tans toward lighter tones, with some gray creeping in on sunny sides. Minor surface checking is normal. A sealed or stained fence holds its color noticeably longer.
Sources
Recommended
Dealing With Something Similar?
Every property is different, but if this sounds like what you’re seeing, we’re happy to take a look and help you figure out what’s actually going on.