General Contracting
Homeowners: Pro Tested Fixes for Rotted Fence Posts, 30–90 min Mender
By Noah Spagnotti

If rot is limited to the ground line and the wood above stays firm, a steel post mender or a sistered support post will usually save it. Full replacement becomes necessary once the wood is soft above grade, the post has snapped, or footing failure has taken multiple posts down the line. Getting the diagnosis right is the whole game.
TL;DR:
Steel post menders are most effective for ground-line rot when the wood above remains sound, offering a repair that can last a decade or more.
Sistering strengthens leaning or slightly compromised posts by adding a new post alongside the old, but it does not address deep rot or footing issues.
Rebuilding the concrete collar is suitable for wobbly posts caused by footing failure and typically takes about one to two hours plus curing time.
Full replacement is necessary when rot climbs above grade or the post is broken, requiring careful removal and proper backfilling to ensure durability.
Proper diagnosis through probing and testing is critical before choosing a repair method, as misjudging can lead to quick failures or future problems.
Table of Contents
Rotted Fence Posts: Steel Mender, Sistering, Concrete Collar, or Full Replacement?
How Do You Tell If a Fence Post Is Rotted or Just Loose?
Method 1: Fixing Rotted Fence Posts With a Steel Post Mender
Method 2: Sistering a New Post to a Leaning Fence Post
Fixing a Wobbly Post: Rebuilding the Concrete Collar
How to Replace a Rotted Fence Post Without Wrecking the Fence
What Materials Actually Prevent Fence Post Rot?
What Does It Cost to Repair or Replace a Rotted Fence Post?
When Should You Call a Contractor Instead of DIYing It?
A Contractor’s Take on Rotted Fence Post Repairs
How Do You Dispose of Rotted Fence Wood Responsibly?
Why Most Fence Post Advice Skips the Real Decision Point
If You’d Rather Not Dig Holes: Getting a Pro to Handle It
Sources
Rotted Fence Posts: Steel Mender, Sistering, Concrete Collar, or Full Replacement?
Four repair paths cover almost every failed fence post, and each one fits a different failure pattern. Picking wrong wastes a weekend and sometimes a post.
A steel post mender anchors into sound wood above the rot and cradles the rotted base in fresh concrete, which makes it the fastest fix when the damage is confined to a narrow band at the soil line. Sistering means setting a new post right beside the failing one and bolting the two together, a good move when a post is leaning but the wood itself hasn’t gone punky. A concrete collar rebuild addresses a different problem entirely: the post is structurally fine, but the footing around it has cracked or shifted, so it rocks like a loose tooth. Full replacement is the last resort and the most durable one, called for when rot has climbed above grade or the post has already broken.
Steel post mender: best for ground-line rot only, sound wood above; 30 to 90 minutes per post; moderate DIY skill; visible metal bracket at the base.
Sistering: best for leaning posts with mostly sound wood; 1 to 3 hours per post; low to moderate skill; doubled post is visible unless boxed in.
Concrete collar rebuild: best for wobbly posts with intact wood (a footing problem, not a rot problem); 1 to 2 hours plus cure time; low skill; nearly invisible once backfilled.
Full replacement: best for broken posts or rot above grade; half a day to a full day per post depending on concrete removal; moderate skill; fence looks factory new at that post.
Durability tracks roughly with effort. A well-installed steel mender can last a decade or more, while a full replacement using a modern post system can run for decades if it’s set and drained correctly. Sistering lands in the middle: strong immediately, but it’s still riding on the old post’s buried section, which may keep degrading underground even after you’ve stabilized the top.
The trade-offs are visual as much as structural. A mender bracket at the base reads as a repair, not an upgrade, and some homeowners find that bothers them more than the actual performance loss. Sistering adds bulk to the post line. A concrete collar disappears once it’s backfilled and the grass grows back. Full replacement is the only method that leaves zero evidence anything was ever wrong.
Pro Tip: Before choosing a mender or sister post, probe the wood every couple of inches above the visible rot line with an awl or screwdriver. If you find one soft pocket six inches above where you thought the damage stopped, replace the post instead. A conservative approach on sound-wood checks beats a mender that fails in year two.
How Do You Tell If a Fence Post Is Rotted or Just Loose?
A post that leans could be rotted, or it could just be sitting in a footing that cracked or never got compacted right. Three quick tests sort out which problem you’re actually dealing with.
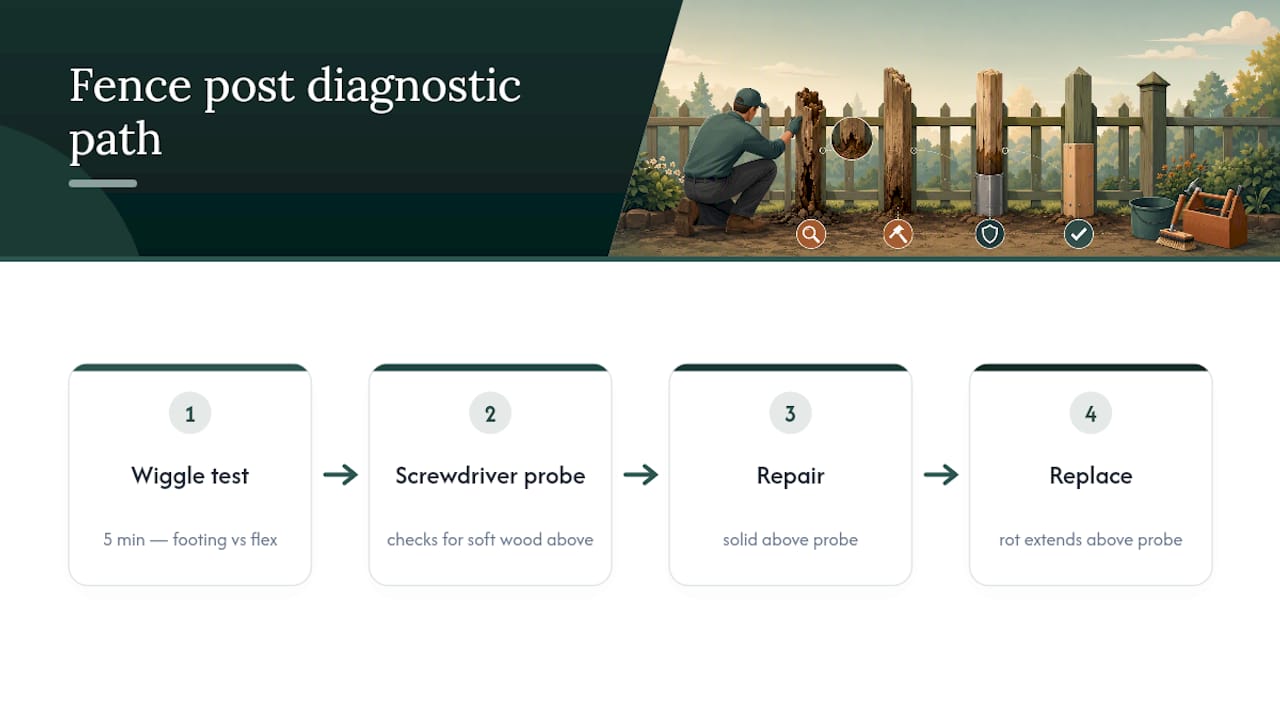
Run the wiggle test. Grab the post at chest height and push it side to side. If it pivots stiffly right at the soil line while the base doesn’t visibly crumble, suspect footing failure, not rot. If it flexes like a wet noodle or you feel grit shifting near ground level, rot is likely doing the damage.
Probe with a screwdriver or awl. Push it into the wood at the soil line and an inch or two below. Sound wood resists and the tool barely sinks in. Rotted wood lets the screwdriver slide in with almost no pressure, sometimes disappearing to the handle.
Check the concrete or footing separately from the wood. If the concrete collar has cracked, tilted as a single chunk, or pulled away from the post entirely while the wood itself probes solid, you’ve got a footing problem you can fix without touching the post.
Look for the telltale signs of early rot before things get structural: dark staining that spreads a few inches above the soil, a spongy texture you can dent with a thumbnail, mushroom growth at the base, or a hollow sound when you tap the post with a hammer.
Tally the scope before you commit to a method. Count how many posts show damage, note which ones carry gate hinges or heavy panel loads, and flag any post sitting within a few feet of a downspout, sprinkler head, or low spot where water pools after rain.
Ground-line rot happens where soil moisture, oxygen, and wood all meet at once, which is exactly the zone these tests target. That’s also why the same post can look perfectly fine two feet up and be mush an inch below the surface.
Method 1: Fixing Rotted Fence Posts With a Steel Post Mender
A steel mender works when the damage is a tight band right at the soil line and everything above it still probes solid. It’s the least invasive of the four repair options and, done correctly, can anchor into sound wood and encase the rotted base in fresh concrete for a fix that holds for years.
Tools and materials: post mender or post repair sleeve sized to your post, galvanized carriage bolts, a drill with bits matched to the bolt diameter, a reciprocating saw or handsaw, a shovel or post-hole digger, quick-setting concrete or compacted gravel, a level, and a wire brush for cleaning the old post surface.
Step by step:
Excavate around the post to expose the full rotted section, going a few inches past where the wood looks damaged.
Cut away all soft, punky wood with a saw. Don’t leave rot behind just because it’s out of sight. It keeps spreading.
Probe the remaining post to confirm sound wood. You need at least 4 to 6 inches of solid wood above the rot line for the carriage bolts to grab without the bracket levering loose under wind pressure.
Slide the mender into place, plumb it with a level, and drill through both the bracket and the post for the carriage bolts. Undersized or too-few bolts is the single most common reason menders fail early.
Bolt it tight, backfill with compacted gravel for drainage or pour quick-setting concrete around the base, then crown the top of the concrete so water sheds away from the post instead of pooling against it.
Check plumbness again once the bracket is bolted and before the concrete sets. Give it a final wiggle test after cure time to confirm the base is rigid.
Pro Tip: If you’re on the fence about whether enough sound wood remains above the rot, err toward replacement. Sistering or replacing a post costs an extra hour of labor; a mender that lets go in a windstorm costs you the whole panel.
Method 2: Sistering a New Post to a Leaning Fence Post
Sistering fits a specific situation: the post is leaning or slightly compromised, but you’re not dealing with rot deep enough to compromise the wood’s core strength. Instead of removing the old post, you plant a new one right next to it and let the two work as a team.
Dig a new hole beside the failing post, typically 6 to 8 inches over, deep enough to match or slightly exceed the depth of the original post.
Set the new post plumb using a level, backfilling with gravel or concrete just as you would for a standalone installation.
Bolt the two posts together using galvanized carriage bolts spaced every 12 to 16 inches along the shared face, which spreads the load rather than concentrating stress at one point.
Transfer the fence rails to the new post where the old attachment points have degraded, re-driving fasteners into solid wood instead of reusing rotted holes.
Let the concrete cure per the bag’s instructions, typically 24 to 48 hours before hanging any real load like a gate.
The upside is speed and strength without tearing out a footing that’s otherwise fine. The downside is visibility: a doubled-up post at the fence line is obvious unless you trim and paint it to blend in, and the buried section of the old post is still underground doing whatever rot does when nobody’s watching. Sistering buys time. It doesn’t stop the clock.
Fixing a Wobbly Post: Rebuilding the Concrete Collar
Sometimes the wood is completely fine and the whole problem is a cracked or undersized footing. That’s a job for a collar rebuild, not a mender or a new post.
This method solves footing failure, not rot. If your screwdriver probe came back solid and the wiggle test showed the post pivoting cleanly at a cracked concrete edge rather than flexing in soft wood, you’re in the right spot.
Expose the footing by digging around the post to a depth below the visible crack or gap, usually 12 to 18 inches.
Brace the post plumb with a couple of temporary stakes and scrap lumber so it can’t shift while you work.
Remove any loose or shattered concrete chunks, but leave sound concrete in place. You’re patching, not demolishing.
Pour new concrete around the exposed section, working it in with a stick or rebar to eliminate air pockets against the post.
Crown the top of the new concrete so it slopes away from the post in every direction, keeping runoff from pooling against the wood.
If the old footing is too deep or too solid to remove practically, drill a new hole immediately adjacent, set a fresh post there, and sister it to the original instead of fighting the old concrete. Give new concrete at least 24 hours before removing braces, and a full 48 to 72 hours before hanging gate hardware or leaning heavy weight against the post.
How to Replace a Rotted Fence Post Without Wrecking the Fence
Full replacement is the answer once rot has climbed above the soil line, the post has snapped, or you’ve already tried probing and found soft wood everywhere you check. Proper depth and backfill method are what determine how long the replacement actually lasts, so rushing this step undoes the whole point of doing it right.
Support the fence panels on either side of the post you’re removing, using temporary braces or a helper holding the rails, so the panels don’t sag or crack once the post comes out.
Remove fasteners connecting the rails to the failing post, backing out screws or pulling nails rather than prying, which avoids splitting good wood on the neighboring posts.
Cut the post at grade with a reciprocating saw if it won’t pull free easily, then dig around the stub to remove it along with any surrounding concrete.
Decide how to handle old concrete. If the footing is small and cracked, break it out and haul it away. If it’s a large, sound block, it’s often faster to dig a new hole overlapping it, or offset the new post a few inches and sister the old footing’s edge.
Dig the new hole to the correct depth, generally one-third of the post’s total length below grade, and always deeper than your local frost line where winters bring hard freezes. Check your municipal building code before finalizing depth, since frost-depth requirements vary by region.
Set the new post, adding a few inches of gravel at the bottom for drainage before the post ever touches concrete.
Plumb and brace the post in two directions with temporary stakes, checking level on two adjacent faces, not just one.
Pour concrete or compact gravel around the base, crowning the top so water sheds away from the post rather than sitting against the grain.
Let the concrete cure fully, generally 24 to 48 hours minimum, before removing braces or hanging any panel weight.
Reattach the rails and pickets, driving fasteners into fresh, solid wood, then wait for the post to dry completely before painting or staining if it was field cut.
Watch for buried utility lines before you dig anywhere near a property line or gate post, and call your local utility locate service if you have any doubt. Use a floor jack or scrap lumber as a support brace rather than relying on a person to hold heavy panels for an extended stretch.
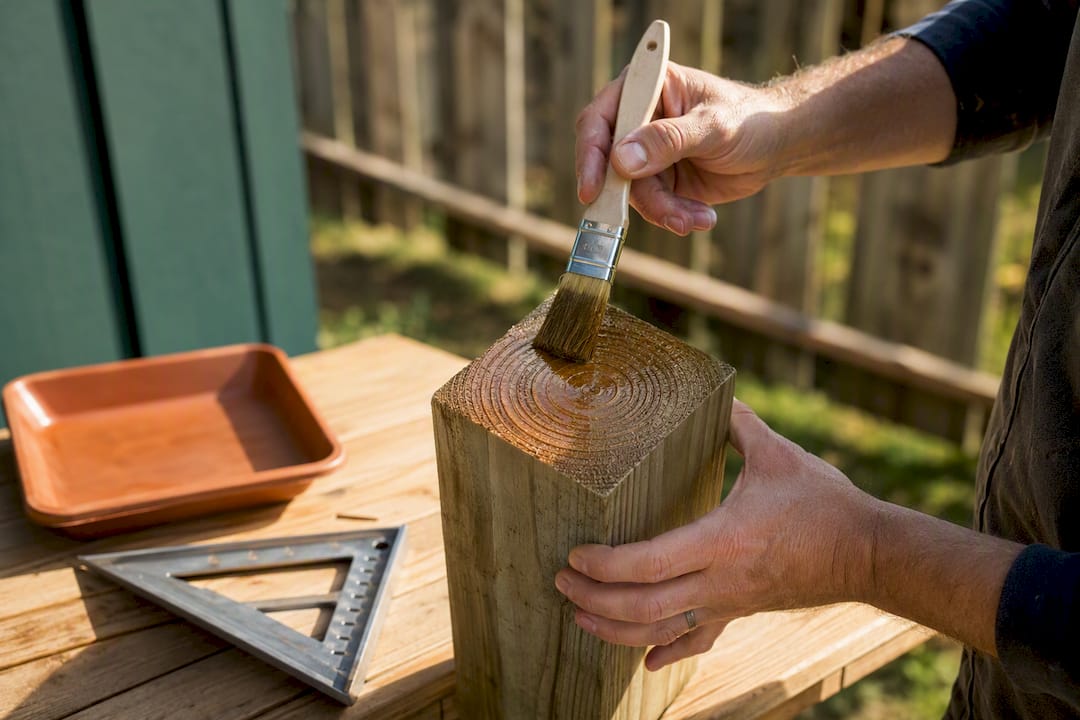
Pro Tip: Any time you cut a treated post to length, brush copper naphthenate or an equivalent end-grain preservative onto the fresh cut before it ever touches soil. Field cuts strip away the factory preservative layer, and that exposed end grain is usually the first place rot starts on an otherwise new post.
What Materials Actually Prevent Fence Post Rot?
Wood species matters less than most homeowners assume. Drainage and correct installation decide post longevity far more than whether you picked cedar, pine, or pressure-treated pine off the shelf.
Start with ground-contact-rated lumber, labeled UC4A or UC4B, which carries a heavier preservative treatment specifically engineered for direct soil contact rather than the lighter above-ground rating sold for deck boards. If you’d rather sidestep wood rot at the base entirely, steel posts paired with wood-post brackets keep the vulnerable ground-line section metal instead of wood, trading a slightly different look for a problem that simply doesn’t apply anymore.
Installation details matter as much as the material choice itself:
Add a few inches of gravel beneath the post before setting it, so the end grain never sits directly in standing water at the bottom of the hole.
Crown every concrete collar so it slopes away from the post in all directions. A flat or dished collar traps water against the wood and defeats the purpose of ground-contact lumber entirely.
Set the post with its factory-treated end down, since that’s the face engineered to resist ground contact.
Seal every field cut, drilled hole, or notch with copper naphthenate after cutting, restoring the protection the factory treatment provided before you altered the wood.
Consider a post sleeve or metal post base bracket, which lifts the wood a couple of inches above grade and keeps it out of the moisture zone entirely.
Maintenance afterward is simple but easy to skip. Walk the fence line once or twice a year, clear mulch or grass clippings that have piled against the base, reseal any new cuts, and hold off on repainting or restaining a repaired post until it’s fully dried out, usually a few weeks after the repair.
What Does It Cost to Repair or Replace a Rotted Fence Post?
Materials alone put a steel mender at the low end of the spectrum, often finished in under an hour once you’ve done the diagnostic work. Sistering runs a bit higher in materials and a few hours in labor, since you’re buying and setting an entire extra post. Full replacement costs the most and takes the longest, typically a half day per post once you factor in old concrete removal, and a full day or more if the footing fights you or the soil is heavy clay.
Steel post mender: lowest materials cost of the four methods; under an hour of labor per post for a DIYer who’s already diagnosed the damage.
Sistering: moderate materials cost (a full post plus bolts); 1 to 3 hours per post including hole digging and concrete cure prep.
Concrete collar rebuild: low materials cost (just concrete mix); 1 to 2 hours of active work plus a full cure cycle before load-bearing use.
Full replacement: highest materials cost per post; half a day to a full day depending on old concrete removal and soil type.
Professional pricing scales with the same variables that slow down a DIY job: how many posts need attention, whether old concrete has to be broken out and hauled off, how workable the soil is, and whether any of the affected posts carry gate hinges or heavy panel loads that demand extra bracing.
A steel post mender installed correctly can hold for a decade or more, which changes the cost math considerably if you’re weighing a $20 mender against a full replacement for a post that’s otherwise sound. Whatever method you pick, budget cure time into your schedule. Concrete needs at least a day before it can bear real load, and a freshly cut or replaced post should dry fully, often a couple of weeks, before you paint or stain it.
When Should You Call a Contractor Instead of DIYing It?
A single rotted post with sound wood above the damage is a reasonable weekend project for most DIYers. The math changes once the problem multiplies or the stakes go up.
Multiple posts failing along the same run often points to a drainage or grading issue affecting the whole fence line, not one bad post, which calls for a broader fix than a single mender.
Gate posts carry far more load and leverage than a standard line post, so a repair that would hold fine elsewhere can fail fast under gate stress.
Utility conflicts near the post location mean you need a locate service and possibly professional judgment before digging at all.
Heavy structural loads, like a fence tied into a retaining wall or supporting an attached structure, raise the cost of getting it wrong.
A contractor’s estimate should walk the property, check soil conditions and existing concrete at each post, assess panel condition, and spell out a recommended scope rather than a vague number. When you’re comparing quotes, ask each contractor for an itemized breakdown covering materials, labor per post, and any drainage corrections, so you’re comparing the same scope of work rather than apples to oranges.
A Contractor’s Take on Rotted Fence Post Repairs
On most service calls, the first move is the same wiggle-and-probe check any homeowner can run: pivot at the ground line usually means footing failure, while flex along the whole base usually means rot has taken hold. That diagnosis decides everything that follows, and getting it wrong is the single biggest reason DIY repairs don’t hold.
Drainage corrections come up on nearly every job. A post that rotted once will rot again in the same spot unless the water problem that caused it gets fixed alongside the wood. On properties with recurring failures, especially near downspouts or low spots, Spagnotti Contracting often recommends upgrading to metal post brackets at the worst-affected locations rather than repeating the same wood-in-ground setup that failed the first time.
For homeowners weighing DIY against a professional fence repair, the honest answer depends on scope: one or two accessible posts favor DIY, while multiple posts, gate loads, or drainage rework usually pay for professional judgment.
How Do You Dispose of Rotted Fence Wood Responsibly?
Rotted fence wood isn’t hazardous on its own, but how you dispose of it depends on whether it was pressure-treated. Untreated or naturally rotted wood, like cedar that’s simply aged out, can typically go into yard waste or a wood-chip pile, since it breaks down the same way any other organic debris does.
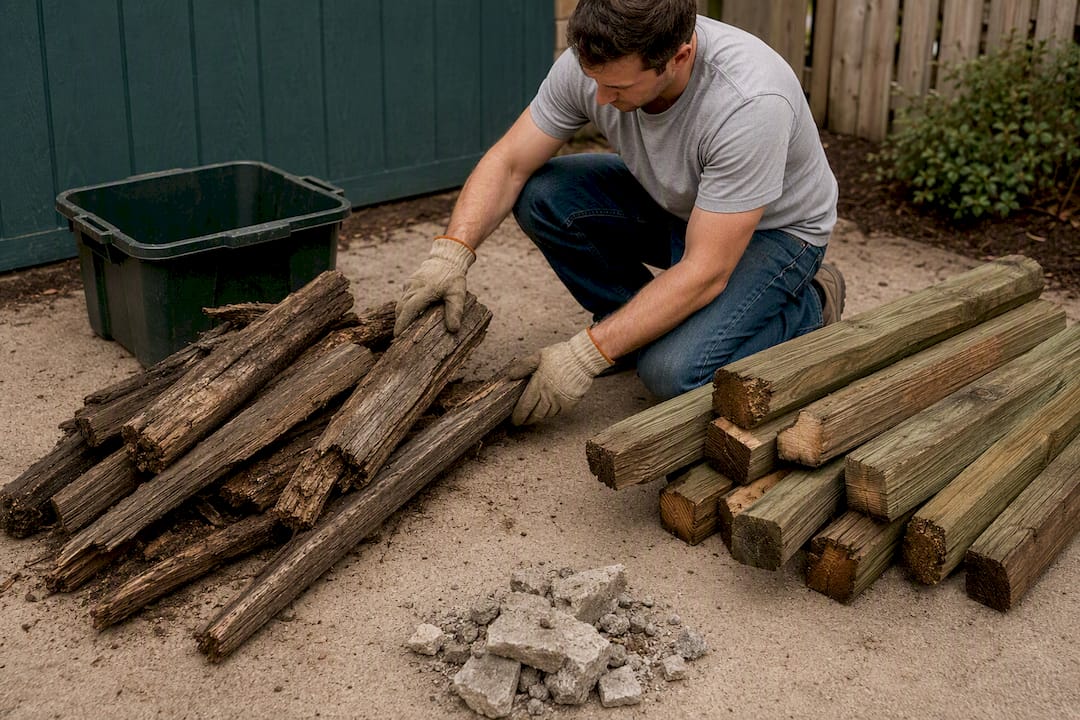
Pressure-treated lumber is a different story. The preservatives that protect it from rot, historically chromated copper arsenate and now more commonly copper-based treatments, mean treated scraps shouldn’t be burned in a fireplace, fire pit, or open burn barrel. Burning treated wood can release concentrated preservative compounds into smoke and ash in ways untreated wood never would. Most municipal waste programs accept treated lumber as regular construction debris, though some require it to be bagged separately or dropped at a specific facility rather than left curbside with yard waste.
Check with your local waste authority before hauling old posts to the curb, since rules vary block to block, let alone city to city. If you’re pulling multiple posts during a larger fence overhaul, a construction debris drop-off or dumpster rental is usually faster than trying to fit six waterlogged 4x4 posts into a weekly trash pickup. Concrete fragments from old footings typically need separate disposal too, since most residential trash services won’t take masonry debris mixed in with regular waste.
Why Most Fence Post Advice Skips the Real Decision Point
Most guides treat post repair as a materials question: pick the right wood, pick the right bracket, done. That misses where homeowners actually go wrong, which is the diagnosis step. A wiggle test and a screwdriver probe take five minutes, and skipping them is how someone ends up bolting a steel mender onto a post that’s rotted three inches higher than they checked.
The conventional wisdom also undersells drainage. Homeowners fixate on wood grade, cedar versus treated pine, when the water sitting against the base decides the outcome more than the tag on the lumber ever will. A crowned concrete collar and a few inches of gravel under the post do more real work than upgrading one grade of treated lumber.
If there’s one priority worth acting on first, it’s this: probe every post on the line once, not just the one that’s obviously leaning. Rot rarely announces itself in just one spot, and catching a second failing post before it snaps saves a repeat trip and a second Saturday lost to digging.
— Noah
If You’d Rather Not Dig Holes: Getting a Pro to Handle It
If probing posts and mixing concrete isn’t how you want to spend your weekend, a full-service option covers everything above, from a single mender install to replacing an entire fence line, without you touching a shovel. Spagnotti Contracting handles fence repair and replacement, drainage corrections around failing footings, and broader carpentry work for property owners who’d rather get an itemized quote than a guessing game.

A request for an estimate typically starts with a site walk where the crew checks each post individually, tests the soil and existing concrete, and flags any gate or structural loads that change the scope. You’ll get a written breakdown covering materials, labor, and any drainage work needed, rather than a flat number that hides what’s actually being fixed. Most single-post repairs wrap up in a day; full fence-line replacements take longer depending on post count and soil conditions.
If your fence has more than one failing post or you’re dealing with a gate post under real stress, get a fence repair estimate from Spagnotti Contracting before the next storm tests it for you. Browse the full range of residential contracting services if the fence work turns up other issues worth addressing at the same time.
Sources
For deeper technical detail beyond this guide, JLC’s breakdown of fence post rot covers treatment classes and drainage principles, and This Old House walks through full replacement sequencing. Always check your local building code for required footing depth before digging.
Recommended
Dealing With Something Similar?
Every property is different, but if this sounds like what you’re seeing, we’re happy to take a look and help you figure out what’s actually going on.