General Contracting
Fix a Leaning Fence Post for Under $50, Diagnose It in 5 Minutes
By Noah Spagnotti

Most leaning fence posts can be fixed instead of replaced. If the wood is still sound, resetting it in fresh concrete or sistering it with a steel post gives you a permanent fix, often in under $50 of materials. Expanding foam and repair spikes work faster but suit smaller jobs. Rotten or cracked posts are the exception. Replace those.
TL;DR:
Refixing leaning fence posts is often cost-effective, with most repairs under 50 dollars in materials when the wood is still sound.
Proper diagnosis using simple tests like a screwdriver probe and footing inspection determines whether to brace, reset in concrete, or replace a post.
Sistering with a steel bracket and concrete resetting are the most durable repairs, especially if the post itself is sound but the footing is compromised.
Foam injection and repair spikes are quick, inexpensive fixes suitable for minor wobbles and stable soil, but less reliable in wet or loose ground.
Consulting professionals is recommended for multiple rotten posts, complex layouts, or structural load-bearing scenarios to ensure safety and longevity.
Table of Contents
Leaning Fence Repair Methods: Which One Fits Your Post
How Do You Know Why a Fence Post Is Leaning?
Step-by-Step Instructions for Each Fence Post Repair Method
Tools and Materials for a Leaning Fence Post Repair
Leaning Fence Repair Cost and Timeline
Safety and Permit Steps Before You Dig
How to Stop a Fence Post From Leaning Again
When Spagnotti Contracting Recommends Calling a Pro
The Real Lesson From Every Failed Fence Repair
Get an Estimate From Spagnotti Contracting for Fence Repair
Sources
Leaning Fence Repair Methods: Which One Fits Your Post
Not every leaning post needs the same fix, and picking the wrong one wastes an afternoon. Here’s the quick rundown:
Sister post (steel bracket): Bolts a rigid support alongside the existing post without digging out old concrete. Best when the post is sound but wobbly at the base.
Concrete reset: Dig out the old footing, reset the post, and pour new concrete. The most durable fix, and the right call when the footing itself has failed.
Two-part expanding foam: Pours around the post and expands to lock it in place within minutes. Good for posts in stable, well-draining soil, less reliable in wet or loose ground.
Repair spike or mender bracket: A metal sleeve driven into the ground next to the post, then bolted on. Cheapest, fastest, and best for minor lean with no rot.
Temporary bracing: A 2x4 stake angled against the post. Buys you time, but it’s not a real fix.
How Do You Know Why a Fence Post Is Leaning?
Before you touch a shovel, figure out what’s actually wrong. Guessing here is how homeowners end up bracing a post that needed replacing, or tearing out concrete on a post that just needed a bracket.
Run the screwdriver test. Push a screwdriver into the wood at ground level, where rot usually starts. Penetration of 1/4 to 1/2 inch suggests partial rot you can still work around. If it sinks in easily past that, the post is compromised and needs to come out.
Check the footing. Wiggle the post and look at the ground around the base. Cracked or crumbled concrete, a hole that’s shallower than 24 inches, or soil that’s heaved upward all point to a footing problem, not a wood problem.
Measure the lean. A post that’s off by an inch or two at the top is a bracing or spike job. A lean of several inches, or one that’s worsened over a season, usually means the footing has shifted and needs a full reset.
Match the finding to the fix. Sound wood plus a bad footing means reset in concrete. Sound wood plus minor wobble means sister post or spike. Any real rot means replace, no matter how good the footing looks.
Pro Tip: If the screwdriver sinks in more than half an inch anywhere around the base, don’t bother bracketing it. That post will fail again within a couple of seasons, and you’ll redo the work.
Step-by-Step Instructions for Each Fence Post Repair Method
Whatever method you land on, prep work is the same. Call 811 before you dig (more on that below), brace the fence panels on either side so they don’t shift, and pull the panel closest to the bad post if you need full access to the base.
Sister post with a steel bracket
Drive or bolt the steel bracket into firm ground alongside the leaning post.
Plumb the post using a level, then bolt it tight to the bracket through both faces.
Recheck plumb after tightening; brackets can shift slightly under torque.
This method skips demolition entirely. Sistering with a steel post avoids removing old concrete and holds up far longer than a temporary brace.
Concrete reset
Dig out the old footing at least 24 to 30 inches deep, wider at the bottom than the top (a bell shape resists frost heave in colder climates).
Add 4 to 6 inches of gravel for drainage before setting the post.
Plumb the post, pour fast-setting concrete, and crown the top so water sheds away from the post instead of pooling.
Let it cure. Foot traffic is fine after a day, but give it the full cure window before hanging panels or gates back on.
Done this way, a concrete footing can last 15 to 25 years, which makes it the method worth the extra sweat.
Expanding foam
Clear loose debris from the base of the post.
Mix and pour the two-part foam per the product instructions.
Plumb the post immediately. You typically have only a few minutes before the foam sets, so have your level ready before you pour.
Repair spike or mender bracket
Drive the spike into solid ground next to the post base.
Fasten the bracket arms tight around the post.
Push on the post to test hold before reattaching panels.
Mender brackets like the E-Z Mender are widely sold at hardware stores and need almost no digging.
Full replacement
Remove the old post and break out or dig out the failed footing.
Set a new post to proper depth with a gravel base for drainage.
Pour concrete, crown it, and let it cure fully before reattaching panels or gate hardware.
Whatever route you take, push on the post a week later. If it’s still solid and plumb, you’re done.
Tools and Materials for a Leaning Fence Post Repair
Dig and set: post hole digger or auger, tamping bar, and a 4 foot level.
Concrete work: fast-setting concrete mix (figure one to two 50-pound bags per post), a wheelbarrow or mixing tub, and gravel for the footing base.
Hardware fixes: steel sister brackets, repair spikes, or mender brackets sized to your post.
Safety gear: work gloves, eye protection, and sturdy boots for digging.
Rentals worth considering: a gas-powered auger if you’re resetting more than two or three posts.
Leaning Fence Repair Cost and Timeline
A single post with no rot typically runs under $50 in materials and a few hours of work. Concrete needs 24 to 48 hours to cure fully, while foam sets in as little as 15 minutes. Costs climb fast with rotten posts, tight access, or gate hardware, which is where professional labor earns its price.
Safety and Permit Steps Before You Dig
Call 811 first, every time. It’s free, and striking a buried utility line is a real safety and financial risk, not a hypothetical one.
Wait for locate marks before digging, and stay clear of them.
Talk to your neighbor if the fence sits on or near a shared property line, especially before removing panels.
Check your local permit rules. Some municipalities require a permit for footing work near a property line. Spagnotti Contracting’s guide to Omaha fence permits walks through when that applies.
How to Stop a Fence Post From Leaning Again
Add gravel under every footing for drainage, not just the one you’re fixing.
Crown the concrete so water sheds away from the post instead of sitting against it.
Use ground-contact rated lumber (UC4B) for any new post.
Add post caps and reseal exposed wood every couple of years.
Redirect downspouts and regrade slopes that dump water against the fence line.
Pro Tip: Crowning the concrete and adding gravel take maybe 15 extra minutes per post, but they’re the difference between a fix that lasts two years and one that lasts fifteen.
When Spagnotti Contracting Recommends Calling a Pro
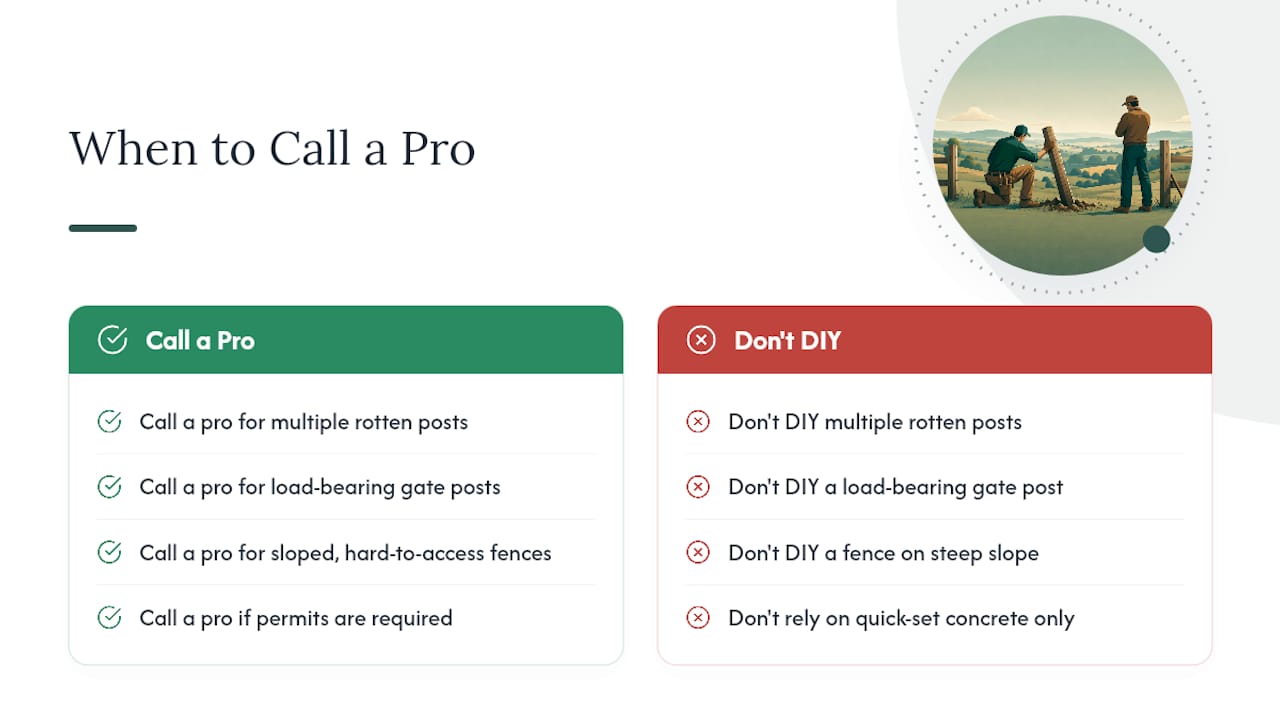
A single sound post with minor lean is a fair DIY project. Multiple rotten posts, a gate post carrying real structural load, or a fence line on a slope with poor access is a different story. That’s when Spagnotti Contracting steps in with proper footing depth, correct disposal of old concrete and lumber, and permit support where your municipality requires it.
Professional work also comes with a warranty, something no bag of quick-set concrete offers. If you’re weighing a bracket against a full rebuild, Spagnotti Contracting’s guide on fixing rotted fence posts walks through the same decision from a contractor’s side of the job.
The Real Lesson From Every Failed Fence Repair
Most fence repair guides bury the diagnosis under a pile of methods, as if the hard part is choosing between concrete and foam. It isn’t. The hard part is being honest about what the screwdriver test tells you. Homeowners want the sister post or the mender bracket to work because it’s less digging, and sometimes they’ll ignore a soft, punky post because the bracket is already bought and the weekend is half over.

That’s backwards. Diagnose first, then pick the method, not the other way around. A five-minute check saves you from redoing the job next spring.
The other place conventional advice falls short: prevention gets treated as an afterthought, a bullet point at the bottom of the article. Gravel and a crowned concrete top add maybe fifteen minutes of work per post. Skip them, and you’re not fixing a fence, you’re renting a few good seasons before you’re back out here with a shovel. Get the water management right the first time, and you likely won’t be reading this article again about the same post.
— Noah
Get an Estimate From Spagnotti Contracting for Fence Repair
If you’ve run the screwdriver test and found rot in more than one post, or the fence line is on a slope with awkward access, that’s exactly where a contractor earns their fee instead of your Saturday. Spagnotti Contracting handles fence repair and replacement across the Omaha metro, along with the carpentry work that comes with damaged rails, pickets, or gate framing.

To get a real estimate, send a few photos of the leaning posts, note how many need attention, and mention anything unusual about access, like a slope, tight side yard, or nearby utility lines. Spagnotti Contracting will scope proper footing depth, handle disposal of old concrete, and flag permit needs before work starts. Check the fence installation and repair page or the full residential contracting services list, and request an on-site estimate to get a straight answer on cost and timeline.
Sources
For utility locating before any digging, use 811 Before You Dig. All other sources cited above appear inline throughout this guide.
Recommended
Dealing With Something Similar?
Every property is different, but if this sounds like what you’re seeing, we’re happy to take a look and help you figure out what’s actually going on.