General Contracting
Squeaky Floors Repair: Find the Cause, Then Fix It
By Noah Spagnotti
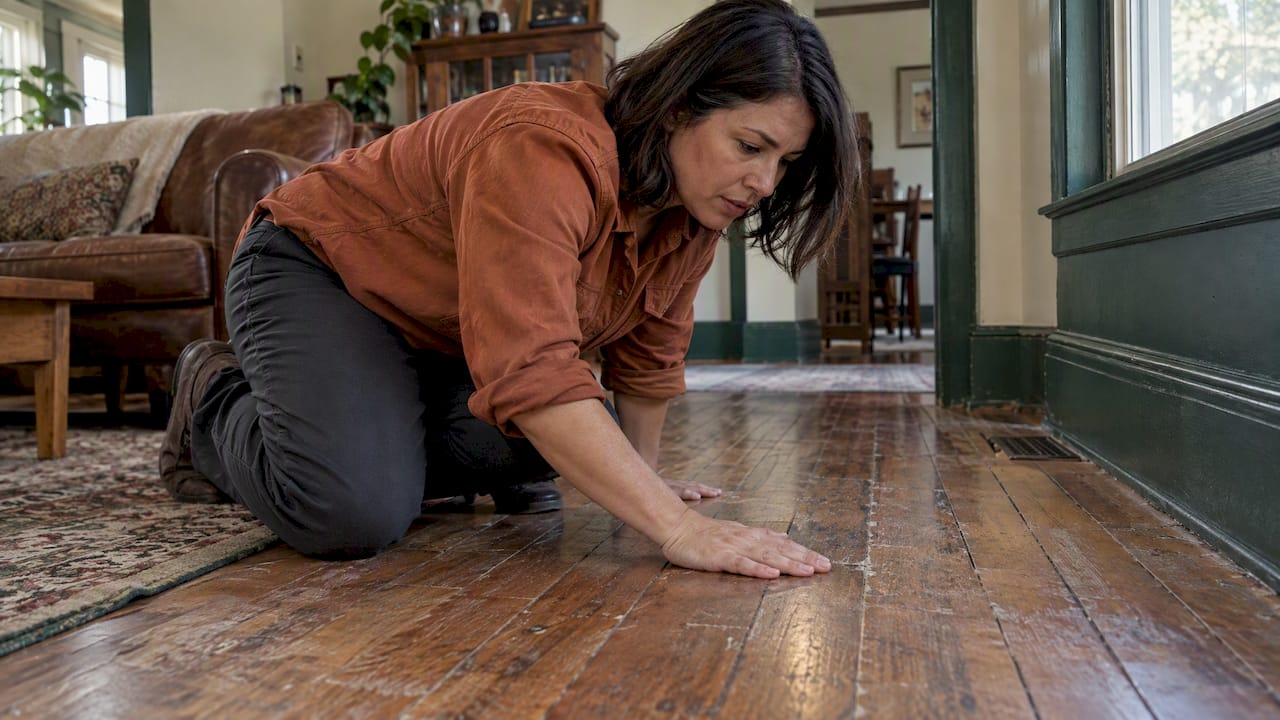
A squeaky floor is usually a loose board, subfloor panel or nail rubbing against something it should be fastened to. Many squeaks are a manageable DIY repair: find the exact spot, then either close the gap from below with a glued shim or pull the layers tight from above with a breakaway screw. The skill is in the diagnosis. If you fix the wrong spot, or fix a symptom of moisture or structural trouble, the noise comes back.
This guide covers hardwood, floors under carpet and laminate. It shows which fix goes with which situation and where DIY should stop and a contractor should start.
TL;DR
Squeaks come from movement: boards, subfloor and fasteners rubbing against each other. The cure is to stop the movement, not to mask the sound.
From below, a shim coated in adhesive closes the gap between subfloor and joist. From above, scored breakaway screws pull the floor down tight, even through carpet.
Talcum powder in the cracks is a no-drill option for boards that rub together, but it may only last a season.
Laminate squeaks usually trace to humidity swings, pinch points or an uneven subfloor, so check those before you pull anything up.
Large gaps, damaged joists, signs of water or termites, or a floor that sags are not squeak problems. Call a professional.
Why floors squeak in the first place
A floor is a stack: finish flooring on a subfloor, the subfloor on joists, all held together with nails or screws. When a piece shifts and rubs against a neighboring board or a fastener, you hear it. This Old House lists the common causes as wood movement loosening nails, gaps between the floorboards and subfloor, and improper installation.
Common patterns include:
Gap between subfloor and joist. The subfloor lifts slightly as you step and drops back with a squeak. This is the classic cause on a floor viewed from the basement.
Loose or backed-out nails. Old nails work loose as lumber dries and the house moves through seasons.
Boards rubbing each other. Tongue-and-groove strips that have shrunk slightly will chafe along their edges.
Shrinking framing lumber. Wood that was damp when installed shrinks and leaves gaps or pops nails.
Moisture. Poor ventilation or a leak can make boards swell and move, and an ongoing moisture problem has to be solved before any squeak repair will last.
Nebraska's seasonal swings matter here. Wood expands and contracts with changes in temperature and humidity, and This Old House notes that this cycle is what loosens nails over time. Dry winter air with the furnace running shrinks wood; humid summers swell it. A squeak that comes and goes with the seasons points to seasonal movement rather than a failing structure.
Step one: locate the squeak
Do not start drilling until you know exactly where the noise lives. This Old House suggests walking the room slowly, marking each squeaky spot with painter's tape or chalk, and, if possible, having someone walk on the floor while you listen from below. Better Homes & Gardens adds that from below you can have a helper squeak the floor while you watch, or measure from a fixed point above and repeat the measurements below.
A practical routine:
Walk it slowly. Step across the room in a grid until you hear the noise. Mark each spot with painter's tape.
Rock your weight. Shift heel to toe on the spot. Note whether the sound seems to come from one board or a wider area.
Go below if you can. In an unfinished basement or crawl space, have a helper walk or bounce on the marked spot while you watch the subfloor and joists with a flashlight. Look for a visible gap, a nail that moves, or a board that flexes.
Find the joists. Squeaks fixed from above work best when the fastener lands in a joist. A stud finder, or the line of existing nails, shows where joists run.
Check for water stains. Dark patches, soft wood or a musty smell on the underside change the job entirely. See the section on when to call a pro.
If the area below is a finished ceiling, you will repair from above. That is common in upstairs rooms and in finished basements.
Fixing squeaky wood floors from below
Working from below is the cleanest repair when you have access, because you do not disturb the finish floor at all.
Glue-coated shims
When you can see a gap between the subfloor and a joist, a shim fills it. Better Homes & Gardens recommends sliding a shim into the gap until you feel resistance, marking it, then reinserting it with construction adhesive or wood glue on the shim and in the gap.
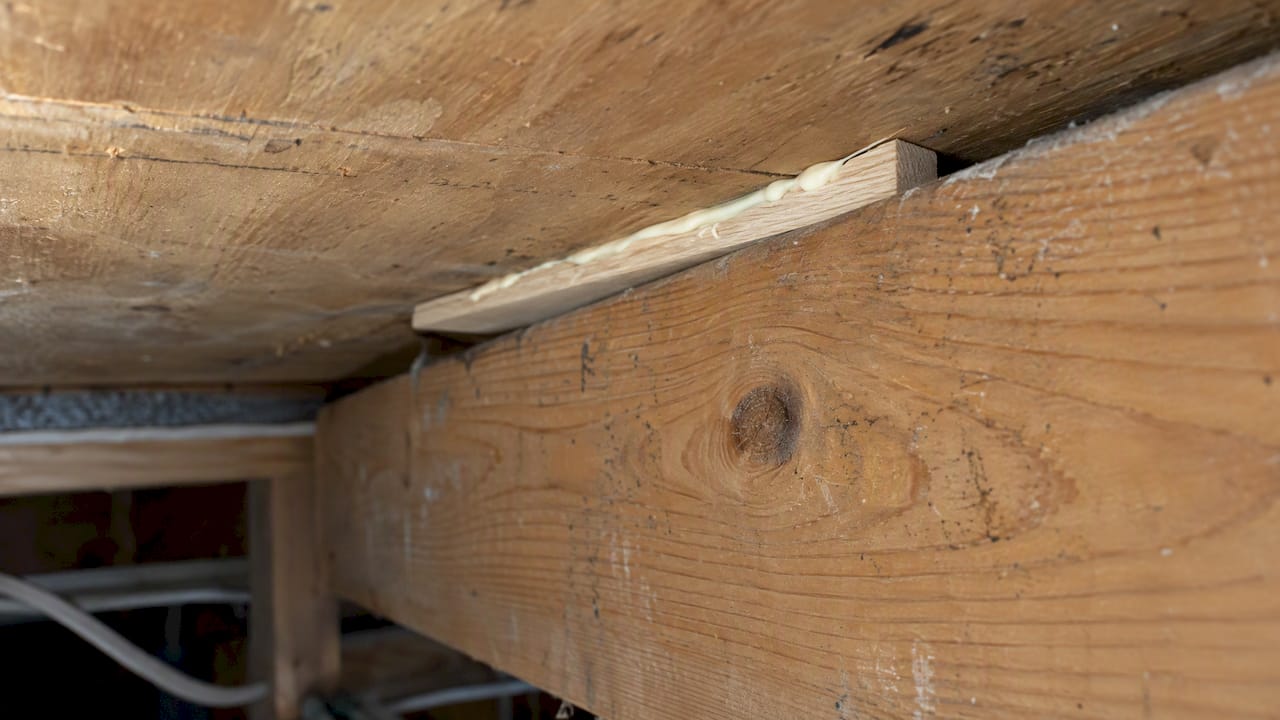
The word that matters is gently. Family Handyman cautions to push shims in lightly, since driving them in can widen the gap and potentially create a new squeak. Stop when the shim is snug, and keep off the floor until the adhesive cures.
Tighten from underneath
For boards that squeak against the subfloor, Family Handyman describes driving screws up through the subfloor into the wood flooring from below. Its guidance: measure the total floor thickness first, use screws 1/4 inch shorter than that thickness, mark the pilot-hole depth on the bit with tape, and set the screw heads flush with the subfloor rather than sinking them. A screw that pierces the surface of a hardwood floor creates a much bigger problem than a squeak.
Fixing squeaky wood floors from above
When the underside is covered by drywall, a ceiling or insulation you would rather not disturb, you fix from the top.
Breakaway (scored) screws
Specialized breakaway screws are made for this job. This Old House explains that the head snaps off at a depth-control fixture, leaving a small hole to fill. Their listed tools and materials are a drill/driver, a 1/8-inch drill bit, a wood filler stick and breakaway screws.
The general sequence This Old House describes:
Confirm whether the floor sits directly on a subfloor or on sleepers, since that changes the screw length.
Hold the depth-control fixture tight to the floor and drive the screw through the floorboard into the subfloor below.
Let the screw head snap off at the fixture, leaving a small hole.
Drive one screw at each squeaky spot.
Fill each hole with a color-matched wood filler stick and wipe off the excess.
This Old House notes that pilot holes aren't typically required with these screws; follow the kit's instructions for your floor.
On a prefinished or stained floor, test the filler color on a scrap first. A bad color match is more visible than the squeak was audible.
Talcum powder, for boards that rub
If two boards chafe against each other and you want no holes, Family Handyman notes that talcum powder worked into the cracks reduces friction and may solve the problem, at least for one season, so treat it as a quick patch rather than a repair. Sweep or vacuum the area first so the powder can reach the joint, then brush it in and wipe off the excess, since talc can be slippery.
What not to do
Avoid spraying oil-based lubricants into a finished floor. They can stain the wood and leave a slippery surface.
Do not rely on more nails. Nails loosen as wood moves; This Old House notes that screws hold much better than nails over time.
Do not drive long screws without measuring thickness first.
Squeaky floor under carpet
Carpet hides the squeak but not the sound. Fortunately, you do not need to pull it up.
This Old House describes a carpeted-floor squeak repair kit: scored screws are driven through the carpet into the floor, and the screw heads break off below the surface. The same page puts the cost of a kit for an average-size carpeted room at $25 to $30.
What makes it work:
Find the joist first. This Old House taps the carpet with a hammer to find a dull thud, then drives a long screw from the kit to confirm a joist is there.
Mark the joist lines across the room (This Old House uses screws every 16 inches and a nylon string) and drive the scored screws along them, spaced 12 to 16 inches apart.
Work in small steps. If the squeak is in one spot, a few well-placed screws into the joist may be all it needs.
If the squeak returns or spreads, the subfloor itself may be loose across a wide area. That is when it may make more sense to pull the carpet and refasten the subfloor than to keep patching.
Squeaky laminate and other floating floors
Laminate is different from nailed hardwood. It floats: planks click together and sit on an underlayment without being fastened to the subfloor. That means you cannot screw a squeak away; the cause is usually something else. Common suspects:
Humidity and temperature swings. Floating floors expand and contract with the seasons. If the noise appears in dry winter weather or a closed-up house, steady indoor humidity is the first thing to try.
Pinch points. Heavy furniture, cabinets, door jambs or baseboards pressed tight against the planks can stop them from moving freely, so they squeal instead. Moving furniture or checking that trim is not clamping the floor down is a cheap test.
Uneven subfloor. Planks that flex over a dip or a high spot will creak when stepped on. Fixing this usually means leveling the subfloor, which means lifting the planks.
Missing expansion gap. Laminate needs space at the walls. If trim or planks are jammed against the wall, the floor has nowhere to go.
Worn locking edges or poor underlayment. Damaged joints rub, and no amount of tightening will help them.
The repair for a localized problem is usually to disassemble the planks back to the trouble spot, fix the subfloor, and reinstall. A full-room squeak across a floating floor often means the installation needs correcting, which is a job for a flooring installer.
The subfloor underneath matters just as much in basements. If you are finishing a lower level, our guide on basement subfloor options and moisture checks explains why moisture comes before any flooring decision.
Do squeaky floors mean structural damage?
Usually not. Better Homes & Gardens notes that, while not common, a squeaky floor can sometimes point to a larger floor-system problem caused by foundation settlement, termite damage, water damage or other hard-to-diagnose issues.
That gives you a simple way to sort squeaks:
What you notice | Likely meaning | Next step |
|---|---|---|
One or two spots, worse in winter | Seasonal movement, loose nails | DIY shim or screw |
Squeak plus visible gap above a joist | Subfloor lifted from framing | Shim from below or screw from above |
Squeak across a whole room | Loose subfloor or installation problem | Refasten subfloor; consider a pro |
Floor feels bouncy or sags | Span, joist or support issue | Call a professional |
Stained, soft or musty wood below | Moisture damage | Fix the water source first, then call a pro |
Sawdust-like debris or hollow-sounding wood | Possible insect damage | Have it inspected |
Cracks that appear in walls and ceilings together with floor movement are another reason to have the house looked at. Our posts on drywall nail pops and drywall corner cracks explain which cracks are normal seasonal movement and which are not.
When to call a professional
Call someone when the floor system is the problem, not just the fastener. Better Homes & Gardens says that if you notice significant gaps or damage to the subfloor, joists or other parts of the floor system from underneath, it may be worth calling a professional.
Signs that point that way:
The gap between subfloor and joist is wide, or shims will not hold.
Joists are cracked, notched, rotted or sagging.
You see water stains, mold or soft wood from the underside.
Squeaks are accompanied by sloping floors, sticking doors or widening cracks.
The floor feels bouncy or sags. A joist or support problem needs a structural repair, not a squeak fix.
You have a termite concern. Have a pest professional confirm it before anything gets covered up.
A water source above the floor, such as a roof leak or failed gutter, can be behind staining in an upper room. If that is the case, the roof or drainage repair comes before the floor repair.
Perspective: fix the cause, not the sound
Squeaky floors often come up at the start of a bigger project: a basement finish, a bathroom remodel, new flooring over an old subfloor. That is the best time to deal with them, because the subfloor is exposed and refastening it takes screws and adhesive rather than demolition.
The approach is the same as with any repair: find the source, confirm what is below the floor, check for moisture, and only then decide on the fix. A quiet floor over a damp or damaged subfloor is a deferred bill, not a repair.
If you are replacing flooring anyway, mention the squeak before the old floor comes up. Refastening the subfloor while it is open is a small add-on. Putting new flooring over a loose subfloor means the noise can come back.
And if a squeak comes with a soft spot, a sag or staining, it deserves a closer look rather than a quick patch.
Need help with a floor that won't quiet down?
If the squeak is widespread, the subfloor is loose, or you are planning new flooring, carpentry or a remodel anyway, Spagnotti Contracting handles flooring installation and subfloor repair, carpentry and framing and drywall across the Omaha metro. Our published flooring planning ranges are $7–$12 per sq. ft. installed for luxury vinyl plank and $4–$8 per sq. ft. installed for carpet and pad, with hardwood, tile and specialty flooring by custom proposal. Final pricing depends on the product, subfloor condition and preparation. See our full list of residential services or contact us to start the conversation.
Preventing squeaks in the first place
Most prevention comes down to installation quality and indoor conditions:
Use construction adhesive with fasteners. Glue plus screws or nails helps hold panels tight to joists so they are less likely to rub as they age.
Use dry lumber and correct fastener spacing. Wet lumber shrinks and leaves gaps or pops nails.
Keep indoor humidity steady. This Old House recommends consistent indoor humidity to reduce wood movement.
Keep crawl spaces and basements dry. This Old House suggests a dehumidifier in damp basements or crawl spaces to protect the subfloor from moisture.
Fix leaks promptly. Roof, gutter and plumbing leaks eventually reach the framing.
Flatten before you floor. A level subfloor means less flex and fewer noises under any finish, including laminate.
FAQ
Can I stop floor squeaks without drilling?
Sometimes. If two boards are rubbing each other, talcum powder worked into the cracks reduces friction, though it may only help for a season. Gluing a shim from below is another no-drill route if you can reach the underside.
How do I fix a squeaky floor under carpet?
Use a carpeted-floor squeak repair kit. Scored screws go through the carpet into the joist, and the heads snap off just below the surface. This Old House puts the cost at $25 to $30 for an average-size room.
Why does my laminate floor squeak?
Laminate floats, so squeaks usually come from humidity swings, furniture or trim pinching the planks, a missing expansion gap or an uneven subfloor. Check those first. If it persists, the planks may need to be lifted and the subfloor corrected.
Do squeaky floors mean something is wrong with my house?
Usually not. Most squeaks are movement between boards, subfloor and fasteners. They deserve a professional look when you also see sagging, significant gaps or damage at the joists, water stains or signs of termites.
Is it better to fix a squeak from above or below?
Below is cleaner when you have access, since you leave the finished floor untouched. Above is the answer when the ceiling below is finished, using breakaway screws and a filler stick to hide the hole.
Sources
Recommended
Dealing With Something Similar?
Every property is different, but if this sounds like what you’re seeing, we’re happy to take a look and help you figure out what’s actually going on.