General Contracting
Homeowners: Wait a Heating Season or Call a Pro for Drywall Nail Pops
By Noah Spagnotti
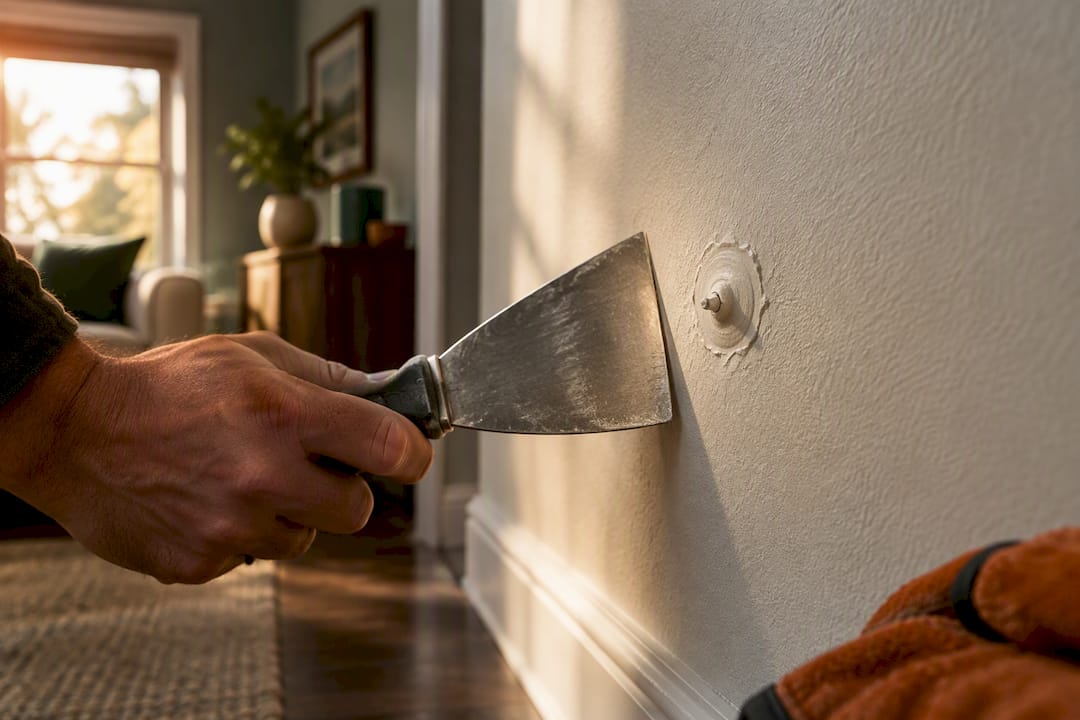
A nail pop is a drywall fastener that has worked loose from the framing behind it, pushing a small bump or crater through the paint. Most are cosmetic and fixed by driving a drywall screw nearby to re-anchor the panel, then covering both fasteners with joint compound, according to AWCI and the Gypsum Association's GA-222. Call a contractor when pops cluster, recur, or line up with cracks elsewhere.
TL;DR:
Nail pops caused by lumber shrinkage are common during the first year, especially near windows, doors, or in weather changes, and often resolve naturally over time.
Proper repair involves anchoring with drywall screws into the stud, patching torn paper with mesh tape, and applying multiple thin coats of joint compound to prevent reappearance.
Recurring or line-patterned pops, cracks near corners, or signs of moisture damage indicate framing or foundation issues requiring professional inspection.
Avoid repairing pops during the first heating season to prevent rework, and confirm adhesive curing times before finishing drywall.
Widespread or persistent nail pops suggest underlying framing problems, and a contractor can diagnose and correct framing or adhesion issues more effectively than DIY patching.
What causes nail pops and how to spot warning signs
Wood framing shrinks as it dries out after construction, and that shrinkage is the most common reason nails and screws back out of the studs. As humidity swings with the seasons, lumber expands and contracts slightly, and a fastener that was flush on installation day can end up sitting a fraction of an inch behind the drywall surface months later.
Installation choices make this worse. A nail driven at the wrong angle, spaced too far from the framing, or simply too short to grab enough wood will lose its hold faster than one installed to spec. GA-222 lists loose attachment, improper fastener length, and lumber shrinkage among the leading causes of both nail and screw pops.
Adhesive plays a role too. Many crews glue panels to the framing in addition to fastening them, and USG's field research found that low-VOC water-based adhesives can shrink while curing, pushing up small domes around the fastener heads sometimes called "screw buttons." Finishing over the panel before that adhesive fully cures locks the problem into the wall.
Not every pop means the same thing. Here's how to read the pattern:
A single, isolated bump on one fastener is almost always simple shrinkage and nothing to worry about.
Several pops in a straight line along one stud usually points to that specific framing member drying and twisting.
Pops scattered across a ceiling or wall in no particular pattern often trace back to general lumber shrinkage during the first year.
Pops paired with diagonal cracks, sticking doors, or gaps at trim can signal framing or foundation movement rather than ordinary drying.
Pops that protrude by a small amount that catches light and shadow under a raking angle are generally worth repairing, since even that small a bump can catch light and shadow under a raking angle, according to GA-222. Smaller ones sometimes still show on high-gloss paint, which is why a flashlight check matters more than eyeballing the wall from across the room.
How to inspect a nail pop and decide if it's DIY-safe
Before grabbing tools, spend five minutes actually looking at the damage. A cheap flashlight held at a low angle against the wall or ceiling will throw shadows across every bump, cracked paint line, and exposed fastener head you'd otherwise miss in normal room light.
Shine a light sideways across the suspect area to reveal bumps that flat overhead lighting hides.
Check the paper. A closed bump with intact paint is a simple fix; a torn or cracked paper surface around the fastener needs mesh tape before you finish it.
Count the pattern. One bump is routine maintenance. A row of five along a joist, or pops showing up on multiple walls at once, is worth a second look before you patch and move on.
Note the timing. A pop that shows up during the home's first heating season is often still-shrinking lumber; permanent cosmetic repair usually holds better once that movement settles down.
If you're looking at an isolated, closed bump, you're clear to repair it yourself with a drywall screw and some joint compound. Anything with torn paper across several fasteners, or bumps that keep reappearing after a repair, is a sign to read the red flags further down before you reach for the mud pan.
Step-by-step DIY repair: screws, compound, and a clean finish
Put on eye protection before you start. Drywall dust and small paint chips flake off during sanding, and a stray screw tip can catch a knuckle if the panel shifts while you're working. Clean the area with a dry cloth so you can see the fastener clearly and confirm exactly where the stud sits behind it.
Locate the stud. Tap along the wall or use a stud finder to confirm where the framing member behind the popped fastener actually runs, since your new screws need to land in solid wood.
Seat or remove the old nail. If the nail head sits just below the surface, tap it flush with a hammer and a nail set. If it's badly bent or the surrounding drywall is crumbled, pull it out entirely.
Drive two drywall screws about 1 to 1.5 inches above and below the original fastener, angled into the same stud, following the repair spacing AWCI and GA-222 both recommend. Sink each screw head just below the paper surface without breaking through it.
Tape torn paper before mudding. If the paint or paper cracked around the original pop, press a small patch of fiberglass mesh tape over the tear so the compound has something to grip, a step InspectAPedia recommends for any open pop.
Apply joint compound in thin coats. Cover the screw heads and the old fastener, feathering the edges out several inches so the patch blends into the surrounding wall. The Spruce recommends letting each coat dry fully before adding the next rather than piling it on all at once.
Sand, prime, and paint. Once the final coat is dry, sand it smooth with a fine-grit sponge, wipe away the dust, and prime the patch before repainting so the new paint doesn't flash a different sheen than the surrounding wall.
Pro Tip: Use a screw gun with a depth-sensing clutch rather than a drill so you don't overdrive the screw and blow through the paper, which turns a clean repair into a bigger patch job.
A few habits separate a repair that lasts from one you'll be redoing in six months:
Use the right screw length so it bites at least three-quarters of an inch into solid framing rather than just grazing the stud edge.
Never rely on the original nail alone. Hammering a popped nail flush again might hide it for a week, but BobVila notes that a hammer-only fix rarely restores a solid connection and the pop tends to come back.
Press on the patch after it dries to confirm the panel feels solid against the stud before you paint over it.
If you're staring down a whole wall or ceiling of pops, or the same spot keeps popping again after a proper screw-and-mud repair, that's the point to stop patching one at a time and bring in someone who can look at the framing itself. Widespread or recurring pops usually mean the fix needs to happen below the drywall surface, not just on top of it.
Preventing repeat pops and timing the permanent fix right
The biggest preventable cause of pops is finishing a wall before its adhesive has cured. USG's testing found that screw buttons could form within 24 hours when panels were mudded over before the construction adhesive finished curing, and that adhesive cure time can run 48 hours or longer depending on temperature and humidity.
Confirm cure time before finishing any glued panel, following the adhesive manufacturer's stated schedule rather than guessing.
Use drywall screws over nails wherever possible and follow the fastener spacing in GA-222, since screws resist backing out of shrinking lumber better than smooth nail shanks.
Hold off on cosmetic repairs during the first heating season if pops are new, since the framing is often still drying and a repair done too early may need redoing.
Consider a partial re-hang when an entire section keeps producing new pops even after correct screw repairs, rather than patching the same few feet of wall repeatedly.
Pops that appear during a home's first winter are common enough that professionals often build in a waiting period before doing permanent cosmetic work, per AWCI's guidance. Repairing too early, before the lumber finishes settling, is a common reason homeowners find themselves patching the same spot twice.
Red flags that call for a contractor, not a patch kit
Most nail pops are routine, but certain patterns point to something bigger than a loose fastener. Treat these as reasons to get a professional opinion before you touch the mud pan again.
Pops clustered in a line or spread across multiple rooms rather than showing up as isolated bumps.
Cracks radiating from window or door corners, doors that stick in their frames, or gaps opening between trim and wall.
Visible foundation cracks or a ceiling that looks like it's sagging anywhere near the affected drywall.
Torn paper across several fasteners, or the same pop returning after a correct screw-and-compound repair.
Any sign of moisture staining or soft, spongy drywall near the pop, which points to a leak rather than shrinkage.
Start with a drywall contractor for a diagnostic look. If they find framing that's out of alignment or evidence pointing toward foundation movement, they can refer you to a structural engineer or foundation specialist rather than you guessing which one to call first.
Why recurring pops are worth a second opinion
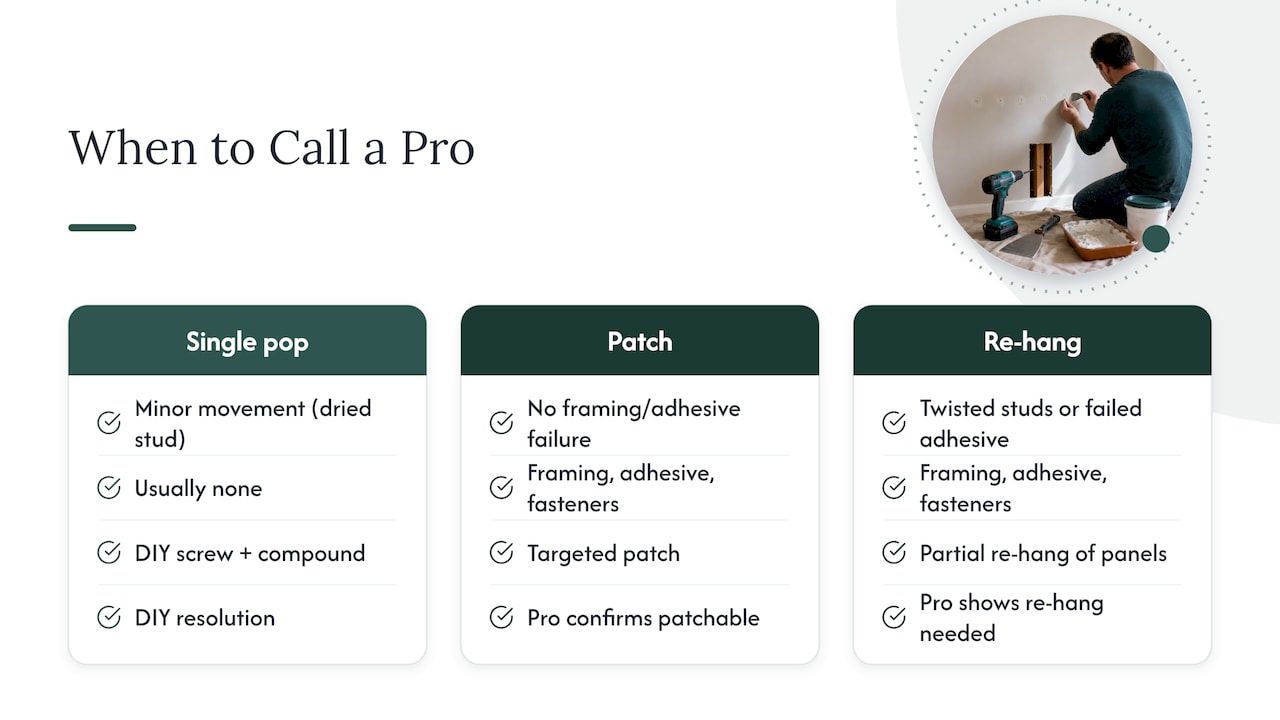
Most single nail pops don't need an expert, but recurring ones almost always have a cause hiding behind the drywall that a screw and some compound won't fix. An experienced eye can tell the difference between a stud that simply dried out and one that's twisted, an adhesive that never cured properly, and fasteners that were too short from the start.
A contractor doing this work checks framing alignment across the affected wall, tests whether old adhesive fully cured, and looks at whether the original fastener spacing matches what the panel actually needed. From there, the scope is usually one of two things: a targeted patch where the framing and adhesive check out fine, or a partial re-hang when several studs or a whole section of adhesive failed. Either way, you should walk away from that visit knowing which one you're getting and why.
— Noah
Get your drywall repaired right the first time
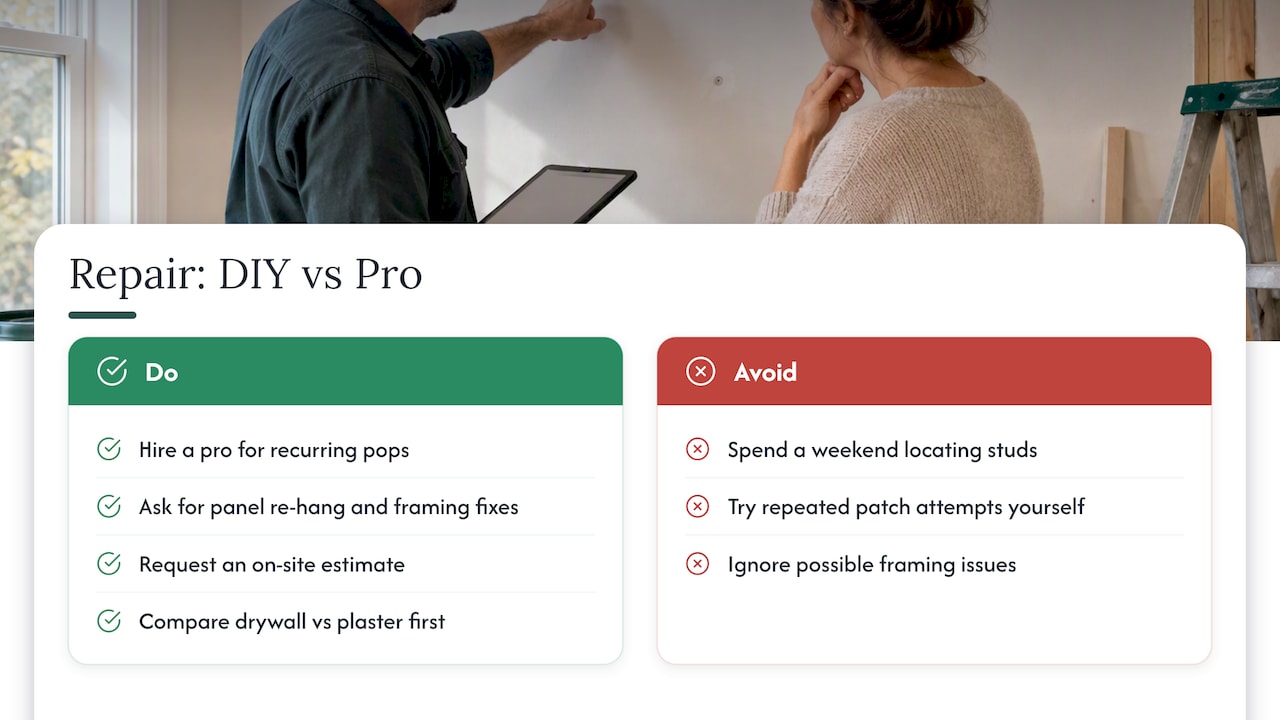
If the pops in your home keep coming back or you'd rather not spend a weekend testing stud locations, a professional contractor can handle drywall repair, panel re-hangs, and the framing fixes that sometimes sit behind recurring pops. Hiring it out saves you the guesswork on whether a stud is twisted or an adhesive never cured, and it means one visit instead of three patch attempts. If drywall trouble runs alongside other issues like a ceiling that needs more than a patch, our drywall versus plaster comparison is worth a look before you commit to a repair path. Reach out through Spagnotti Contracting to request an estimate on drywall repair for your home.
Sources
For repair procedure and cause detail straight from the source, GA-222 covers the formal fastening and finishing steps, while AWCI's guidance explains timing and pop patterns in plainer terms. USG's white paper is the one to read if adhesive-related screw buttons are your specific issue.
FAQ
Can I just hammer in nail pops?
Hammering a popped nail back in place usually hides the bump only temporarily, since it doesn't restore a solid connection to the stud, according to BobVila. Driving a drywall screw nearby and finishing over both fasteners holds up far better over time.
Is it normal to have nail pops in a new build?
Yes, nail pops during a home's first year or first heating season are common, since new lumber is still drying out and shrinking. Waiting until that movement settles before doing permanent cosmetic repairs often prevents redoing the same patch twice, per AWCI.
How many nail pops are normal on a ceiling?
There's no fixed count that separates normal from concerning, but a handful of isolated bumps scattered across a ceiling during the first year usually reflects ordinary lumber shrinkage. A tight cluster or a straight line of pops along one framing member is a different pattern that's worth a closer look, per GA-222.
Why are there so many nail pops in my house?
Widespread pops usually trace back to lumber that's still shrinking, fasteners that were too short or poorly spaced during installation, or adhesive that shrank while curing under the drywall. If patches keep failing in the same spots, a drywall contractor can check whether the framing or the original installation is the actual source.
How do repair methods differ for plaster walls versus drywall?
Plaster repair typically involves securing loose plaster to the lath with plaster washers rather than drywall screws, then patching with a plaster-specific compound instead of standard joint compound. Drywall repair relies on drywall screws driven into the stud and standard joint compound, which is a simpler process for most homeowners to attempt.
Recommended
Dealing With Something Similar?
Every property is different, but if this sounds like what you’re seeing, we’re happy to take a look and help you figure out what’s actually going on.