General Contracting
6 Drywall Types Homeowners Must Know to Avoid Costly Rework
By Noah Spagnotti
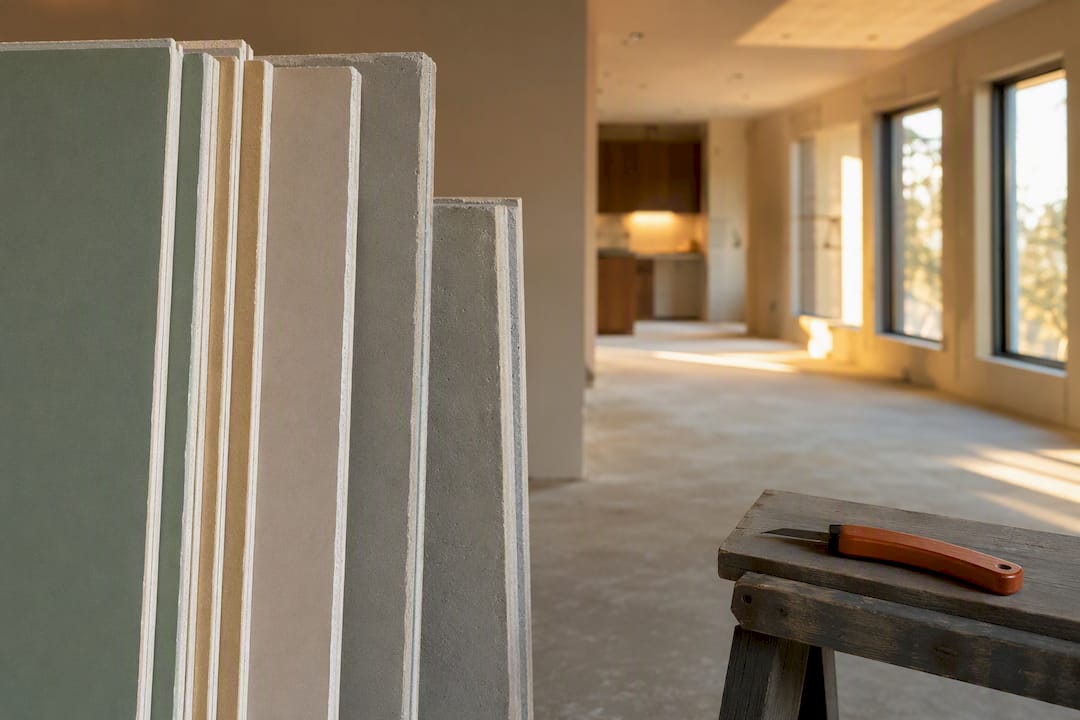
Most homes use one of six drywall families: standard, moisture/mold resistant, cement/backer board, fire rated Type X or Type C, soundproof, and paperless fiberglass panels. The rule of thumb is simple: match the board to the room’s moisture, fire risk, sound needs, and ceiling span, then pick 1/2 inch for standard walls or 5/8 inch where code or a ceiling span demands it. Fire rated Type X, governed by ASTM C1396, and garage-to-house separations are where getting this wrong actually violates code, not just aesthetics.
TL;DR:
Using moisture or mold-resistant drywall in high-humidity areas like basements enhances long-term durability compared to standard drywall.
Fire-rated Type X or Type C drywall, with 5/8-inch thickness, is essential for garage separations to meet building code requirements and ensure safety.
Avoid installing greenboard behind tile in showers because it only resists splashes and humidity, not direct water contact, which causes failure.
For ceilings on 24-inch framing spans, 5/8 inch drywall is recommended to prevent sagging, even if using lightweight variants for easier handling.
Proper preparation, layout, and screw depth are critical to prevent cracks, pops, and callbacks during drywall installation, especially in complex or large projects.
Spagnotti Contracting
Plan Your Interior Remodel With Confidence
Spagnotti Contracting provides detailed planning, quality workmanship, and clear communication for residential interior remodeling projects in the Omaha metro area.
Table of Contents
Drywall Types Explained: What Each One Actually Does
How to Choose Drywall by Room
Drywall Thickness Guide: 1/2 Inch vs 5/8 Inch
How to Tell What Drywall Is Already on Your Walls
Pro Installation and Finishing Tips That Prevent Callbacks
Buying and Handling Drywall Without Wrecking It
Common Installation Mistakes and How to Avoid Them
Durability and Lifespan of Each Drywall Type
Environmental Impact and Sustainability of Drywall Materials
What Homeowners Get Wrong Most Often
Get Drywall Done Right the First Time With Spagnotti Contracting
Sources
FAQ
Drywall Types Explained: What Each One Actually Does
Walk into any home improvement store and you’ll find a wall of gypsum board that looks nearly identical until you read the fine print. The differences matter more than most homeowners realize, and picking the wrong one costs real money in rework.
Regular (standard) drywall is the default for a reason. It’s a gypsum core wrapped in paper, sold mostly in 1/2 inch and 5/8 inch thicknesses, and it belongs on interior walls and ceilings that stay dry. It’s cheap, easy to cut, and finishes well with standard joint compound. There’s no reason to upgrade from standard board unless a specific condition in the room calls for it.
Moisture resistant board, the classic greenboard, has a wax coated face that shrugs off humidity better than plain paper. Mold resistant board, usually purple, goes a step further with additives baked into the gypsum core itself rather than just the surface treatment. Purple board consistently outperforms greenboard in high humidity settings, which is why many basement and laundry room jobs have shifted toward it. Neither one, though, is rated for direct water contact. Greenboard behind a shower is a mistake you’ll be fixing again in two years.
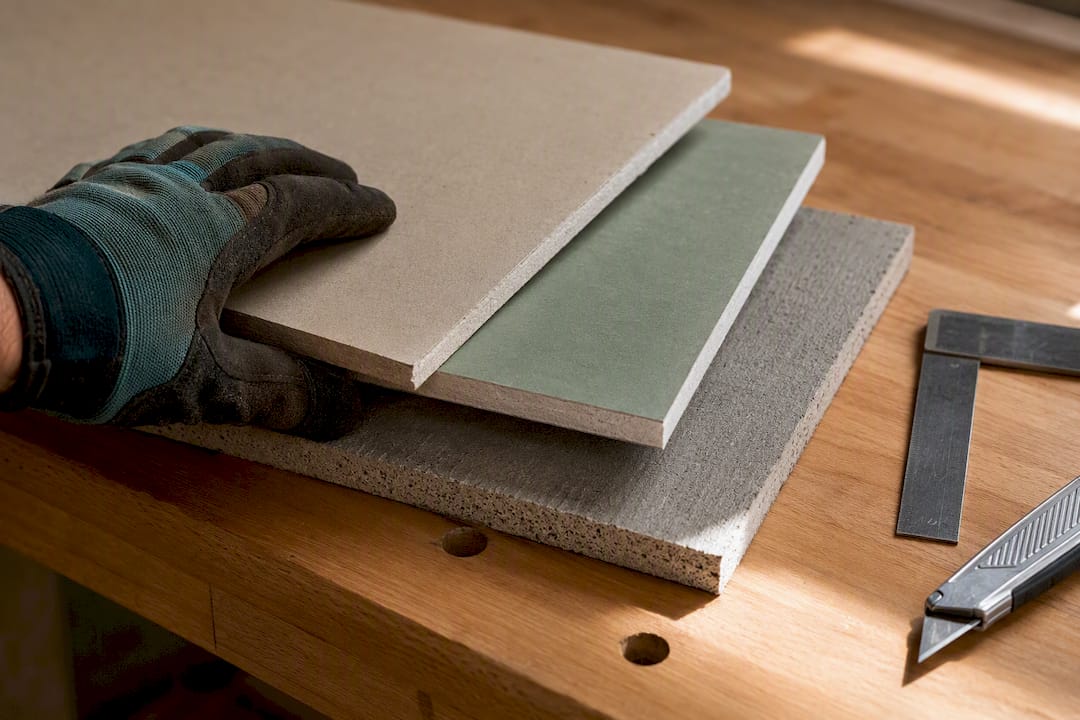
Paperless, fiberglass faced drywall replaces the paper facing entirely with a fiberglass mat. That mat resists mold growth far better than any paper facing, and many paperless products carry Greenguard low VOC certification. It’s a strong pick for basements and areas near (but not directly hit by) moisture, according to guidance from The Spruce.
Cement and backer board isn’t technically drywall at all. It’s a cement based panel, and it’s what belongs directly behind tile in a shower surround or tub deck. Standard practical guidance confirms cement board is required in direct-wet locations where any gypsum-core product, moisture resistant or not, would eventually fail.
Type X and Type C are fire rated boards built with glass fiber and other additives that slow flame spread. Type X commonly requires a minimum 5/8 inch core to hit its rating. Type C uses a higher concentration of glass fiber and vermiculite, giving it better fire performance in some assemblies, which is why some contractors favor it for ceilings specifically.
A short list of what else you’ll run into:
Soundproof/acoustic drywall: dense, multi-layer panels with a viscoelastic core, used in home theaters and shared walls between units.
Blue board: designed as a base for veneer plaster rather than joint compound, a niche but useful product.
Lightweight/flexible panels: cut roughly a third lighter than standard board, easier for one person to hang on ceilings, or bendable enough for curved walls and archways.
How to Choose Drywall by Room
The fastest way to avoid a callback is to pick the board type before you’re standing in the aisle guessing. Bedrooms and living rooms want standard 1/2 inch board. Ceilings and garages need either 5/8 inch or Type X, both for sag resistance and, in the garage’s case, for code. Bathrooms that don’t get direct spray, think powder rooms or the wall behind a vanity, do fine with moisture or mold resistant board. Anything getting hit with water directly, like a shower surround, needs cement board, full stop.
Greenboard’s wax coating handles splashes and humidity, not standing water, which is exactly why it fails behind tile. For basements, paperless or purple board is the safer long-term call over standard paper-faced gypsum, since humidity swings are a near-permanent condition down there rather than an occasional splash.
Room / Area | Recommended Board | Typical Thickness | Why |
|---|---|---|---|
Bedrooms, living rooms | Standard | 1/2 inch | Dry, low-risk space |
Ceilings (16” o.c. framing) | 5/8 inch standard or Type X | 5/8 inch | Reduces sagging over spans |
Attached garage walls/ceiling | Type X | 5/8 inch | Code-mandated fire separation |
Powder room, vanity wall | Moisture or mold resistant | 1/2 inch | Handles humidity, not standing water |
Shower surround, tub deck | Cement/backer board | 1/2 inch | Direct water contact under tile |
Basement walls | Paperless or purple board | 1/2 inch | Long-term humidity resistance |
Home theater, shared walls | Acoustic/soundproof | 5/8 inch (often double layer) | Sound dampening |
If you’re deciding between a drywall ceiling and a drop ceiling for a basement remodel, the thickness and fire considerations above still apply either way, and it’s worth comparing both options before you commit to materials.
Drywall Thickness Guide: 1/2 Inch vs 5/8 Inch
Thickness isn’t a minor spec, it’s a structural decision. Half inch board is the standard for interior walls on 16 inch on center framing, and it’s been the default for decades because it’s light, affordable, and strong enough for vertical wall applications.
Ceilings are a different story. Gravity works against a horizontal panel constantly, so 5/8 inch is recommended for ceilings, especially on 24 inch on center framing where the span between joists is wider and sag risk climbs. Fire rated assemblies, including that garage separation wall, generally require 5/8 inch Type X to meet code minimums.
The trade-off is weight. A 4x8 sheet of 5/8 inch board runs noticeably heavier than the same size in 1/2 inch, which changes screw length requirements and makes a two-person lift or a rented panel lift worth the money on ceiling work.
Quick guide:
1/2 inch: standard walls, 16 inch o.c. framing, most bedrooms and living spaces.
5/8 inch: ceilings, 24 inch o.c. framing, fire rated walls, garage separations.
Lightweight 5/8 inch: roughly a third lighter than standard 5/8 inch, easier on the back for solo ceiling installs, slightly more expensive per sheet.
Screw length: always add at least 1/2 inch beyond the panel thickness so the screw bites solidly into the framing.
How to Tell What Drywall Is Already on Your Walls
Before you patch a hole or plan a remodel, figure out what’s actually behind the paint. Guessing wrong means buying the wrong compound, the wrong screws, or worse, disturbing something you shouldn’t.
Check the face color and texture. Green or purple facing points to moisture or mold resistant board. A fuzzy, non-paper surface is likely paperless fiberglass faced panel.
Look at cut edges near an outlet or vent. Cement board reveals a dense, gray, non-fibrous core that feels much heavier for its size than gypsum.
Measure the thickness at any cut opening. A tape measure at an outlet box tells you instantly whether you’re dealing with 1/2 inch or 5/8 inch board.
Check the edge profile. Factory edges are tapered for smooth seam finishing; a square-cut edge usually means it was trimmed on site, not a factory indicator of type.
Stop if you see mold, a crumbling core, or suspect the home predates 1978. Older homes can have asbestos-containing joint compound or textures, and disturbing that material yourself is a real health risk. That’s the point to call a professional rather than keep cutting.
Pro Installation and Finishing Tips That Prevent Callbacks
Most drywall problems trace back to preparation, not the mudding or sanding stage. Professional finishers estimate that roughly 90 percent of finish quality comes down to layout and prep work done before a single seam gets taped.
Start by cutting panels slightly undersized, about 1/4 to 1/2 inch shy of the full span. Installers do this deliberately because a tight-fit panel introduces tension that shows up as a crack months later. Forcing a board into place to eliminate a gap is one of the most common amateur mistakes we see, and it’s an easy one to avoid.
Screw depth matters more than people expect. The goal is a slight dimple in the paper face without tearing it. Overdriven screws lose holding power and create weak points that pop loose later, so match your screw length to panel thickness and use a depth-sensing bit or collared drywall screws if you’re not confident in your technique.
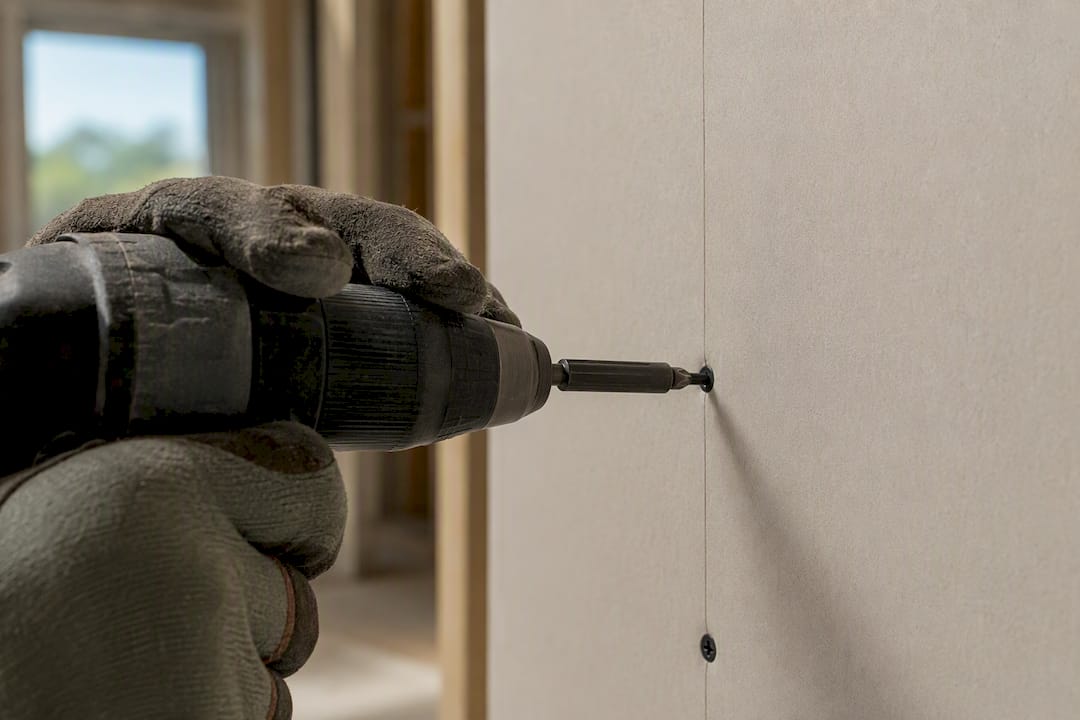
Plan your sheet layout before you hang the first panel. Stagger seams so you avoid four-way intersections, where four sheet corners meet at one point, since that spot cracks almost every time. Ceilings generally need screws every 7 inches along framing, walls every 8 inches, tighter than most DIYers assume.
Pro Tip: If your home was built before 1978, get any old texture or joint compound tested for asbestos before sanding or cutting into it. It’s a cheap test that avoids a serious exposure risk, and most local labs turn results around in a few days.
Pull a permit when your local code requires one, particularly for garage separation walls or any fire rated assembly. Skipping that step is the fastest way to fail a home sale inspection years down the road.
Buying and Handling Drywall Without Wrecking It
Sheet size affects more than your truck bed. Standard panels come in 4x8, 4x10, and 4x12 sizes, and longer sheets reduce the number of seams you’ll need to tape and finish, which cuts down on both labor and future crack risk.
Weight climbs fast with size and thickness. A 4x12 sheet of 5/8 inch board is not a one-person job, and trying to muscle it up a staircase alone is how sheets, and backs, get damaged. For ceiling work especially, renting a drywall lift or hiring delivery to the room itself saves both the material and your body.
Before you check out, run through a short buyer’s checklist:
Confirm the thickness and fire rating match what the room actually requires.
Buy 5 to 10 percent extra material to cover waste from cuts and mistakes.
Verify your local code requirements for any fire-rated or garage separation work before you buy.
Ask about delivery placement directly into the room if you’re working on an upper floor or finished basement.
Common Installation Mistakes and How to Avoid Them
The gap between a smooth wall and a lumpy, cracked one usually comes down to a handful of repeatable mistakes. Skipping the layout plan is the biggest one. Homeowners often just start hanging sheets from a corner without mapping out where seams and butt joints will land, and that’s how you end up with a seam running straight down the middle of a doorway.
Skimping on fasteners is another. Spacing screws too far apart saves a few minutes but leaves panels prone to movement, which shows up as hairline cracks along the seams within a year. Mudding too thick in one pass is a related error. Thin, multiple coats with proper drying time between them beat one thick coat every time, even though it feels slower.
Taping technique trips up a lot of first-timers too. Paper tape bedded in compound holds better long term than self-adhesive mesh tape in most wall applications, though mesh has its place on patch repairs where speed matters more than decades of durability. And sanding too aggressively between coats can tear the paper facing on standard board, creating a rough spot that shows through even a fresh coat of paint.
None of these mistakes are complicated to fix once you know to watch for them. They’re just easy to miss on a first project, which is exactly why they show up so often in patch and repair calls.
Durability and Lifespan of Each Drywall Type
Standard drywall, kept dry, can last the lifetime of the house. It’s not the material that fails, it’s moisture or impact damage that forces replacement. Moisture resistant and mold resistant boards extend that lifespan meaningfully in humid rooms, but they’re not indestructible. Purple board in a basement with a chronic humidity problem will still eventually show staining if the underlying moisture issue never gets fixed.
Paperless fiberglass faced panels tend to outlast paper-faced boards in borderline-damp conditions specifically because there’s no paper for mold to colonize in the first place. That makes them a smart long-term choice for basements and utility rooms even at a slightly higher upfront cost.
Cement board is the toughest of the group in wet conditions, essentially immune to the kind of water damage that would destroy gypsum board within months. It’s built for direct water exposure and holds up for decades under tile when installed correctly.
Fire rated Type X and Type C don’t degrade faster than standard board under normal conditions. Their fire-resistant additives don’t wear out over time, they’re baked into the core permanently. The real lifespan threat to any drywall type is the same across the board: water intrusion, structural settling that cracks seams, and impact damage from daily life. Match the board to the room’s actual conditions and most types will comfortably outlast the mortgage.
Environmental Impact and Sustainability of Drywall Materials
Gypsum board’s environmental footprint comes down mostly to two things: the energy used to process raw gypsum and manufacture panels, and what happens to the material at the end of its life. Standard drywall is largely recyclable, and a growing number of construction waste programs accept clean gypsum scrap for reprocessing into new board or agricultural soil amendments.
Paperless fiberglass faced panels often carry Greenguard certification for low volatile organic compound emissions, which matters for indoor air quality during and after installation, not just for the planet. That’s a real advantage in tightly sealed modern homes where off-gassing lingers longer than in older, leakier construction.
Waste at the job site is the other half of the sustainability picture, and it’s the half homeowners actually control. Buying accurately sized sheets and planning layout to minimize offcuts reduces landfill waste more than any certification on the box. A well-planned drywall job, with sheets chosen for the room’s actual dimensions, simply generates less scrap than a job where panels get hacked down out of convenience.
What Homeowners Get Wrong Most Often
We’ve reworked more than one job where a homeowner installed greenboard behind a shower surround, assuming “moisture resistant” meant “waterproof.” It doesn’t, and the tile job failed within two years once water worked its way behind the panel.
That’s the pattern worth remembering: matching board to actual room conditions, not just picking the familiar name at the store, prevents most of the expensive redos we see. DIY is fine for a standard bedroom wall. Large ceiling spans, fire rated garage assemblies, and anything with visible mold or suspected pre-1978 materials are where it’s worth bringing in a professional before the project turns into a bigger repair than you started with.
— Noah
Get Drywall Done Right the First Time With Spagnotti Contracting
Choosing the correct board type matters, but getting it hung, taped, and finished without callbacks matters just as much, and that’s where a lot of ambitious DIY projects stall out halfway through a ceiling.

Professional drywall installation, repair, and finishing services are available throughout the Omaha metro area, with project management from the initial estimate through the final coat of paint. Hiring a pro makes the most sense for attached garage fire assemblies, large ceiling lifts that need more than one set of hands, and any water or mold damage that needs remediation before new board goes up. If your project touches tile and wet areas, our bathroom remodeling team can handle the cement board and finish work together. Check out our full drywall installation and repair services and request a personalized estimate for your project.
Sources
FAQ
What Are the Four Main Types of Drywall?
The four most common types are standard, moisture/mold resistant (greenboard and purple board), fire rated (Type X and Type C), and cement/backer board for direct wet areas like showers.
Is 1/2 Inch or 5/8 Inch Drywall Better?
Neither is universally better. Half inch is the standard for interior walls, while 5/8 inch is recommended for ceilings and required in most fire-rated assemblies because of its added sag resistance and thickness.
What Are the Three Main Types of Drywall?
If you’re narrowing it to three, most guides point to standard, moisture resistant, and fire rated Type X or Type C, since those three cover the vast majority of residential rooms.
How Do I Tell What Type of Drywall I Have?
Check the facing color, green or purple indicates moisture or mold resistant board, then measure the thickness at a cut opening like an outlet box to confirm whether it’s 1/2 inch or 5/8 inch.
Can I Use Greenboard in a Shower?
No. Greenboard resists humidity and splashes but isn’t rated for direct water contact, so cement or backer board is required under tile in a shower surround.
Recommended
Dealing With Something Similar?
Every property is different, but if this sounds like what you’re seeing, we’re happy to take a look and help you figure out what’s actually going on.