General Contracting
Drop Ceiling vs Drywall: Which Basement Ceiling Wins?
By Noah Spagnotti
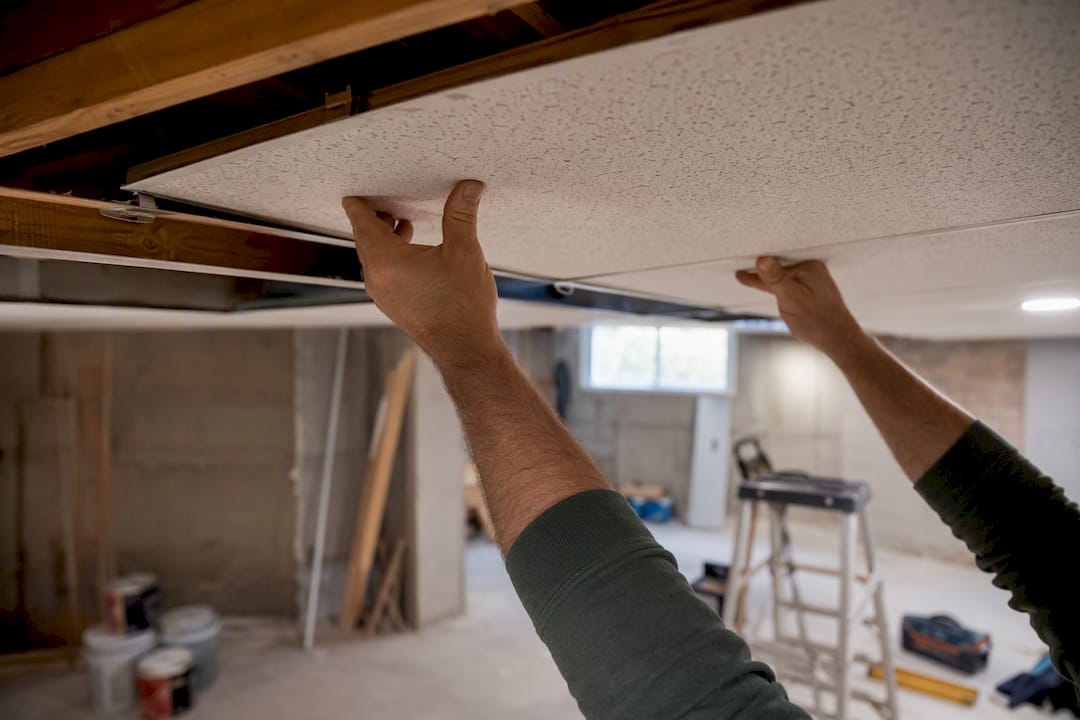
Choose drywall when you want a seamless, high-value finish that reads like the rest of your house. Choose a suspended drop ceiling when your basement’s plumbing, ductwork, and wiring need regular access and you’re willing to trade some headroom for that convenience. Neither option is universally “better.” Your joists, your mechanicals, and your resale plans decide this one.
Before you call a contractor, weigh these deciding factors:
Headroom and access frequency: a drop ceiling eats 4 to 6 inches of height and makes sense mainly when you’ll open that ceiling more than once a decade.
Moisture, sound, and resale: drywall generally wins on resale perception and sound isolation; drop tiles win on moisture-resistant swaps and absorbing echo.
Pro Tip: Grab a tape measure tonight and check your finished-to-lowest-obstruction height, then find your main water shutoff and sewer cleanout. Those two numbers will settle half this decision before your contractor even walks the site.
TL;DR:
Drywall offers a seamless, long-lasting finish that preserves ceiling height and typically costs less upfront at $2 to $6 per square foot.
Drop ceilings cost $5 to $28 per square foot and provide easy access to plumbing, wiring, and ductwork, especially when used regularly.
In moisture-prone areas, moisture-resistant drywall variants extend longevity, while fiber tiles are suitable for sound absorption in specific zones.
Combining drywall in living areas with drop tiles near mechanical hubs creates cost-effective hybrid ceilings that address both aesthetics and access needs.
Accurate site inspection, including measuring height and mapping mechanicals, is critical for choosing the right system and avoiding costly surprises.
Table of Contents
Drop Ceiling vs Drywall: What Each System Actually Is
The Case for and Against Drywall
The Case for and Against a Drop Ceiling
Drop Ceiling vs Drywall Cost: What You’ll Actually Pay
Installing and Maintaining Each System
Sound, Moisture, Fire Rating, and the Headroom Rule You Can’t Skip
Your Decision Checklist Before Calling a Contractor
Mixing Drywall and Drop Ceiling by Zone
What Contractors Actually Check on Site
A Job That Taught Us Access Beats Aesthetics
Getting Your Basement Ceiling Done Right
Key Takeaways
Sources
Drop Ceiling vs Drywall: What Each System Actually Is
A drywall basement ceiling is gypsum board screwed directly to the joists or furring strips, taped, mudded, and painted into one continuous surface. A drop ceiling, also called a suspended ceiling, hangs a metal grid a few inches below the joists and drops lightweight tiles into that grid. Both terms get thrown around loosely, so it helps to know the variants before you start pricing anything.
For basements specifically, the material matters more than the category:
Green board and Type X drywall: moisture-resistant and fire-rated gypsum boards built for below-grade humidity and code-driven fire separation.
Mineral-fiber tiles: the classic acoustic tile, absorbent but prone to sagging if humidity runs high.
Vinyl-faced tiles: washable, mold-resistant, and the go-to choice near sump pumps or utility rooms.
Low-profile grids: shave the typical clearance loss down closer to 4 inches instead of 6, which matters in a basement that’s already tight.
None of this is cosmetic trivia. A standard paper-faced drywall panel in a damp mechanical room is asking for trouble, and a bargain fiber tile above a humidifier will droop within a couple of seasons. Match the variant to the room’s actual moisture load, not just the room’s budget.
The Case for and Against Drywall
Drywall’s biggest selling point is that it disappears. A properly finished, painted drywall ceiling reads as part of the house rather than “the basement,” which is exactly why it tends to carry a higher resale perception than a grid of tiles. It also barely touches your headroom. Since it mounts nearly flush to the joists, you keep almost every inch of your existing ceiling height, and recessed lighting sits cleanly without the boxy look a drop ceiling can create around fixtures.
Durability is the other strong argument. Properly installed and moisture-managed, drywall can last 40 to 70 years, which is multiple lifetimes longer than a fiber tile. That longevity depends entirely on keeping water away from it, though, which is why green board or a comparable moisture-resistant panel is the only sensible choice below grade.
The trade-off shows up the day something breaks. Getting to a leaking pipe or a dead run of wire means cutting drywall open, and that cut has to be patched, taped, textured, and repainted to disappear again.
Seamless, paintable finish that matches the rest of the home
Near-zero headroom loss compared to a suspended grid
Strong multi-decade lifespan when moisture is controlled
Every repair requires cutting, patching, and repainting
Pro Tip: If you know exactly where your main shutoff valve or electrical panel access sits, ask your contractor to frame in a small, painted access panel there before the drywall goes up. You get the seamless look everywhere else and skip the future cut-and-patch bill entirely.
The Case for and Against a Drop Ceiling
A drop ceiling’s whole reason for existing is access. Pop a tile, and you’re looking at your joist bays, ductwork, and wiring without a saw, a joint compound bucket, or a repaint. Contractors dealing with utility-heavy basements lean toward drop grids specifically because that access gets used, sometimes more than once a year.
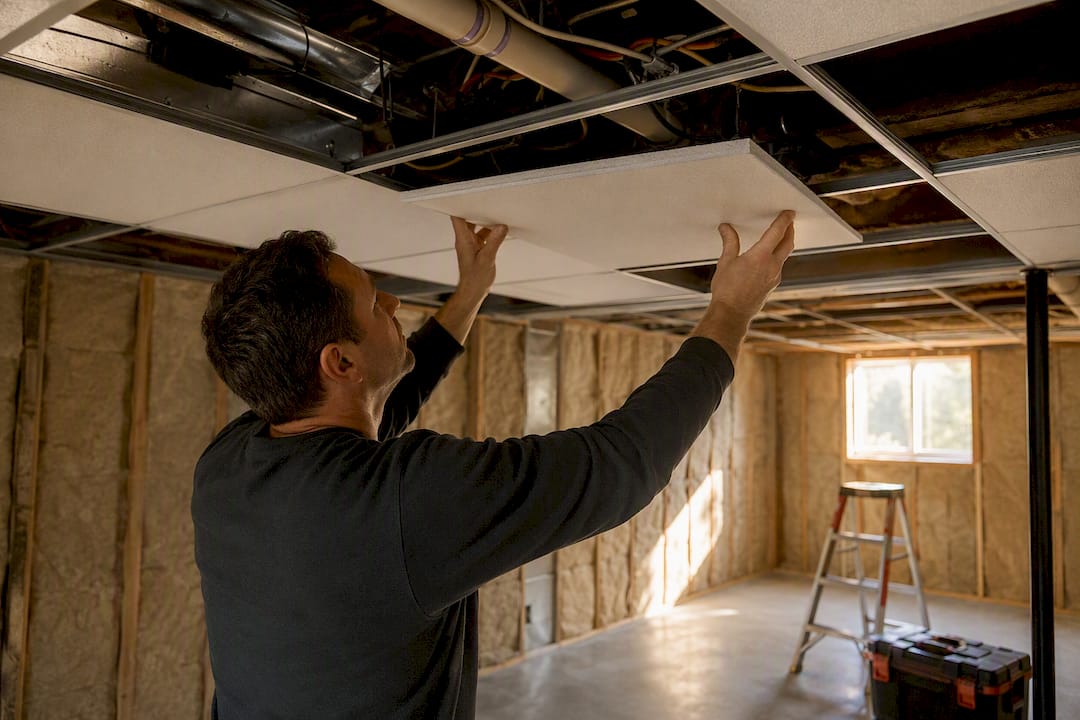
Acoustically, it’s a mixed bag. Mineral-fiber and vinyl-faced tiles absorb noise well inside the room, with NRC ratings between 0.50 and 0.90 compared to roughly 0.05 for bare drywall. That cuts echo in a home theater or gym setup. What it doesn’t do well by default is stop sound from traveling up to the floor above, since the grid and tile assembly is far less airtight than a taped drywall layer. Upgrading to dense, gasketed tiles closes some of that gap.
The headroom cost is real. Expect to lose 4 to 6 inches of finished height, which matters a lot if your basement already sits close to code minimums. Standard fiber tiles also have a shorter service life, typically 10 to 15 years before sagging or discoloring, especially in a basement running high humidity without a dehumidifier.
Tiles pop out and back in with no demolition or repainting
Strong in-room sound absorption with the right tile choice
Loses several inches of ceiling height the drywall option keeps
Standard tiles need replacing well before drywall would
Premium wood-look, coffered, or metal-look tiles paired with a slim grid genuinely close the gap on the “commercial ceiling” look that keeps some homeowners away from drop ceilings in the first place.
Drop Ceiling vs Drywall Cost: What You’ll Actually Pay
Cost is where most homeowners start, and it’s also where the two systems diverge the most depending on what you buy. Installed drywall in 2026 runs roughly $2 to $6 per square foot, covering material, hanging, taping, mudding, and paint. Drop ceilings span a much wider range, about $5 to $28 per square foot, because a basic fiber tile and a premium coffered wood-look tile aren’t remotely the same product.
Here’s how those ranges translate into whole-basement numbers:
A basic 500 square foot job leans drywall on sticker price alone. A premium drop ceiling with designer tiles can cost more upfront than mid-range drywall, which surprises a lot of homeowners who assume “suspended ceiling” automatically means “cheap.”
Upfront cost is only half the picture, though. Model this out over 20 years and the math shifts depending on how often you’re actually opening that ceiling. Every drywall cut for a plumbing or wiring repair means a patch job, and a single cut-and-patch event can run several hundred dollars once you count materials, labor, texture matching, and repainting. Do that two or three times over two decades, which is realistic for a basement with an aging furnace, water heater, or sump system nearby, and you’ve quietly added $1,000 or more to the drywall’s lifetime cost. A drop ceiling absorbs those same repairs for the price of popping a tile and, worst case, replacing one $5 to $15 tile that got damaged.
That’s the real calculation: drywall usually wins on day-one price and finish quality, but a drop ceiling can close or even flip that gap in a basement where mechanicals need regular attention.
Installing and Maintaining Each System
Installation timelines and skill requirements differ enough that they should factor into your decision, not just your budget.
Drywall goes up in stages: hanging the board, taping and mudding in multiple coats with drying time between each, sanding, priming, and painting. A 500 square foot basement ceiling typically takes a crew 4 to 7 days start to finish once drying time is factored in.
Drop ceilings install faster: snapping a level line, hanging the wire grid, and dropping tiles into place. The same 500 square foot space often wraps in 1 to 3 days.
DIY reality check: a motivated homeowner can install a basic drop ceiling grid over a weekend with rented tools. Drywall finishing is a different animal. Getting seams invisible takes practice, and a botched mud job shows up as shadowing under every light fixture.
Both jobs generate real dust and debris, but drywall sanding produces far more fine gypsum dust that spreads through HVAC returns if you don’t seal the room off first.
Watch for three recurring problems on basement jobs: joist clearance that’s tighter than the plans assumed, mechanical lines clustered in one bay that force an awkward grid layout or extra framing, and tile sag in basements without a dehumidifier running. None of these are dealbreakers, but they’re the kind of surprise that turns a two-day job into a four-day job if nobody catches them during the walkthrough.
Pro Tip: Run a dehumidifier in the space for a week before your contractor finalizes material choices. If humidity swings widely, that single data point should steer you toward moisture-resistant board or vinyl-faced tile, not standard versions of either.
Sound, Moisture, Fire Rating, and the Headroom Rule You Can’t Skip
Acoustic performance comes down to two different measurements that get confused constantly. NRC (Noise Reduction Coefficient) measures how much sound a surface absorbs inside the room, which is where acoustic drop tiles shine. STC (Sound Transmission Class) measures how much sound is blocked from passing through to another room or floor, and that’s where mass matters most, favoring double-layer drywall with decoupling clips or resilient channel.
For absorption (echo control in a home theater or gym): dense mineral-fiber or specialty acoustic tiles.
For isolation (keeping noise from traveling upstairs): decoupled, double-layer drywall beats a standard grid every time.
Moisture handling should shape your material choice more than your color scheme does. Vinyl-faced or specialty moisture-resistant tiles hold up near sump pumps and utility rooms, and pairing either ceiling system with a basement dehumidifier extends its life regardless of which one you choose.
Fire safety is where code gets involved. Type X drywall provides a rated, roughly one-hour fire-resistant assembly commonly required near furnaces or in shared walls, while drop ceiling tile ratings vary considerably by product, so check the manufacturer’s rating rather than assuming any tile meets code. Before you commit to either system, measure your actual finished-to-lowest-obstruction height and compare it against your local minimum ceiling height requirement. That single measurement, more than any aesthetic preference, is what tanks a drop ceiling plan in a basement that’s already borderline.
Your Decision Checklist Before Calling a Contractor
Run through this before you request bids, and you’ll get more accurate quotes because you’ll be asking sharper questions.
Rank your priorities in order: headroom, access frequency, aesthetics, budget, sound control, resale value. Whichever sits at the top usually decides the system.
Measure floor-to-lowest-obstruction height in the shortest spot in the basement, not the tallest.
Locate every shutoff valve, cleanout, and electrical junction box currently hidden above the joists.
Run a humidity check over a week or two to establish a baseline before picking materials.
Decide whether one system needs to cover the whole basement or whether a hybrid layout fits better.
When you sit down with a contractor, ask these directly:
How many basement ceiling jobs have you completed in the past year, and can I see photos?
Which tile brands or grid systems do you install, and why those specifically?
What’s the warranty on materials and labor?
How do you handle moisture mitigation before the ceiling goes up?
If we go hybrid, where would you place the transition and why?
If your mechanicals cluster in one or two bays rather than spreading across the whole ceiling, that’s usually your cue to zone a drop ceiling only where it’s needed and drywall everywhere else.
Mixing Drywall and Drop Ceiling by Zone
You don’t have to pick one system for the entire basement, and in a lot of layouts, you shouldn’t. A common hybrid pattern runs drywall around the perimeter and living areas, then drops a tile grid over the mechanical zone near the furnace, water heater, or main panel. Another popular layout uses a central tray of drywall for visual interest while keeping tile access along the edges where ductwork runs.
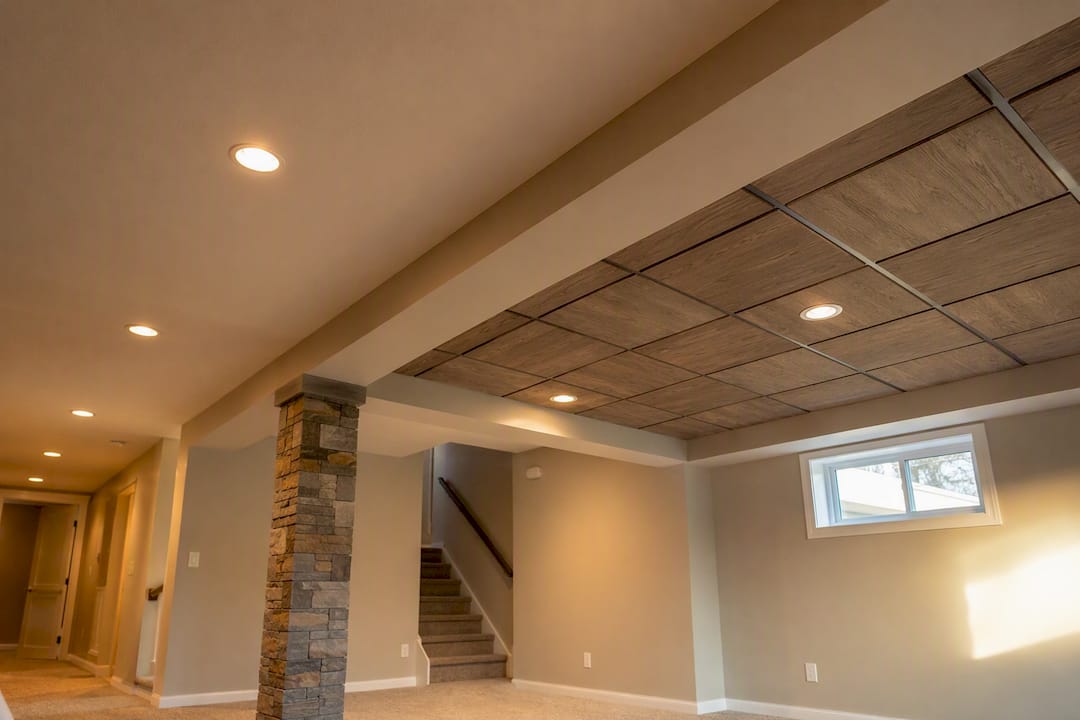
The trick to making a hybrid ceiling look intentional rather than accidental is the transition. A boxed soffit or a reveal trim strip at the seam gives your eye a clean stopping point instead of an abrupt material change. Recessed lighting placed right at that transition line also draws attention away from the seam itself.
Skip the builder-grade white tile in a 2x2 grid if you’re going hybrid. A wood-look tile, a slim black grid, or a coffered pattern reads as a design choice rather than a compromise, and it’s often the detail that keeps a hybrid basement from looking like an unfinished office suite. For complementary wall finishes in the same space, decorative wall treatment options can help tie the room together.
What Contractors Actually Check on Site
Our default recommendation follows a pretty simple rule: drywall for living-area basements where resale and finish quality matter most, and a drop ceiling wherever mechanical access gets used regularly and headroom allows it. That’s not a hard rule, but it’s where most experienced contractors land before anything else gets factored in.
On a walkthrough, we’re checking finished height against code minimums, mapping where plumbing and wiring cluster, and testing for humidity issues that would rule out standard tile or paper-faced board. That inspection process mirrors what we run on other projects, including our pre-build deck inspection checklist.
Pro Tip: Ask any contractor bidding your basement ceiling to walk the space with you before quoting. A five-minute walkthrough catches joist clearance and mechanical clustering that a phone estimate never will.
Confirm finished height against your local code minimum before design starts
Map every shutoff, cleanout, and junction box location
Test humidity levels across at least one full week
A Job That Taught Us Access Beats Aesthetics
We once finished a basement where the homeowner wanted drywall everywhere, until we found three shutoff valves and a sump pump control clustered in one ceiling bay. Switching just that section to a drop tile saved a future service call from turning into a demolition project. For more basement-specific reasoning like this, see our guide to basement finishing decisions.
— Noah
Getting Your Basement Ceiling Done Right
Spagnotti Contracting handles both sides of this decision directly, framing, hanging, and finishing drywall with moisture-resistant board where basements need it, plus the carpentry work to frame soffits or transitions if you go hybrid.

Every basement ceiling estimate starts with an on-site walkthrough where we measure finished height, locate your mechanicals, and check for humidity issues before recommending a system, not after. You get a written scope, a realistic timeline, and one point of contact from the first measurement to final paint. If you’re ready to turn this comparison into an actual plan for your basement, request an estimate through our residential contracting services page and we’ll walk your space with you.
Key Takeaways
Drywall wins on seamless resale-ready finish and headroom preservation, while a drop ceiling wins on non-destructive utility access and faster repairs in mechanical-heavy basements.
Point | Details |
|---|---|
Headroom decides a lot | Drop ceilings cost 4 to 6 inches of height; measure your lowest point before choosing either system. |
Cost ranges vary widely | Drywall runs about $2 to $6 per square foot installed; drop ceilings range from $5 to $28 depending on tile quality. |
Access frequency matters most | Repeated drywall repairs near mechanicals can add up over 20 years faster than swapping a drop tile. |
Hybrid zoning solves both | Drywall in living areas plus drop tile near mechanicals often beats an all-or-nothing choice. |
Spagnotti Contracting scopes it on site | Every estimate includes measuring finished height and mapping mechanicals before recommending a ceiling system. |
Sources
Basement ceilings: drywall or a drop ceiling? — Fine Homebuilding
Drop Ceiling vs. Drywall: Complete Guide — The Basement Guide
Recommended
Dealing With Something Similar?
Every property is different, but if this sounds like what you’re seeing, we’re happy to take a look and help you figure out what’s actually going on.