Decks
Cracked Deck Boards: DIY Inspection, Repair, or When to Call a Pro
By Noah Spagnotti
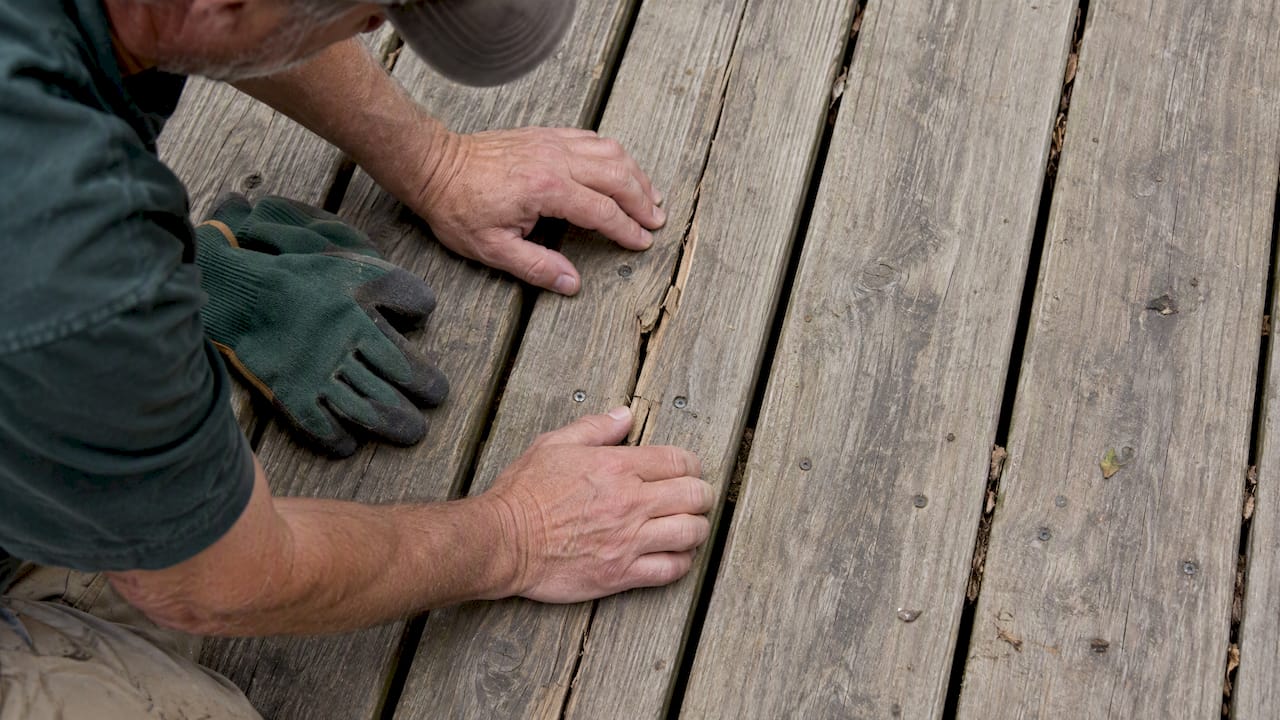
Most cracked deck boards are repairable if the crack is a surface check that runs with the grain and the wood underneath is still solid. If the split goes all the way through the board, the wood is soft or spongy, or you find rot at the joists, replacement is the safer call. This guide walks through inspection, repair, replacement, and prevention, and then explains when the job is big enough to hand to Spagnotti Contracting.
TL;DR:
Repair surface checks with solid wood underneath using epoxy or structural adhesive, but replace boards if splits are full thickness or wood feels soft.
Visual examination and screwdriver tests can reveal whether cracks are cosmetic or indicate underlying rot, especially if the wood sinks easily or shows decay signs.
Replacing a cracked deck board is quick and manageable if joists are sound, but soft framing, rot, or damaged hardware warrant professional inspection and repair.
Proper deck design, regular sealing, and spacing prevent moisture buildup and limit future cracking, especially at joints and water contact points.
Call a contractor if multiple cracks appear, rot is detected, or the deck feels unstable, as these issues involve structural safety beyond DIY repair scope.
Why deck boards crack in the first place
Wood is constantly trading moisture with the air around it, swelling when it absorbs water and shrinking as it dries. That cycle creates internal stress, and the surface often dries faster than the core, which pulls the board apart along the grain. Keeping wood at a stable equilibrium moisture content is one of the most reliable ways to limit this kind of damage, since boards that stay closer to a consistent moisture level move less and crack less.
Not every crack means the same thing. A shallow surface check is cosmetic and limited to the top layer, while a through-split runs the full thickness of the board and signals real structural loss. Knots and juvenile wood near the board's center are weak points and tend to crack first.
Installation mistakes make all of this worse:
Fasteners driven too close to the board's end split the wood on contact.
Skipping predrilling forces the screw to wedge the fibers apart instead of threading through them.
Boards in direct contact with joists trap moisture at the contact point, which can speed up both cracking and decay.
Fewer cracks start with better framing. Designing for rapid drying, such as spacing joints and tapering board edges, is recommended over relying on treated lumber alone, according to OSU Extension Service.
How to inspect and judge how bad the crack is
Start with a visual sweep, then get hands-on. A few minutes of testing tells you whether you are looking at a cosmetic fix or a framing problem.
Look along the full length of the crack to see if it runs through the board or just across the surface.
Press a screwdriver into the crack and the surrounding wood: if it sinks 1/4 to 1/2 inch with little resistance, you are dealing with decay, not just a dry-season split, based on guidance from a local deck inspection guide.
Check the boards on either side of the crack for similar splitting, which often points to a shared moisture or fastener problem.
Inspect the joist and ledger underneath for soft spots, rust streaks around hangers, or fasteners that have backed out.
Loose or corroded hardware under a cracked board is often a bigger issue than the crack itself, a point covered in more detail in what a contractor checks before building or replacing a deck.
As a rule of thumb: surface checks with sound wood underneath are a DIY repair, through-splits with firm framing call for a single board replacement, and any soft joist, rusted hanger, or loose ledger means it is time to bring in a professional.
Pro Tip: Test the board with your full body weight before you trust any repair. If it flexes or feels springy, treat it as a structural issue, not a cosmetic one.
Quick, durable repairs for small or non-structural cracks
Ordinary interior wood putty is a poor match for a deck because it cannot handle the constant swelling and shrinking that outdoor wood goes through. A marine-grade epoxy or exterior structural adhesive flexes and bonds better under those conditions, according to UC ANR's guidance on deck assemblies.
For a surface check or a partial split, the process is straightforward:
Clean the crack of dirt and old finish, then let the wood dry fully before applying anything.
Inject epoxy into the crack with a syringe or thin nozzle so it reaches the full depth, not just the opening.
Clamp the board while the epoxy cures if the crack has any gap to close, which is a more dependable fix for deep splits than filler alone.
Once cured, sand the surface flush and reapply stain or sealer to match the surrounding wood.
Pro Tip: Check the epoxy's temperature range before you start. Most structural adhesives cure poorly below 50°F, so cold-weather repairs may need to wait for a milder day.
Avoid filling a crack that sits at a joint where the board naturally moves, such as near a butt joint, since rigid filler there tends to pop loose within a season.
When and how to replace a cracked deck board
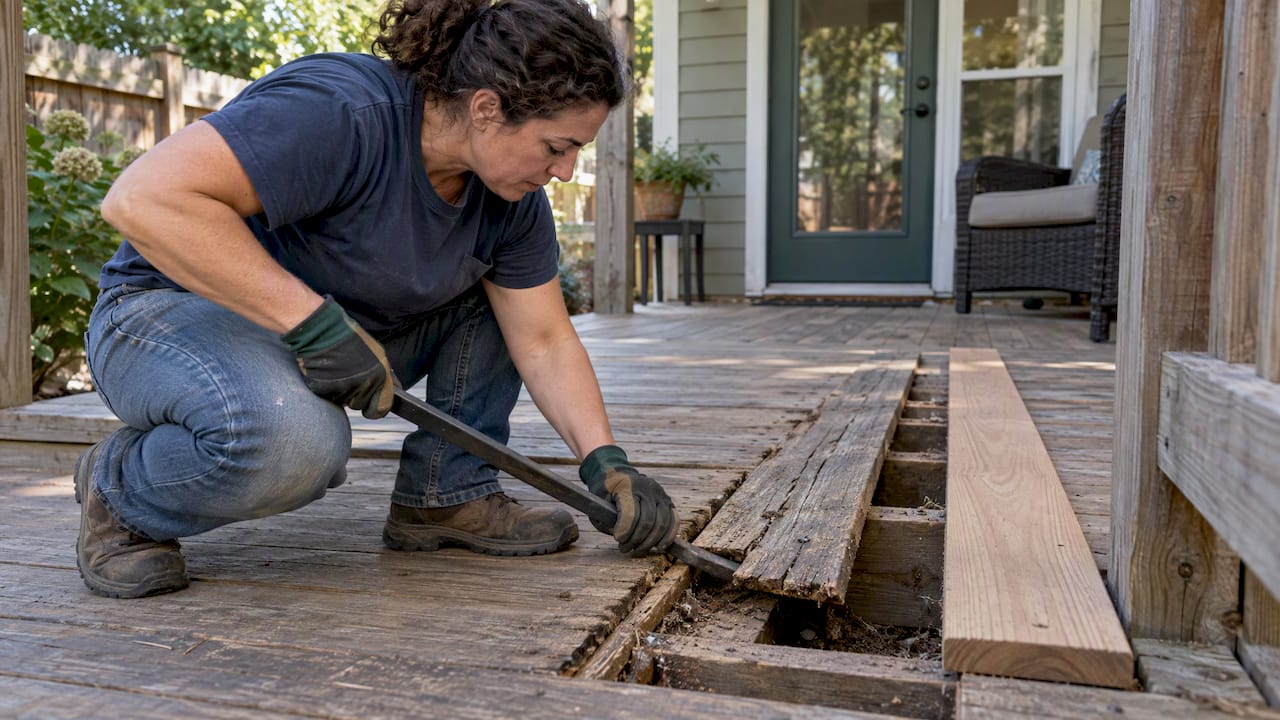
Replacement makes sense once a crack runs through the board, the wood feels soft, or repairs have already failed once. According to Decks, swapping a single damaged board is usually a manageable DIY project as long as the joists underneath are sound.
What you will need:
Pry bar, cat's paw or nail puller, drill/driver, circular saw, tape measure
Replacement decking that matches the existing species and thickness
Corrosion-resistant deck screws, flashing tape or metal flashing, exterior sealant or stain
Steps:
Remove the damaged board, prying gently and working from the center toward each end to avoid splitting neighboring boards; cut nails flush if they resist pulling.
Inspect the exposed joists for soft wood, cracked hangers, or loose fasteners, and repair or replace any compromised framing before moving forward.
Cover exposed fastener holes and joist tops with flashing tape to keep water from tracking into the framing, a step Decks.com recommends for protecting joists long term.
Cut the new board to length, prefinishing it on all sides before installation so the color matches once it weathers.
If the replacement is wet pressure-treated lumber, cut it about 1/8 inch long since it will shrink slightly as it dries.
Predrill near both ends, then fasten with coated deck screws spaced evenly, leaving a consistent gap for drainage and seasonal movement.
A prefinished board blends in much faster than one left to weather on its own, and it avoids the temptation to sand away the factory treatment just to even out the color.
Prevention: habits that cut down future cracking
A lot of cracking comes down to design choices made when the deck was built, and a few of those choices are easy to correct during repairs.
Space boards consistently and taper butt joint edges so water drains instead of pooling at the seam.
Double up joists under butt joints and keep framing clear of soil contact, both recommended in USDA Forest Products Laboratory's technical guidance on preventing wood decay.
Clean debris out of board gaps regularly since trapped leaves and dirt hold moisture against the wood.
Reseal or restain on a regular schedule rather than waiting for visible graying or cracking to show up.
Predrill near board ends and use coated deck screws instead of nails, which resist backing out and splitting.
Contact points trap water and dry slowly, which is why they fail first. Spaced joints, beveled board edges, and avoiding direct wood-to-wood contact at waterlines all reduce decay risk, per UC ANR. Homeowners who want to skip this maintenance cycle altogether often look at composite decking, which does not split the way solid wood does.
When to call a contractor: Spagnotti Contracting's perspective
Some signs mean the project has outgrown a weekend repair: rot in the joists, a ledger pulling away from the house, several boards cracked at once, or any flex that makes the deck feel unsafe to stand on.
Rot found below more than one board usually points to a framing problem, not a board problem.
A failing ledger connection is a structural issue that affects the entire deck's safety.
Multiple cracked boards in the same area often share a root cause worth inspecting as a whole.
A professional inspection documents joist condition, hanger integrity, and photo evidence of problem areas, the kind of review outlined in what a contractor checks before building or replacing a deck. Some contractors approach deck repairs with detailed planning and clear communication, using licensed and insured crews from the initial walkthrough to the final check.
Contractors treat a visible crack as a symptom first, which is why checking the ledger and joist connections matters more than the crack itself.
Our take: DIY confidently, but set a hard line on structure
The honest advice on cracked deck boards gets muddled because most guides treat every crack the same. A hairline check on a sun-baked board and a through-split over a rotting joist are not the same problem, and treating them the same way either wastes a homeowner's weekend on unnecessary replacement or, worse, talks them into patching something that should come apart entirely.
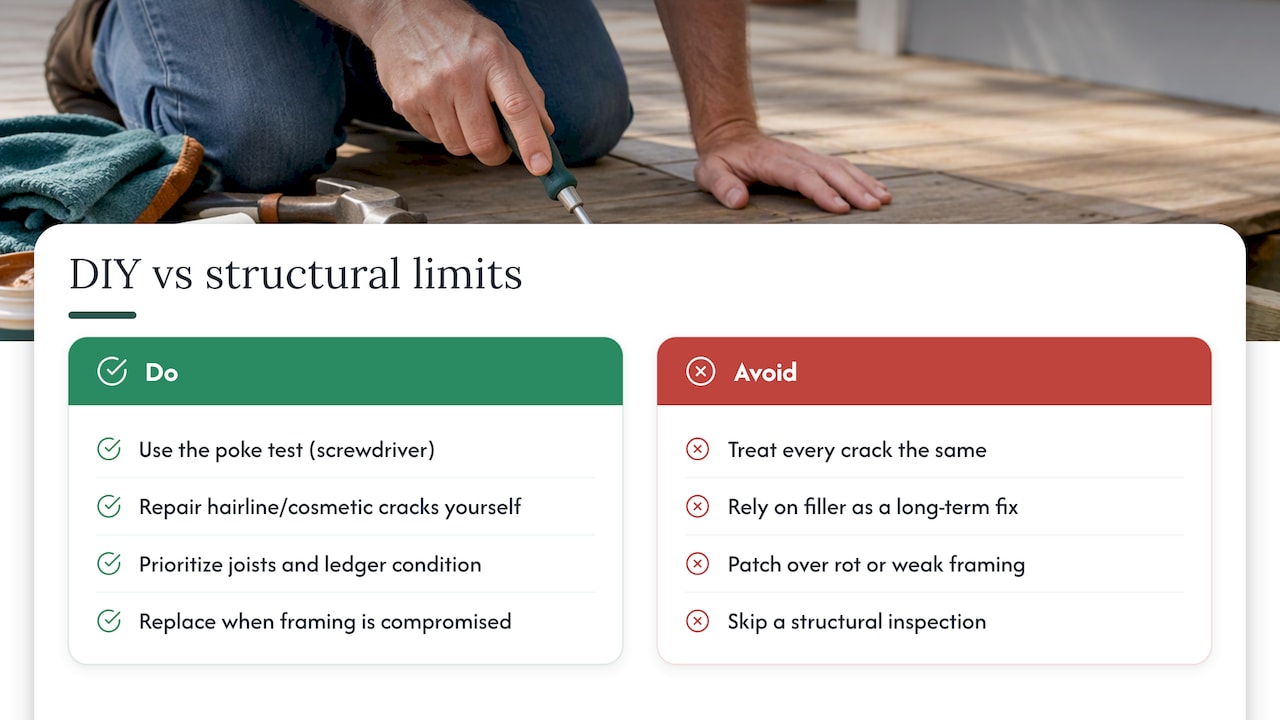
The conventional advice leans too hard on cosmetic fixes. Wood filler and generic sealants get recommended as if they solve the underlying moisture problem, when they usually just hide it for a season. If you take one thing from this guide, make it the poke test: a screwdriver tells you more in ten seconds than a visual inspection does in ten minutes.
Prioritize the framing, not the board. A deck with sound joists and a solid ledger can tolerate a few cosmetic cracks for years. A deck with a compromised structure cannot be fixed with filler, no matter how good the filler is.
— Noah
Get a deck repair estimate from Spagnotti Contracting
If the inspection turns up rot, a failing ledger, or more cracked boards than you expected, a single repair can turn into a bigger project fast. Contractors may handle everything from a single board swap to a full deck repair or replacement, with licensed crews and a clear plan before work starts. To get a quote, have a few photos of the damage ready, along with the deck's approximate age and square footage, so the estimate reflects the actual scope of the work.
FAQ
Can a cracked deck board be repaired instead of replaced?
Yes, if the crack is a surface check and the wood underneath is still solid, epoxy filler and clamping can restore the board. A through-split or soft, spongy wood means replacement is the safer option.
What causes deck boards to crack over time?
Seasonal swelling and shrinking as wood gains and loses moisture is the main driver, along with knots, juvenile wood, and fasteners placed too close to board ends. Trapped moisture where boards sit flush against joists speeds up both cracking and decay.
How do I know if a cracked board means rot underneath?
Press a screwdriver into the crack and surrounding wood: if it sinks 1/4 to 1/2 inch with little resistance, that indicates decay rather than a simple dry-season split, according to a local deck inspection guide. Soft, discolored wood around the crack is another sign that replacement is needed.
Is replacing one deck board a reasonable DIY project?
Yes, replacing a single damaged board is usually straightforward as long as the joists underneath are sound, per Decks.com. The job gets harder if you find rot, hanger damage, or a weak ledger, which is when a professional inspection makes sense.
When should I call a contractor instead of fixing it myself?
Call a contractor if you find rot in the joists, a loose or failing ledger, several cracked boards at once, or any part of the deck that feels unstable underfoot. Spagnotti Contracting inspects framing and hardware before recommending a repair or full replacement.
Sources
Recommended
Dealing With Something Similar?
Every property is different, but if this sounds like what you’re seeing, we’re happy to take a look and help you figure out what’s actually going on.