Roofing
Roof Insurance Claim Process: A Homeowner's Playbook
By Noah Spagnotti
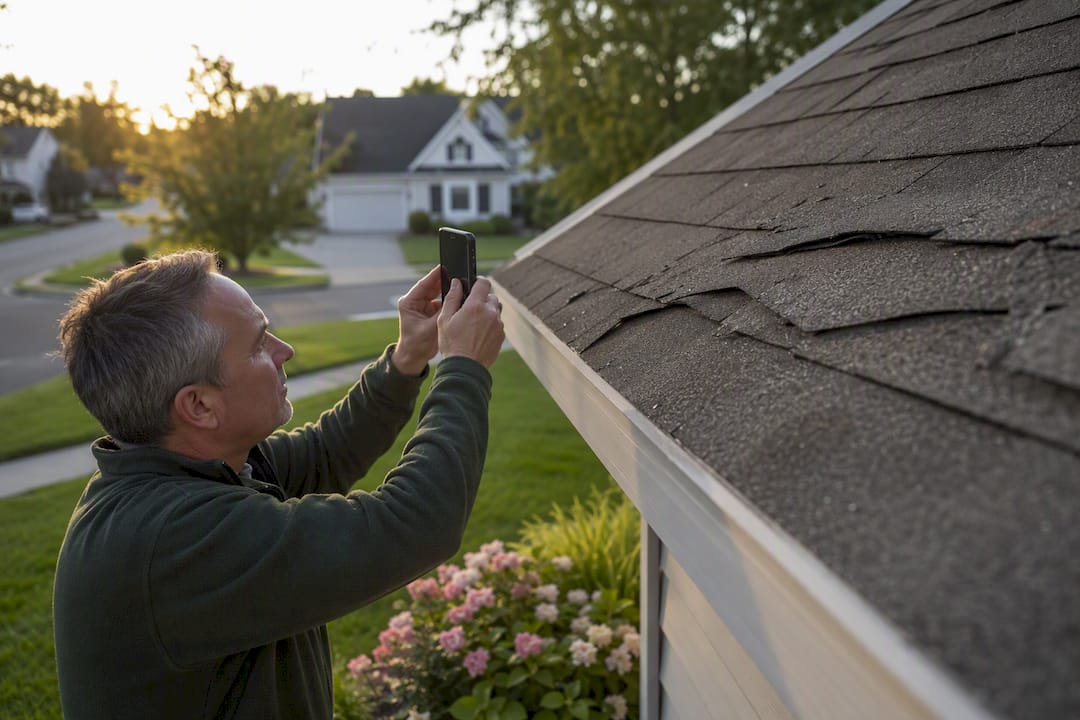
File your claim within 24 to 72 hours of discovering roof damage, document everything with time-stamped photos before you touch a shingle, and put a tarp over any active leak before it reaches your attic. Once you report the loss, expect a claim number within minutes and an insurance adjuster inspection scheduled within a few days to two weeks, depending on your carrier and storm volume in your area.
Here’s what the first hour should look like:
Check the attic and rooms below the roofline for water intrusion, and keep everyone away from unstable areas.
Photograph the damage from the ground and, if safe, from a ladder, before any repairs.
Cover exposed areas with a tarp to stop water from spreading.
Call your insurer’s claims line and get your claim number in writing (email or text confirmation).
Write down the adjuster’s name, contact info, and appointment window as soon as it’s scheduled.
Carriers like State Farm and Allstate both process roof claims through the same basic framework, and manufacturer guidance from companies like GAF echoes it, too: document first, mitigate second, file promptly.
Pro Tip: Set your phone’s location services on before you shoot photos. The geotag and timestamp embedded in the file become useful evidence if your insurer questions when damage occurred.

Key Takeaways
Following the ten-step claims workflow, documenting damage immediately, and involving a licensed contractor early are what separate a fully paid roof claim from a denied or underpaid one.
Point | Details |
|---|---|
File within 24 to 72 hours | Prompt notice protects your claim; delayed reporting invites disputes over cause and worsening damage. |
Document before you touch anything | Time-stamped photos of roof and interior damage are your strongest evidence if the insurer pushes back. |
Know your RCV vs ACV status | ACV policies withhold depreciation until you finish repairs and submit proof; RCV pays full replacement cost. |
Never sign before approval | Assignment of Benefits or a permanent repair contract signed too early can strip you of claim control. |
Get local help early | Spagnotti Contracting inspects, estimates, and manages adjuster meetings for Omaha metro homeowners facing a roof claim. |
Where to Verify Claim Details and Get Extra Help
Cross-check your specific policy against carrier guidance directly, since terms vary by state and insurer.
American Family Insurance’s roof coverage guide for RCV, ACV, and deductible details.
Progressive’s coverage overview for covered perils and exclusions.
GAF’s homeowner claims guidance for contractor and supplement basics.
Your state’s Department of Insurance for unresolved disputes or delayed responses.
If your home has rooftop solar, check how panels affect your coverage and inspection process before the adjuster visit, since solar equipment often needs separate documentation.
Table of Contents
What Is the Roof Insurance Claim Process, Step by Step?
What Documents and Photos Do You Need for a Roof Claim?
How Do RCV, ACV, and Deductibles Affect Your Payout?
How Does the Insurance Payment Process Actually Work?
Should You Hire a Contractor, Public Adjuster, or Attorney?
How Long Does a Roof Insurance Claim Take?
What Mistakes and Scams Should You Watch For?
How Spagnotti Contracting Supports Your Roof Claim
Frequently Asked Questions
Sources
What Is the Roof Insurance Claim Process, Step by Step?
The roof insurance claim process runs through ten fairly predictable stages, and skipping or rushing any of them is usually what turns a routine claim into a drawn-out dispute. A structured 7- to 8-step workflow, moving from documentation through final invoicing, consistently reduces denials and speeds up settlement when homeowners follow it right after damage happens.
Secure the property. Keep people away from unsafe areas and shut off power to any fixtures near water intrusion.
Document everything. Wide shots, close-ups, and interior photos come before any cleanup.
Make temporary repairs only. Tarps and emergency patches are fine. Permanent replacement is not, yet.
File the claim. Call, use the carrier’s app, or file online. Most major insurers offer all three.
State the facts plainly when you call: date of the storm or discovery, visible damage, and any active leaks. Avoid guessing at cause or cost.
Schedule the adjuster and confirm what they’ll need to see, including attic access.
Get an independent contractor estimate before or shortly after the adjuster visit.
Compare the contractor’s scope against the adjuster’s report and flag anything missing.
Request supplements for items the adjuster’s estimate left out.
Complete repairs, then submit final invoices to release any withheld depreciation.
Keep a simple log through all of this: every adjuster name, every call date, your claim number, and a running folder of receipts and photos. This record becomes your best defense if the insurer’s numbers ever don’t match what you experienced.
Most states expect “prompt notice” of a loss, though the exact deadline varies by state and by policy language. Filing within a few days, rather than weeks, avoids the argument that delayed reporting worsened the damage. State Farm’s claims process notes that homeowners should confirm which deductible applies to wind or hail losses right when they file, since that number affects everything downstream.
During the adjuster visit, come prepared:
Have your photos and contractor estimate ready to hand over or reference.
Walk the adjuster to interior damage, not just the roof.
Ask directly whether the estimate reflects RCV or ACV, and what depreciation was withheld.
Request a copy of the written scope before the adjuster leaves.
Pro Tip: A contractor estimate that’s higher and more detailed than the adjuster’s scope isn’t a problem, it’s leverage. Use it to request a supplement rather than accepting a lowball number outright.
A claim can realistically run from $8,000 to $25,000 or more depending on roof size and material, which is exactly why under-documentation costs homeowners real money. Do not sign a permanent repair contract, and especially not an Assignment of Benefits, before your claim is approved. Handing a contractor the right to negotiate directly with your insurer sounds convenient, but in some states it strips you of control over your own claim and can create legal complications if disputes arise later.
What Documents and Photos Do You Need for a Roof Claim?
Your evidence file is what separates a smooth payout from a drawn-out argument. Insurers and roofing groups agree that date-stamped, high-resolution photos taken immediately after the event carry the most weight.
Photograph and keep:
Wide shots of the whole roof from multiple angles.
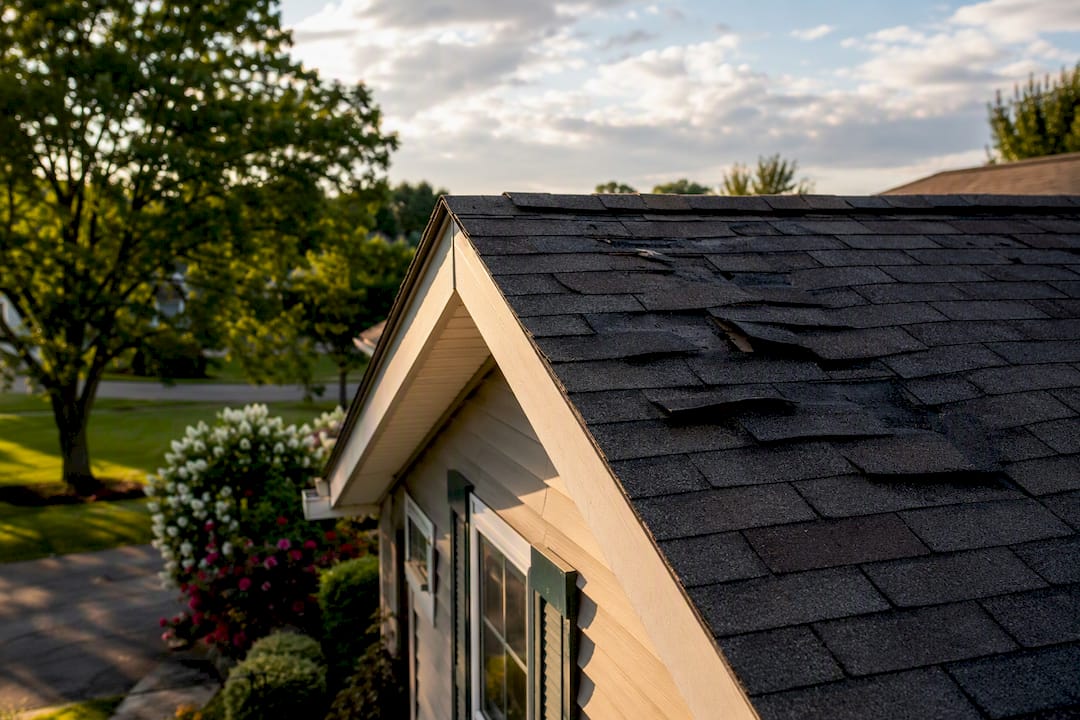
Close-ups of damaged shingles, dented vents, and gutter dings.
Interior ceiling stains, attic leaks, and any warped flooring.
Local storm reports or weather data matching the damage date.
Receipts for tarps, temporary repairs, and any inspection fees.
Name your files by date and location (“2026-04-12-northslope.jpg”) and keep everything in one dedicated folder, digital or physical. Skipping receipts is a common misstep. Failing to document mitigation costs can mean the insurer simply won’t reimburse those reasonable emergency expenses.
Pro Tip: A drone shot of the whole roof is useful, but don’t climb onto a wet or steep roof yourself to get it. Ground-level photos with a zoom lens are safer and still admissible as evidence.
How Do RCV, ACV, and Deductibles Affect Your Payout?
Your policy’s fine print decides how much cash actually lands in your account, and most homeowners never read it until a claim is already underway. Homeowners insurance generally covers sudden events, wind, hail, fire, or falling debris, while excluding long-term neglect, wear and tear, flooding, and earthquakes. Reasonable emergency repairs, tarps included, are usually reimbursable if you kept the receipts.
The bigger factor is how your policy calculates value:
Replacement Cost Value (RCV) pays what it actually costs to install new materials.
Actual Cash Value (ACV) pays RCV minus depreciation for the roof’s age and wear.
Many policies pay ACV upfront and release the recoverable depreciation only after you finish repairs and prove it.
Deductibles for wind and hail sometimes run as a flat dollar amount, but often run as a percentage of your dwelling coverage, typically 1% to 5%, which can mean thousands more out of pocket than a standard deductible.
Pro Tip: Pull your declarations page before you file. It states whether your roof coverage is RCV or ACV and what deductible type applies. A five minute call to your carrier to confirm beats an unpleasant surprise after the adjuster leaves.
How Does the Insurance Payment Process Actually Work?
Money moves in stages, not all at once, and that catches a lot of homeowners off guard. The adjuster’s scope of loss becomes the basis for an initial payment, often calculated at ACV even on RCV policies, with the depreciation held back until you prove the work is done.
The flow generally looks like this:
Adjuster issues an initial estimate.
Insurer sends a first check, minus your deductible and any withheld depreciation.
You complete the repairs.
You submit the final invoice and proof of completion.
Insurer releases the recoverable depreciation.
Say your roof estimate comes to $15,000, your deductible is $1,500, and $3,000 is held as depreciation. Your first check is roughly $10,500. Finish the job, submit the invoice, and the remaining $3,000 typically follows.
Contractors can also file supplements when the adjuster’s scope missed line items like flashing, starter shingles, or code-required upgrades and waste factor, which is often where a chunk of underpaid claims gets recovered. Keep your final invoice, a signed completion certificate, and dated photos of the finished roof on hand. That paperwork is what triggers the depreciation check.
Should You Hire a Contractor, Public Adjuster, or Attorney?
Bring in a roofing contractor immediately if there’s visible structural damage, an active interior leak, or anything that looks unsafe to leave alone. A licensed contractor can also produce an estimate formatted to match the adjuster’s scope, which is often what catches missed items before you ever need to argue about them.
Legal help makes sense only after repeated denials or if you suspect bad faith handling, not as a first move.
Verify any contractor’s license and ask for local references, not just online reviews.
Ask for a written, itemized estimate before agreeing to anything.
Walk away from anyone who pressures you to sign on the spot after knocking on your door.
Spagnotti Contracting handles the roof inspection, contractor estimate, and adjuster meeting as one coordinated process, which is often what keeps a legitimate claim from stalling out over a missed line item.
Pro Tip: A contractor who accompanies the adjuster in person, rather than relaying photos secondhand, tends to catch damage that a rushed inspection misses.
How Long Does a Roof Insurance Claim Take?
Expect a rough sequence rather than an exact countdown, since timing shifts with storm volume and your specific carrier.
File within 24 to 72 hours of discovering damage.
Adjuster inspection: a few days up to two weeks.
Initial estimate and first check: typically within days of the inspection.
Contractor scheduling and repairs: one to four weeks, longer during storm season.
Recoverable depreciation: released after you submit proof of completion, usually within your policy’s stated window.
State response deadlines for insurers vary, so check with your carrier or your state’s Department of Insurance if a stage drags well past what you were told to expect.
What Mistakes and Scams Should You Watch For?
Most claim problems trace back to a handful of avoidable errors, not bad luck. Waiting weeks to report a loss, making permanent repairs before the adjuster sees the damage, and tossing receipts for temporary fixes all weaken a claim that would otherwise be straightforward.
Door-knocking contractors who show up right after a storm promising an instant, no-cost roof replacement deserve real skepticism. So does any request to sign away your full claim rights before you’ve even seen an estimate.
Insurers and industry groups consistently warn against signing repair contracts or an Assignment of Benefits before a claim is approved. Doing so can strip you of control over your own claim and create financial exposure you didn’t sign up for.
Get at least two independent estimates before committing to a contractor.
Ask to see a physical license, not just a business card.
Demand a written, itemized scope of work, never a verbal promise.
Report high-pressure sales tactics to your carrier or your state’s Department of Insurance.
Why contractor involvement changes the outcome
We’ve seen claims move faster and pay out more accurately when a contractor documents damage alongside the homeowner, sits in on the adjuster visit, and prepares a supplement request the moment the scope falls short. One roof missed for flashing and waste factor in the adjuster’s first estimate recovered several thousand dollars once a proper supplement went in. Spagnotti Contracting’s roofing services exist for exactly that role.
How Spagnotti Contracting Supports Your Roof Claim
You don’t have to manage the adjuster, the paperwork, and the repair schedule alone. Spagnotti Contracting inspects the roof, builds a contractor estimate that matches the adjuster’s format, sits in on the adjuster meeting when needed, and handles the final invoicing that triggers your recoverable depreciation check.

That last part matters more than homeowners expect. An estimate that doesn’t line up with the adjuster’s scope is the single biggest reason supplements get denied, and it’s the piece most homeowners have no way to catch on their own. Spagnotti Contracting serves homeowners across the Omaha metro area and handles roofing, siding, gutters, and the interior repairs, like drywall or painting, that often follow water intrusion from a damaged roof. If your roof shows storm damage, start with a roofing estimate or reach out through the main services page to get someone on your property this week.
Frequently Asked Questions
How do I start filing a roof claim after storm damage? Call your insurer’s claims line, use their app, or file online, then document the damage with photos before making any permanent repairs. You’ll typically get a claim number the same day.
What’s the difference between RCV and ACV for roof claims? RCV pays the full cost to replace your roof with new materials. ACV pays that amount minus depreciation for the roof’s age, though many insurers release the withheld depreciation once you complete repairs.
How long does a roof insurance claim usually take to settle? From filing to final payment, most claims run four to eight weeks, though contractor scheduling during storm season can push that timeline longer.
Can I get a second estimate if I disagree with the adjuster’s scope? Yes, and it’s often smart to get an independent contractor estimate regardless of whether you agree, since it gives you leverage to request a supplement if items were missed.
Should I sign a contract with a contractor before my claim is approved? No. Wait until the claim is approved and you understand your coverage limits before signing any repair contract or Assignment of Benefits.
This article is general information, not a substitute for advice from a qualified financial advisor. Consult a qualified financial professional about your own circumstances before acting on anything here.
Sources
File a Roof Insurance Claim: Step-by-Step Guide | Roof Policy
Roof Insurance Claim Guide 2026 — How to Get Insurance to Pay for Roof Replacement | CostPrism
Recommended
Dealing With Something Similar?
Every property is different, but if this sounds like what you’re seeing, we’re happy to take a look and help you figure out what’s actually going on.